
Use Terraform to manage Rundeck Jobs
Use Terraform to manage Rundeck Jobs
Terraform is an open-source Infrastructure as Code (IaC) tool used in IT and DevOps to automate and manage the provisioning and configuration of infrastructure resources. It allows users to define their infrastructure in a declarative manner, specifying the desired state of resources, such as virtual machines, networks, and databases, in a configuration file.
Terraform then takes this configuration and interacts with cloud providers or on-premises infrastructure to create, modify, or delete resources to match the defined configuration. This approach makes it easy to version and manage infrastructure, collaborate with team members, and ensure consistency across different environments.
Note
Note: This provider is community-supported. While Rundeck/PagerDuty staff review and approve pull requests, new feature development is driven by community contributions. We welcome and encourage community involvement at the open source repository.
What is a Terraform Provider?
A "provider" is a plugin that serves as an interface between Terraform and a specific infrastructure or service provider. Providers are essential components in Terraform because they enable the tool to interact with various cloud, virtualization, and other infrastructure platforms.
Each provider is responsible for translating the resource configurations defined in Terraform's HashiCorp Configuration Language (HCL) into API calls and actions that are specific to a particular provider's platform. This includes creating, updating, deleting, and managing resources within that platform. More information about providers here.
The Terraform Provider to manage a Rundeck instance
Rundeck Projects, Jobs, and Keys can be created and configured via Terraform using the Rundeck Terraform service. Terraform can handle Rundeck projects thanks to the project resource. In this guide, let's see how to manage Rundeck Jobs through Terraform by using the Terraform Rundeck Provider.
Requisites
- Terraform 1.0 or later installed on your local computer. Follow this guide to learn how to install it. To see the version, execute
terraform -version. - A local Rundeck instance (version 5.0.0 or later). Check this guide to learn how to install it.
- Basic knowledge about Linux terminal usage.
Tips
Though these instructions are written for the open source Rundeck application, they are also applicable for PagerDuty Runbook Automation.
Configuring the Rundeck Instance
The Rundeck Instance must be configured for access. To accomplish this, the objective is to create an API access token. In this example, the Rundeck instance is a local war based installation that runs in the /opt/ directory.
- Launch the Rundeck instance and login as
adminuser. The Rundeck instance is available at http://localhost:4440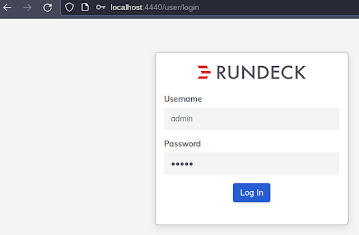
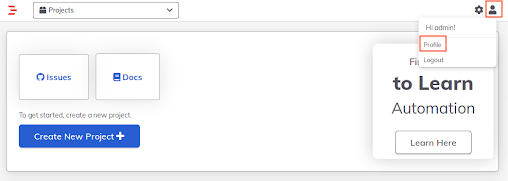
- Click the user icon (upper right) and then click on "Profile.”
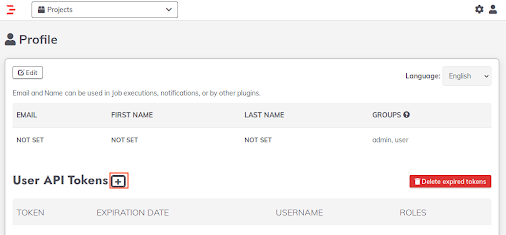
- Click "+" icon (next to "User API Tokens").
- Give the token a name such as "Terraform API Token" and then click on the green "Generate New Token" button.
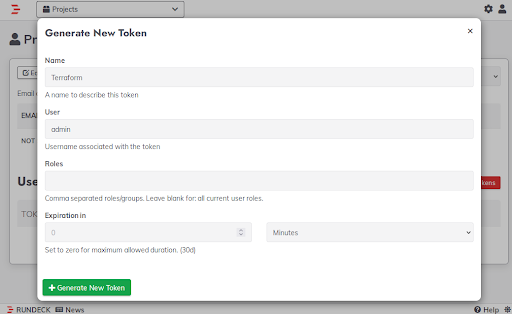
- Save the token content to use later in the Terraform file definition (next section).
Configuring the Terraform Provider environment
Create a local directory in which to install the Provider and work.
Create an empty file called
rundeck.tfnow. This file must include information on the Terraform provider in the first area, rundeck instance information in the second section, and the desired actions in JSON format.In this
rundeck.tffile add the provider data:terraform { required_providers { rundeck = { source = "rundeck/rundeck" version = "~> 1.1" } } }This enables Terraform to use the Rundeck provider. The
versionattribute uses~> 1.1to allow any 1.x version (automatically gets bug fixes and new features while staying on major version 1).In the
rundeck.tffile, add the Rundeck instance resource block:provider "rundeck" { url = "http://localhost:4440/" auth_token = "your_token" }The Rundeck instance token from the previous section is the
auth_tokenattribute, and theurlpoints to your Rundeck instance (in this case, a local instance athttp://localhost:4440). The provider defaults to API version 56, which works with Rundeck 5.0.0 and later.Now, let's add a new Rundeck Project resource:
resource "rundeck_project" "terraform" { name = "terraform" description = "Sample Application Created by Terraform Plan" resource_model_source { type = "file" config = { format = "resourcexml" file = "/opt/rundeck/resources.xml" writable = "true" generateFileAutomatically = "false" ssh_authentication_type = "password" } } extra_config = { "project.label" = "Terraform Example" } }
The file attribute is associated with the Rundeck server file path of the model source, which in this case is /opt/rundeck/resources.xml. The resources.xml file includes a remote node example, as follows:
<?xml version="1.0" encoding="UTF-8"?>
<project>
<node name="node00"
description="Node 00"
tags=""
hostname="192.168.56.20"
osArch="amd64"
osFamily="unix"
osName="Linux"
osVersion="5.14.0-284.30.1.el9_2.x86_64"
username="remote_username"
ssh-authentication="password"
ssh-password-storage-path="keys/mypasswd" />
</project>
Next, we can add a job resource to the
rundeck.tfas follows:resource "rundeck_job" "bounceweb" { name = "HelloWorldTerraform" project_name = "${rundeck_project.terraform.name}" node_filter_query = "name: node.*" description = "Hello World from the Terraform Rundeck Provider" command { shell_command = "whoami" } }The
node_filter_queryrepresents the job node filter and thecommandsection expresses the Rundeck jobs steps.Now let's add the password resource. Add the following block to the
rundeck.tffile:resource "rundeck_password" "terraform" { path = "keys/passwd" password = "my_password" }And the ACL resource block:
data "local_file" "acl" { filename = "${path.cwd}/user.yaml" } resource "rundeck_acl_policy" "example" { name = "ExampleAcl.aclpolicy" policy = "${data.local_file.acl.content}" }This block requires a file in the terraform working directory named
user.yaml(referred to in thefilenameattribute); the example used in this how-to is the following one:description: desc. context: project: '.*' for: resource: - allow: '*' adhoc: - allow: '*' job: - allow: '*' node: - allow: '*' by: group: user --- description: desc. context: application: 'rundeck' for: resource: - allow: '*' project: - allow: '*' project_acl: - allow: '*' storage: - allow: '*' by: group: user
This is the full rundeck.tf content:
terraform {
 required_providers {
   rundeck = {
     source  = "rundeck/rundeck"
     version = "~> 1.1"
   }
 }
}
provider "rundeck" {
url = "http://localhost:4440/"
auth_token = "your_rundeck_auth_token"
}
resource "rundeck_project" "terraform" {
   name        = "terraform"
   description = "Sample Application Created by Terraform Plan"

   resource_model_source {
       type = "file"
       config = {
           format = "resourcexml"
           file = "/opt/rundeck/resources.xml"
           writable = "true"
           generateFileAutomatically = "false"
           ssh_authentication_type = "password"
       }
   }

   extra_config = {
       "project.label" = "Terraform Example"
   }
}
resource "rundeck_job" "bounceweb" {
   name              = "HelloWorldTerraform"
   project_name      = "${rundeck_project.terraform.name}"
   node_filter_query = "name: node.*"
   description       = "Hello World from the Terraform Rundeck Provider"

   command {
       shell_command  = "whoami"
   }
}
resource "rundeck_password" "terraform" {
path = "keys/passwd"
password = "vagrant"
}
data "local_file" "acl" {
   filename = "${path.cwd}/user.yaml"
}

resource "rundeck_acl_policy" "example" {
   name = "ExampleAcl.aclpolicy"
   policy = "${data.local_file.acl.content}"
}
Testing the Terraform Provider against the Rundeck Instance
To make sure the Rundeck instance and Terraform Provider are configured correctly, a preliminary test is required. The steps to accomplish this are as follows:
The first step is to validate our
rundeck.tfdefinition. If you type theterraform validatecommand, you will see the following output:Success! The configuration is valid.
You can learn more about the terraform validate command here.
2. Run the terraform init command. The provider is downloaded to your working directory with this operation. This is what you will get as an output:
Initializing the backend...

Initializing provider plugins...
- Finding rundeck/rundeck versions matching "~> 1.1"...
- Finding latest version of hashicorp/local...
- Installing rundeck/rundeck v1.1.2...
- Installed rundeck/rundeck v1.1.2 (signed by a HashiCorp partner, key ID 363DB95DA1D090AA)
- Installing hashicorp/local v2.5.1...
- Installed hashicorp/local v2.5.1 (signed by HashiCorp)

Terraform has created a lock file .terraform.lock.hcl to record the provider
selections it made above. Include this file in your version control repository
so that Terraform can guarantee to make the same selections by default when
you run "terraform init" in the future.

Terraform has been successfully initialized!

You may now begin working with Terraform. Try running "terraform plan" to see
any changes that are required for your infrastructure. All Terraform commands
should now work.

If you ever set or change modules or backend configuration for Terraform,
rerun this command to reinitialize your working directory. If you forget, other
commands will detect it and remind you to do so if necessary.
You can learn more about the terraform init command here.
3. Now let's test the rundeck.tf definition. To do so, execute the terraform plan command. You will see all the elements to apply to your instance.
Essentially, this is a simulation of what would happen if we decided to make these modifications to our Rundeck instance (see the following section). More information regarding the terraform plan command may be found here.
Creating a Rundeck Project and Job via Terraform
Execute the
terraform applycommand to see the sameterraform planverification. You will be prompted to confirm application of these changes.Do you want to perform these actions? Terraform will perform the actions described above. Only 'yes' will be accepted to approve.Type
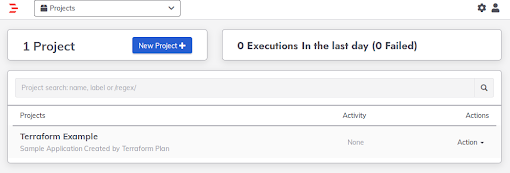
yesand press the Enter key. The Rundeck project, including the sample task, has been built.You may use the
terraform showcommand to check the current status of this implementation.In your web browser, navigate to the Rundeck instance. The project, job, key, and ACL are all present.
Rolling back
When we need to undo all modifications, we can accomplish it by following these procedures.
In the working directory created in the first section, type
terraform destroyto undo all changes made to the Instance. Typeyesand press the "Enter" key to confirm.rundeck_acl_policy.example: Destroying... [id=ExampleAcl.aclpolicy] rundeck_password.terraform: Destroying... [id=keys/passwd] rundeck_job.bounceweb: Destroying... [id=acb1685c-6940-4818-bf60-ec6c027552cd] rundeck_password.terraform: Destruction complete after 0s rundeck_acl_policy.example: Destruction complete after 0s rundeck_job.bounceweb: Destruction complete after 0s rundeck_project.terraform: Destroying... [id=terraform] rundeck_project.terraform: Destruction complete after 0s
Next Steps
Once you're comfortable with the basics, explore additional capabilities:
- Job Scheduling - Add cron schedules to your jobs for automated execution
- Notifications - Configure email, webhook, or plugin notifications for job events
- Job Options - Create parameterized jobs with dropdown choices and validation
- Webhooks - Configure external systems to trigger your Rundeck jobs (v1.2.0+)
- Import Existing Resources - Bring existing Rundeck resources under Terraform management
For advanced features and examples, see the provider documentation.