
Nodes
Nodes
Overview
A Node is a resource that is either a physical or virtual instance of a network accessible host. Nodes have a few basic attributes but a Node's attributes can be extended to include arbitrary named key/value pairs. Each node has a uniquely identifying name. In addition to name, some pieces of metadata are required (like hostname and username) and some are optional. Attributes typically describe the properties of a node or reflect the state of the node. One of a Node's built in attributes is called "tags" which is a list of classifications or categories about that Node.
Note on Node Name Whitespace
When generating inventories from Rundeck to Ansible, node names must not contain whitespace characters (such as spaces or tabs). Ansible treats whitespace as a separator, which can lead to parsing errors or unexpected behavior if included in node names. To ensure compatibility and avoid issues, always use names without spaces—consider using underscores (_) or hyphens (-) instead. For example, use web_server_01 or db-node-2 rather than web server 01.
To add nodes to your Rundeck instances, see Configure - Resource Model Sources Configuration
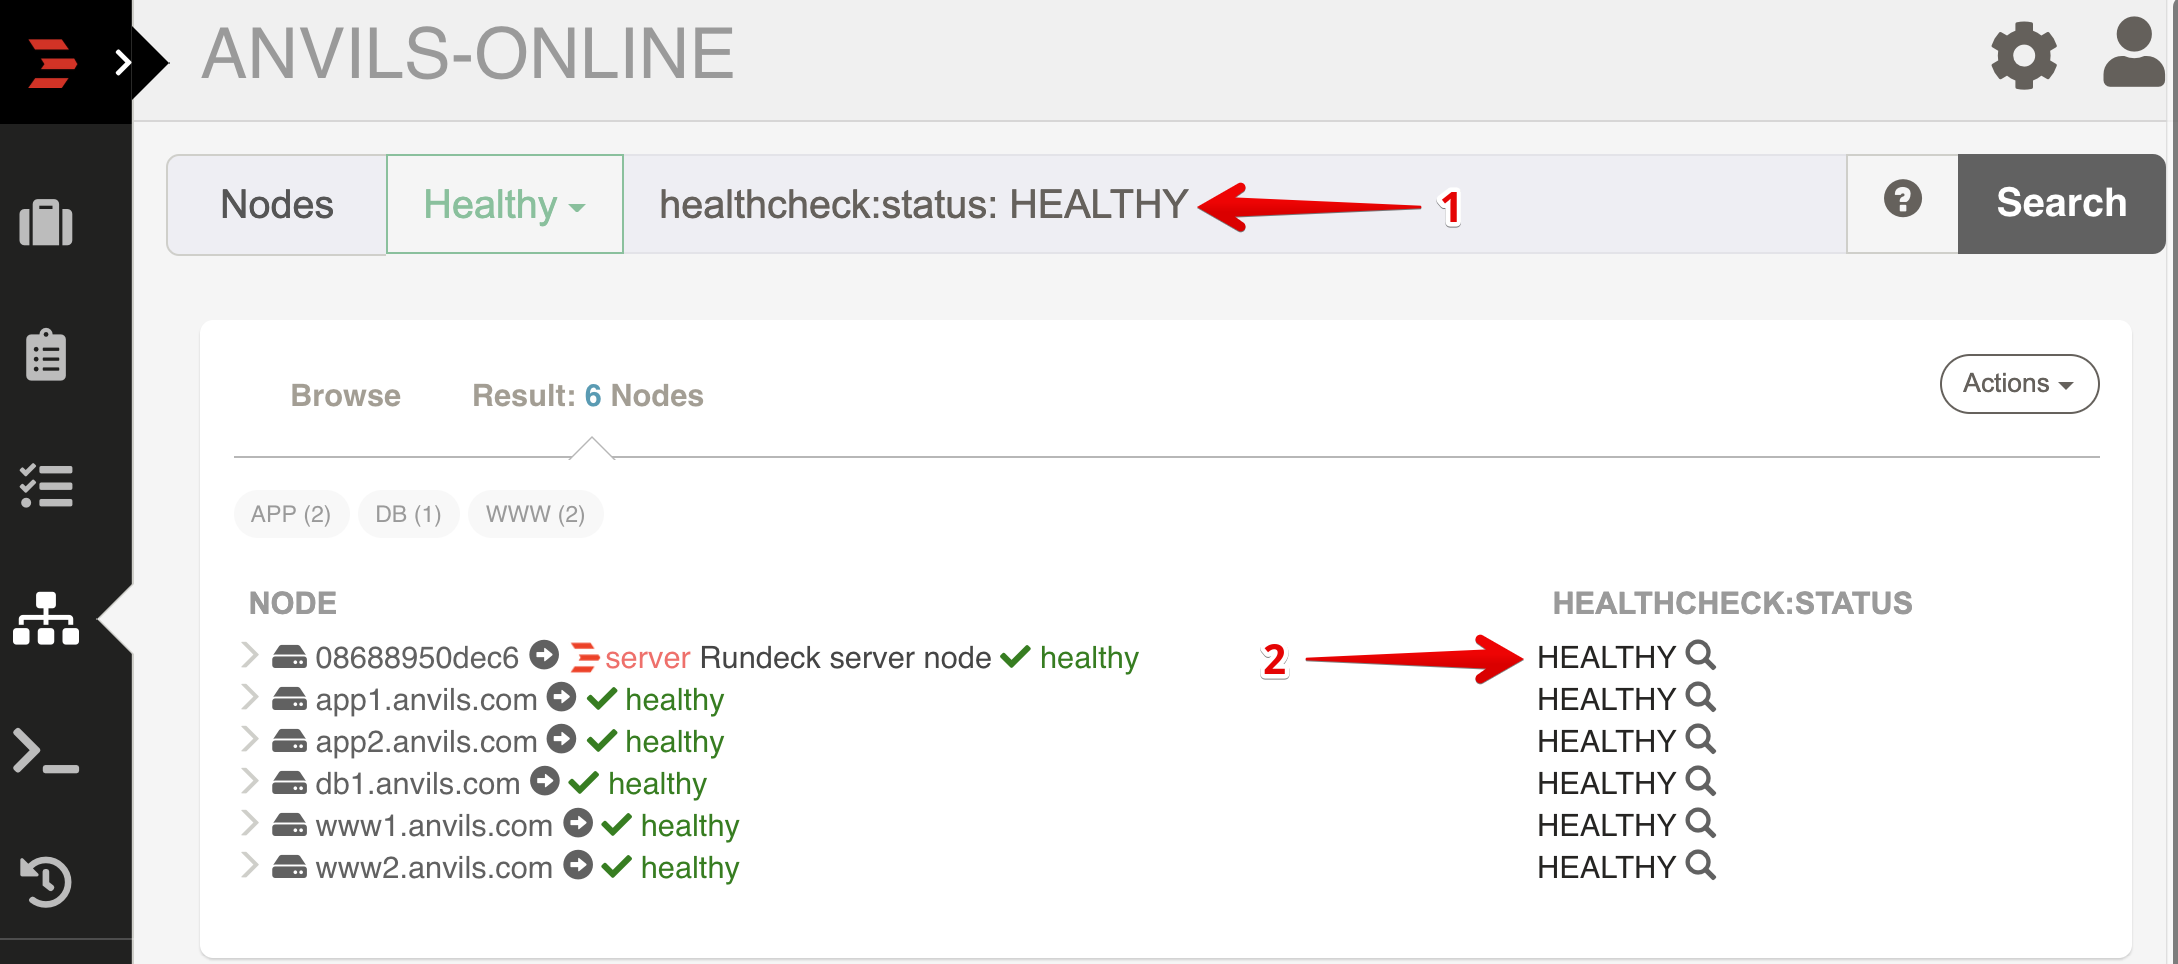
Nodes tab overview
Navigate to this page by clicking on the "Nodes" link in the navigation menu.
The screenshot above shows the elements of the Nodes page user interface.
- Filter - Search expression using tags and attribute patterns. The filter menu also contains an item to list all nodes in the project.
- Tags - Category or classification of Nodes. Each tag shows the number of nodes that reference that tag. You can click the tag name and list other nodes with that tag.
- Node detail - Clicking on the node name will show a dialogue that lets you view the attributes and values for that Node.
- Attributes - Node attributes describe the characteristics or state of a Node
- Actions- Run a command or create a Job for the nodes matching the filter.
- Health Status - an indication of the Health Status of the Node (see Health Checks).
Attribute name spaces
Because nodes might have many attributes, it can be helpful to use a naming convention that groups them into namespaces. The naming convention is simple:
{namespace}:{name} = {value}
When Rundeck sees an attribute with a name containing a colon, it automatically groups them in the UI. For example, the screenshot below shows a node with two attributes under the "web" prefix.
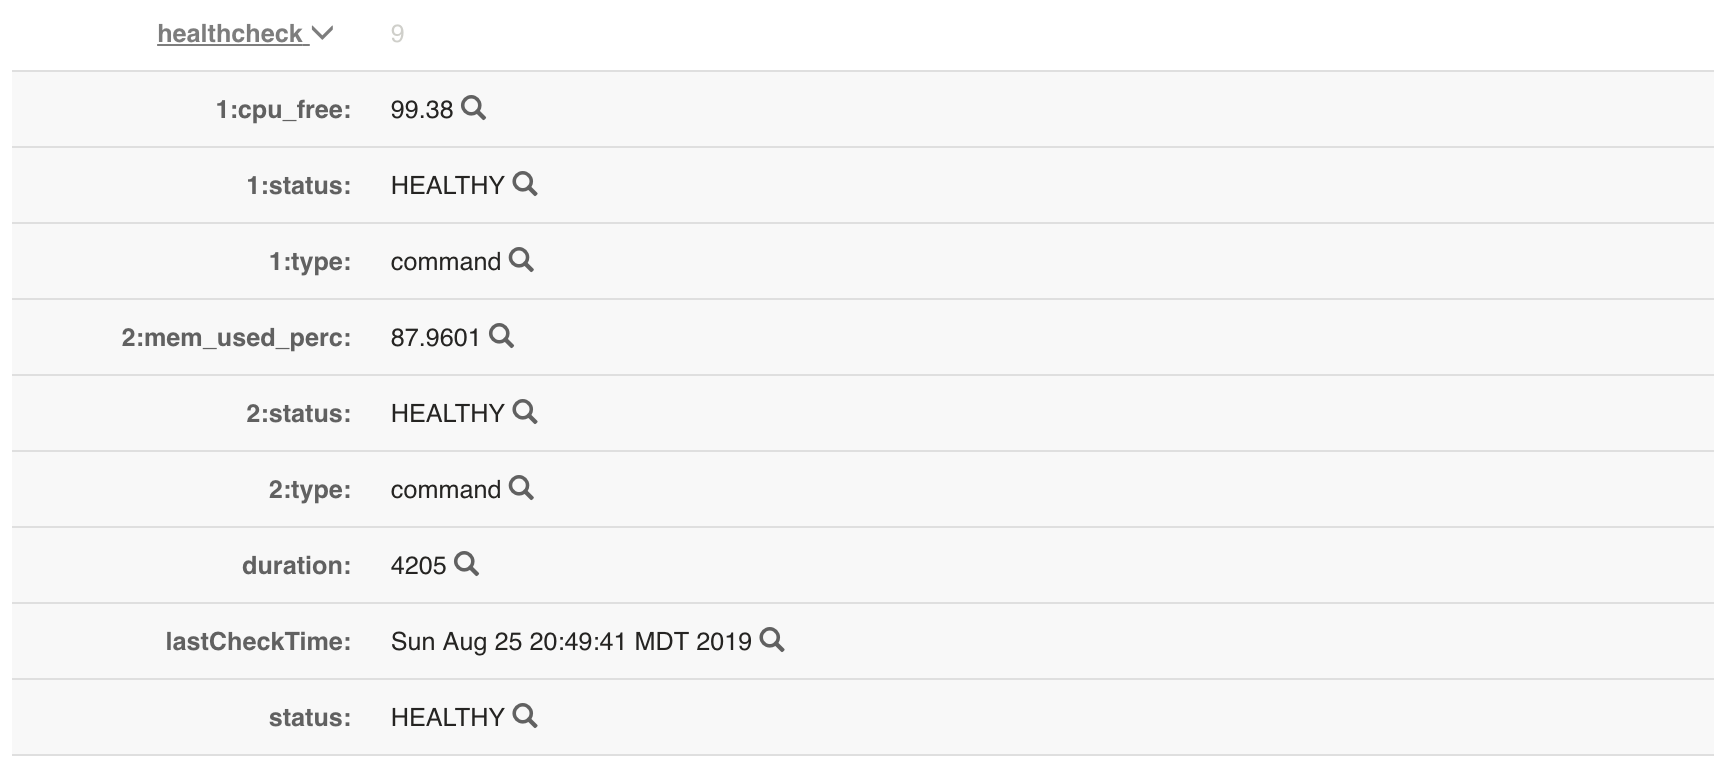
In this example, there are 9 attributes listed.
This naming convention is really just a graphical treatment to reduce the amount of data being shown all at once. This convention also helps add structure to your resource model.
Navigating Nodes by tag or attribute
The node detail view contains a set of hyperlinks that automatically filter the nodes in the project. By clicking on a Node's tags, attribute names or attribute values the list of nodes will be refined to match a more specific expression. You can delete parts of the expression from the filter form to expand the search again.
As you click search links in the node detail view, that attribute is placed in the node filter form and the attribute becomes a new column in the list view. These filtered list views are useful to create custom views about the project nodes.
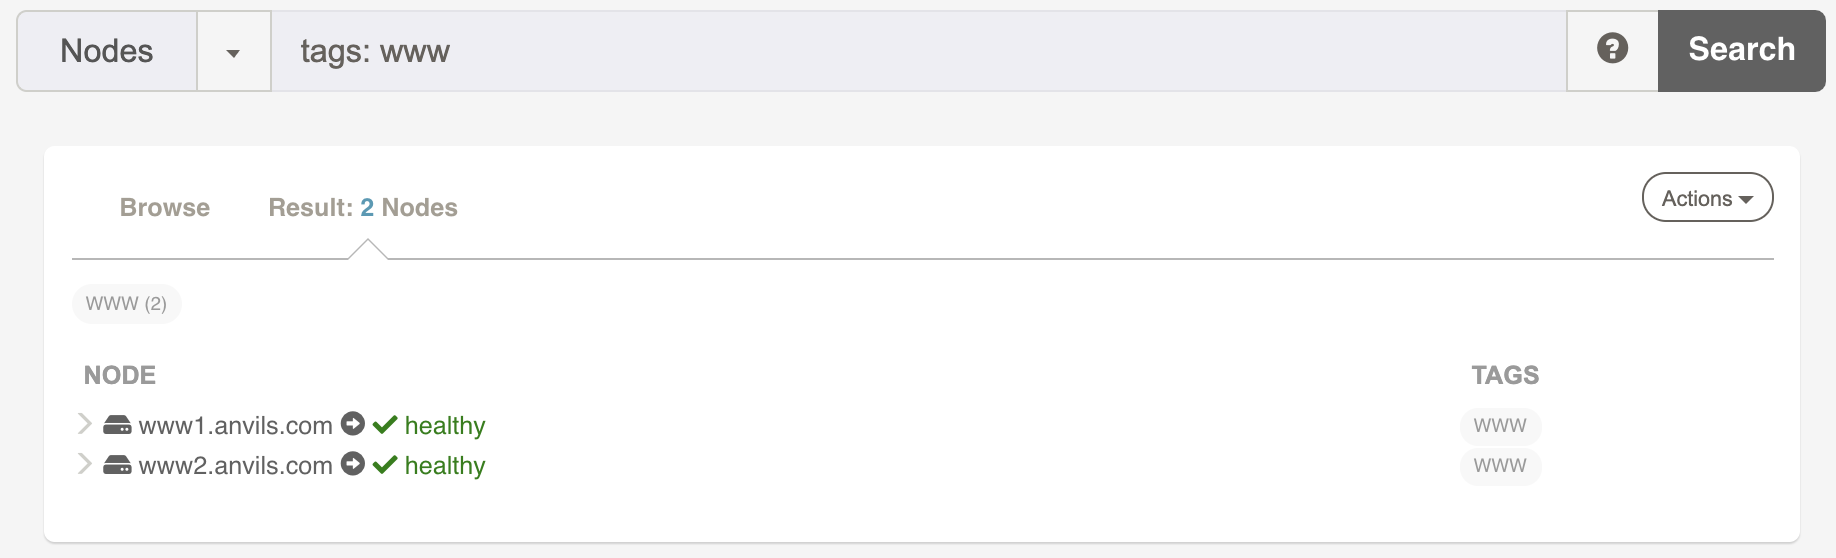
The screenshot below shows a case where two nodes were found that were tagged "www" have an attribute named web:pid and with their web:state attribute value "RUNNING".
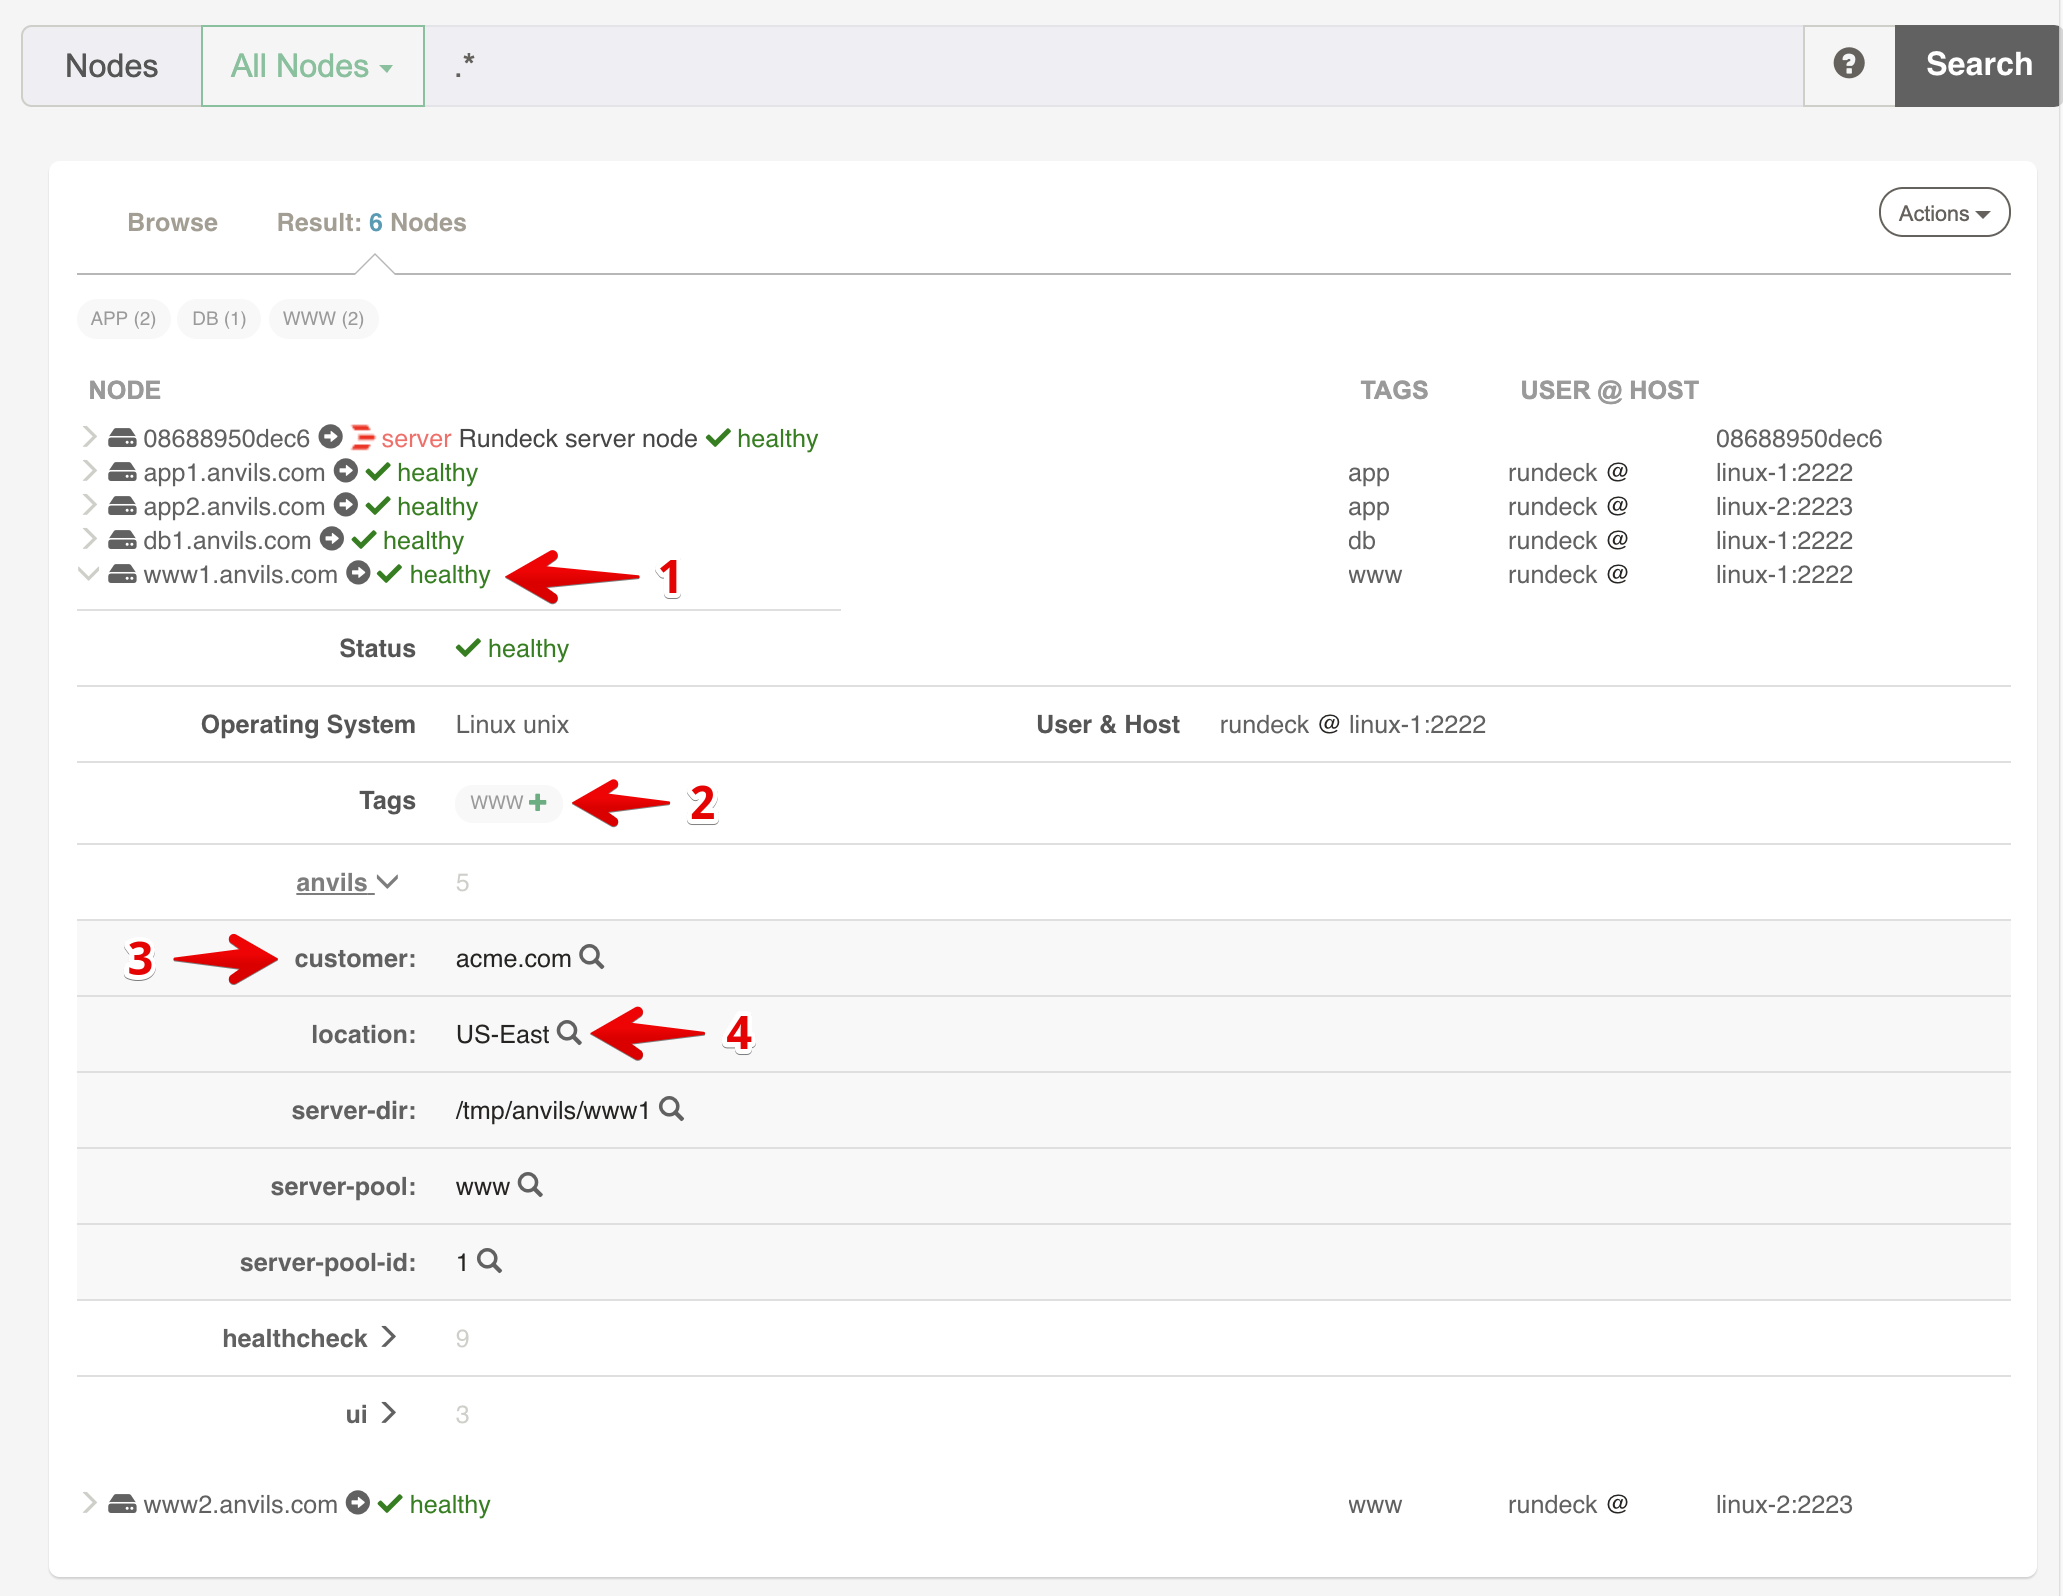
- Clicking the single node view icon filters the list down to just that node.
- Find nodes with this Tag (e,g just nodes with tagged "www").
- Find nodes with this Attribute name (e.g., any node with the "anvils:customer" attribute).
- Find nodes with this Attribute value (e.g., any node with attribute "anvils:location=US-East" ).
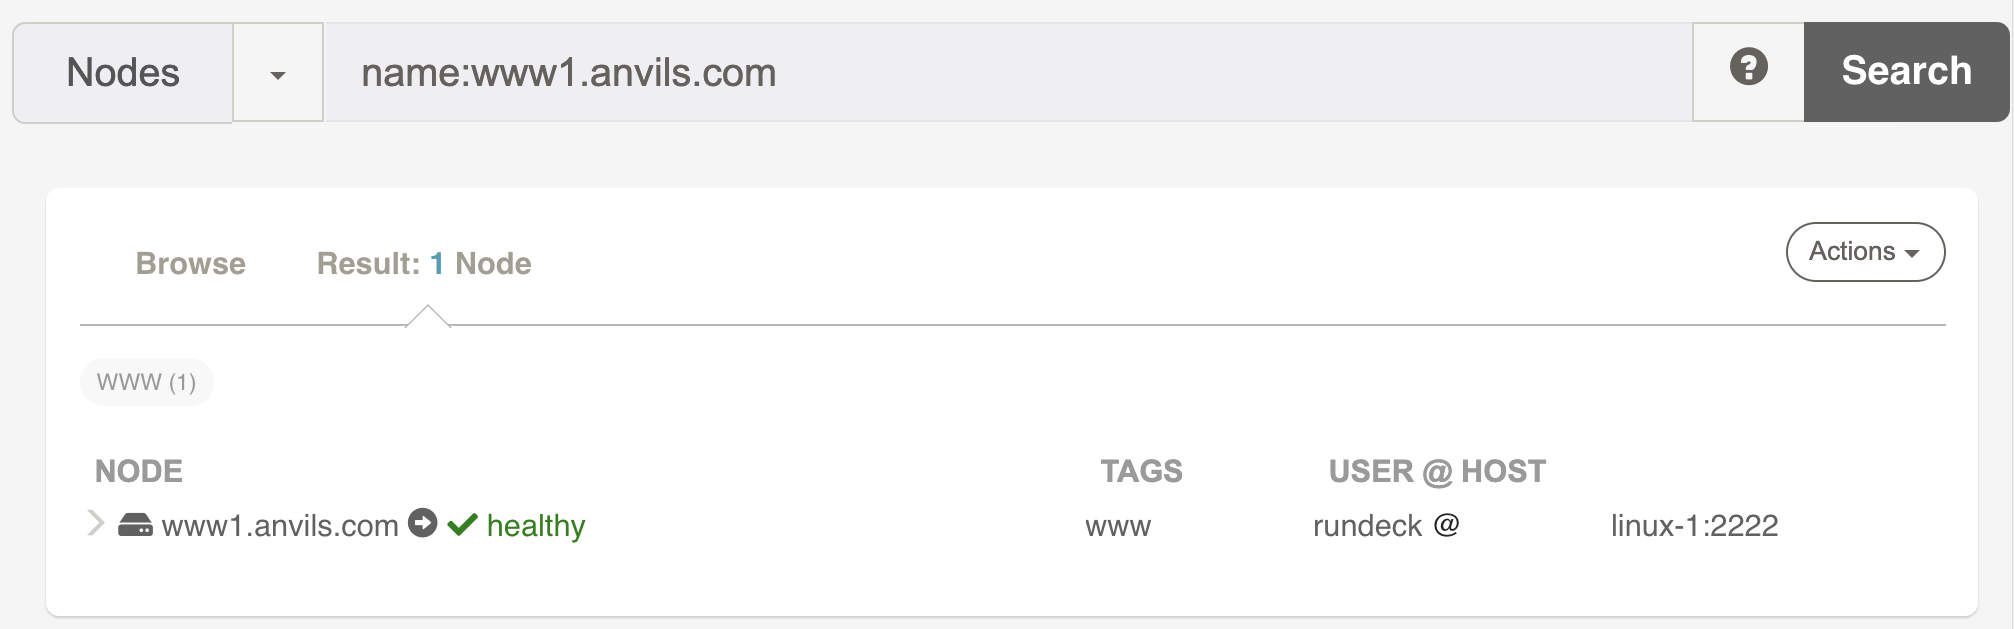
The next screenshot shows a single node view. Notice the nodes unique name is entered in the filter form.
Node filtering
A node filter is a search pattern that matches a set of nodes. Rundeck node filters let you match Nodes based on a pattern like "tags" or any node attribute. You can define node filters that include and exclude nodes based on sets of patterns. While a node filter can specifically reference nodes using their unique name, filter patterns are more resilient to changes in your environment and better handle dynamically provisioned servers.
- Filter expression
- Column labeled by attribute name
Filter expression syntax
The filter expression syntax is very simple. You can find a list of nodes by entering their names, or by attribute name and value. Values can also be regular expressions.
For full syntax information see the Node Filters chapter.
If you forget the syntax, press the help button in the filter form and a dialog containing a cheat sheet will be displayed (see screenshot below).
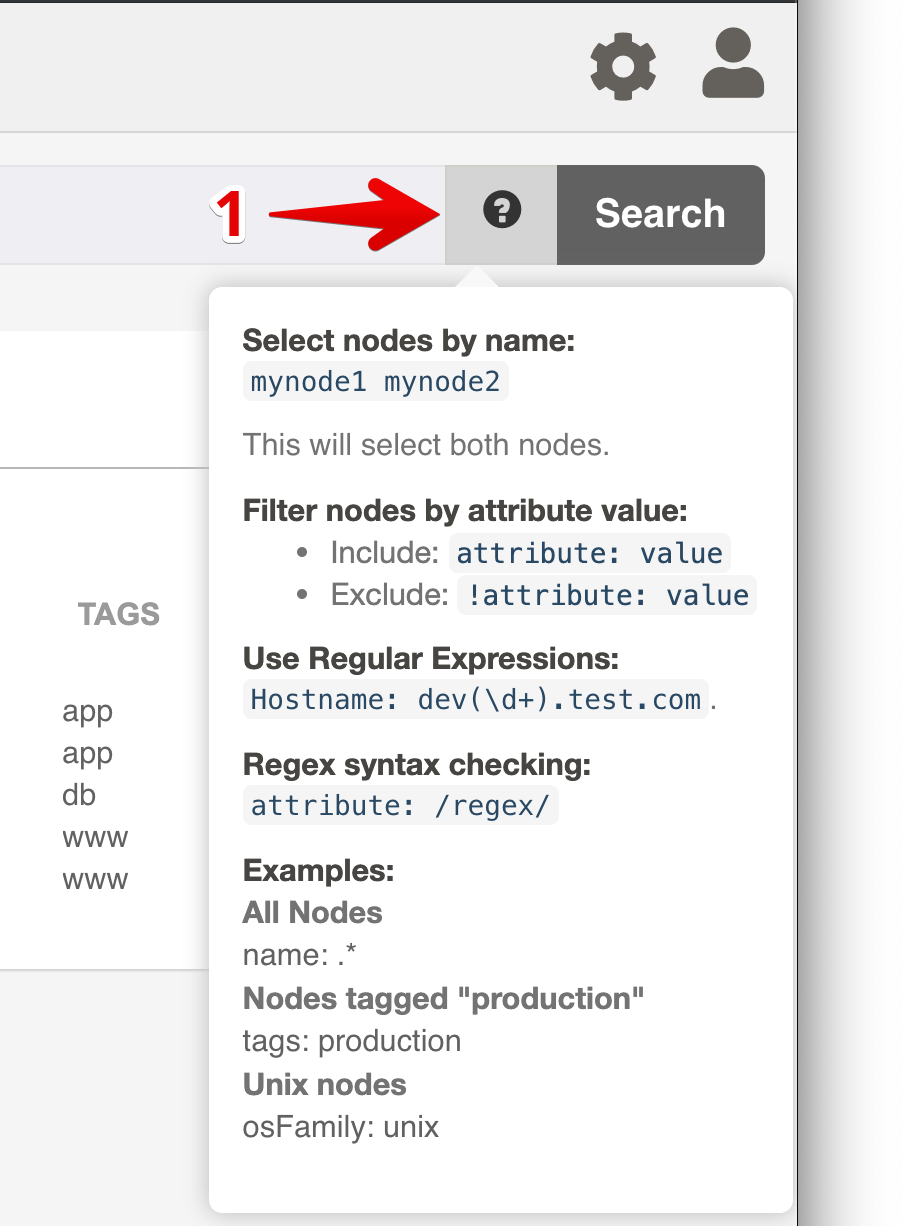
To exclude nodes that match a pattern place a "!" (exclamation point) to negate that part of the match.
- Filter expression help dialog
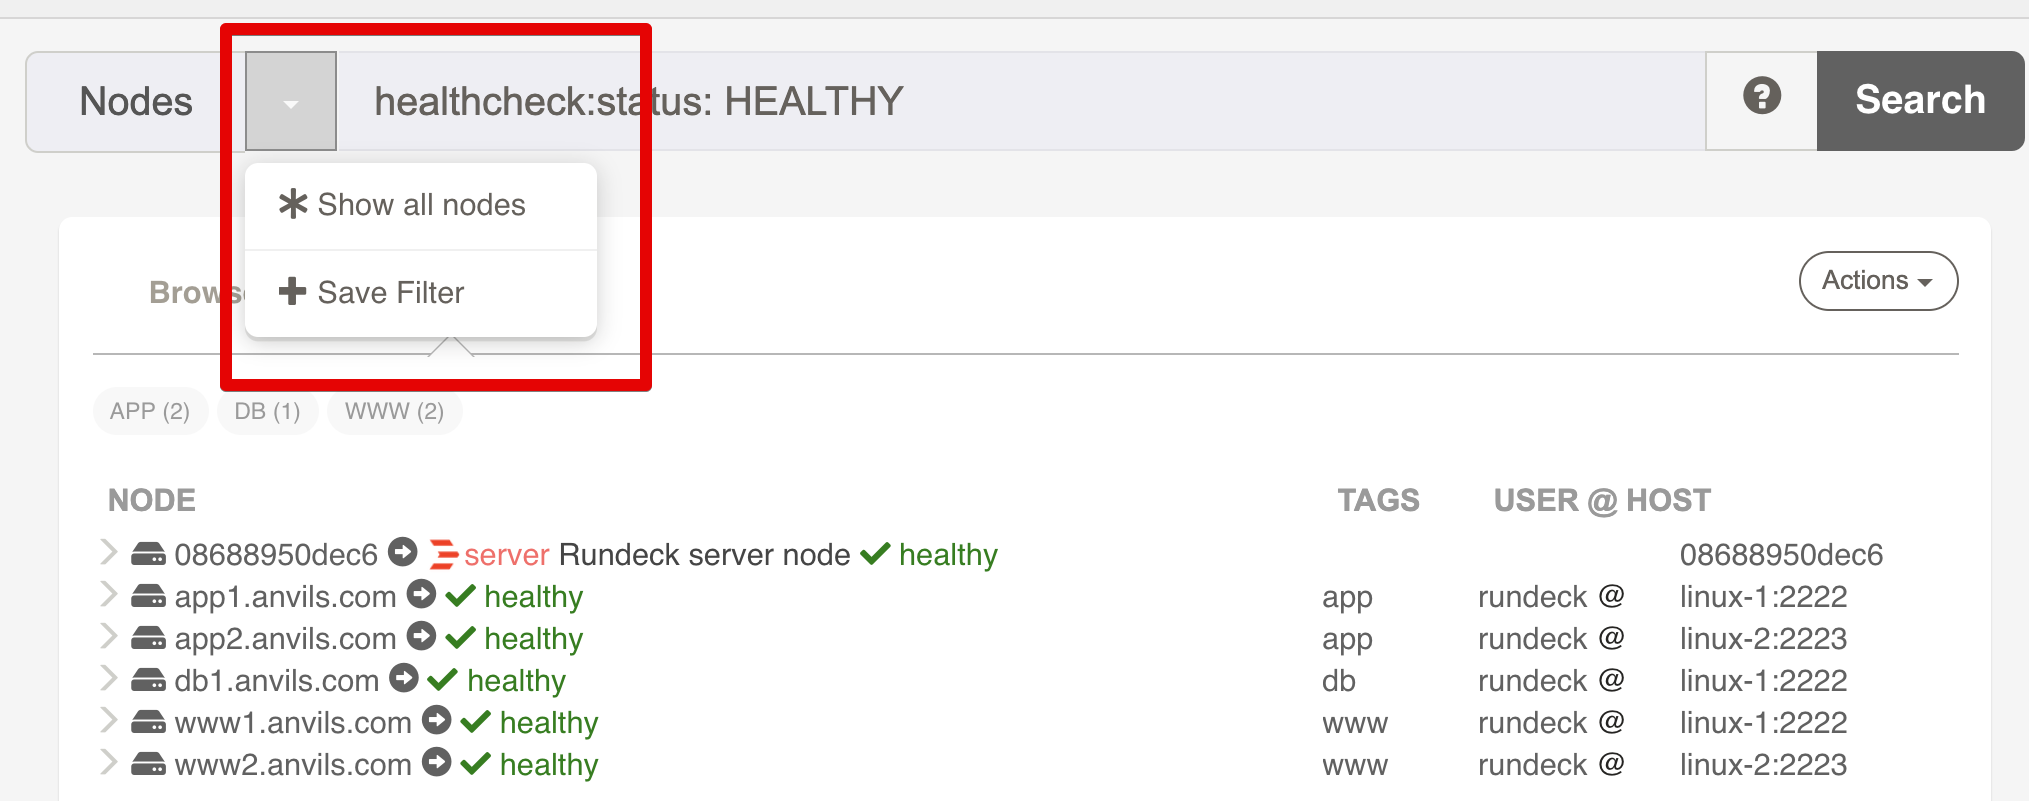
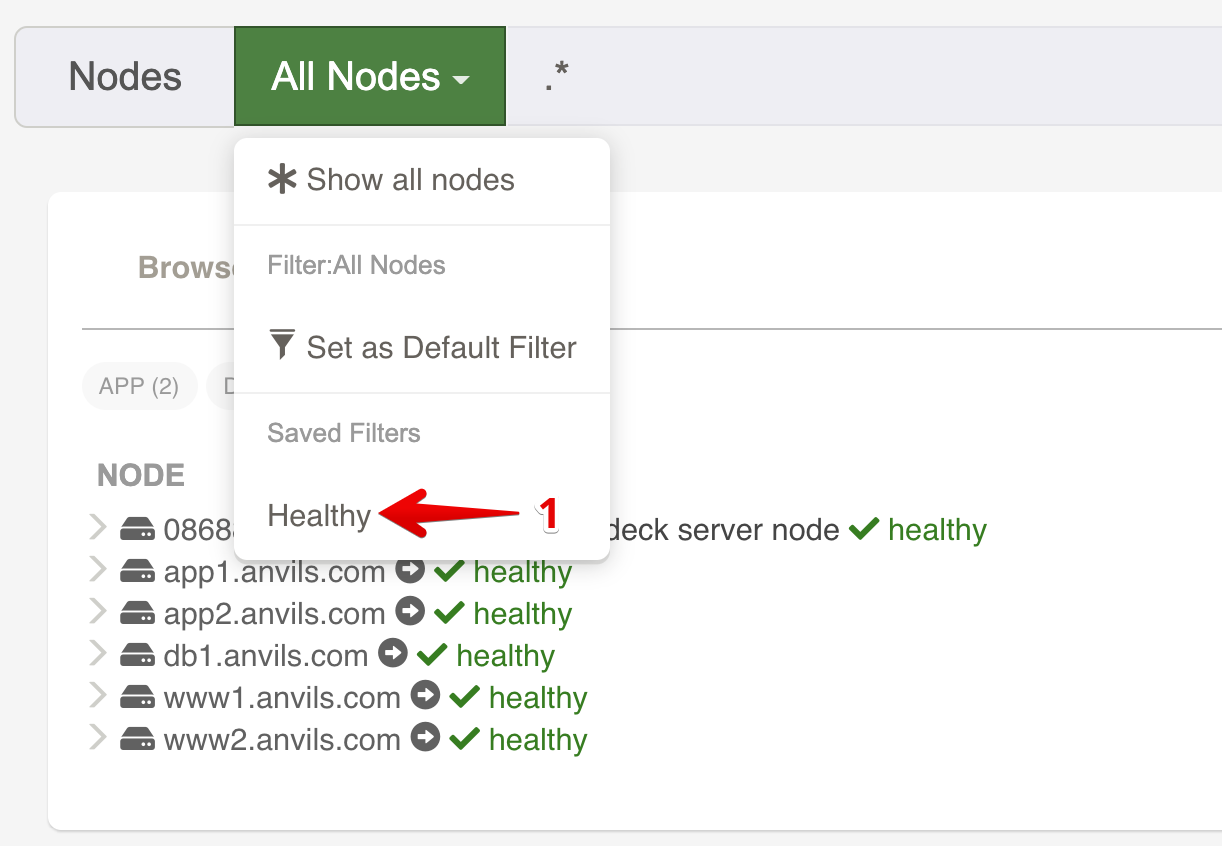
Saving filters
Often times you will want to go back to a set of nodes that matched a filter. You can save the filter and give it a name by pressing the "down arrow" button to the left of the search field.
The example below shows the dialog to confirm saving a new filter.
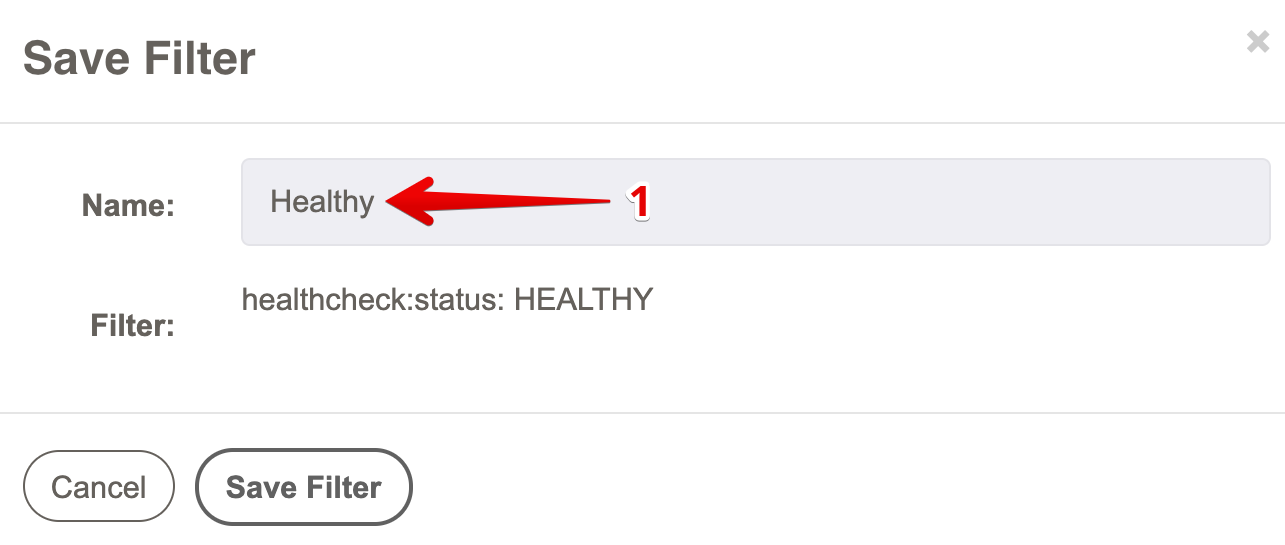
- Filter name
The saved filters become available in the Filters menu in other parts of rundeck, like in the Nodes page, when creating Jobs or running Commands.
- Named filter in menu
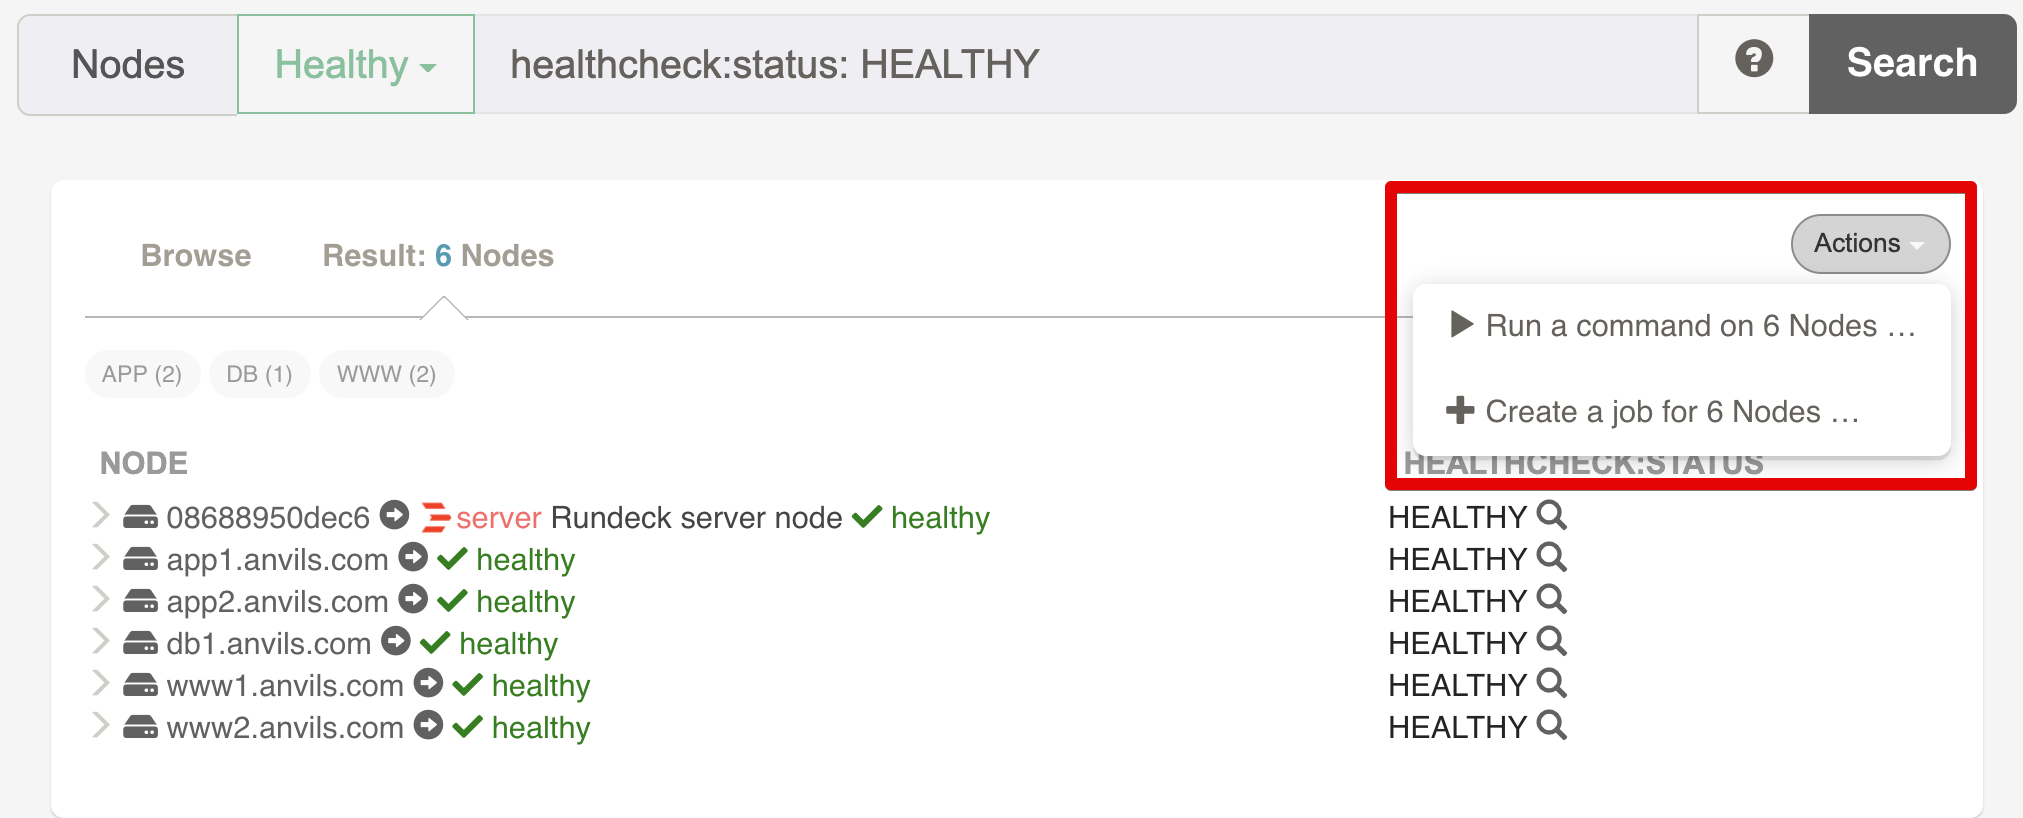
Node actions
Often times you are browsing and filtering nodes because you want to do something with the list. The Node Actions menu contains links to
- Run a command. Choosing this menu item will forward your browser to the Commands page.
- Create a job. Choosing this menu item will forward you to the Job create page and enter the filter expression in the edit form.
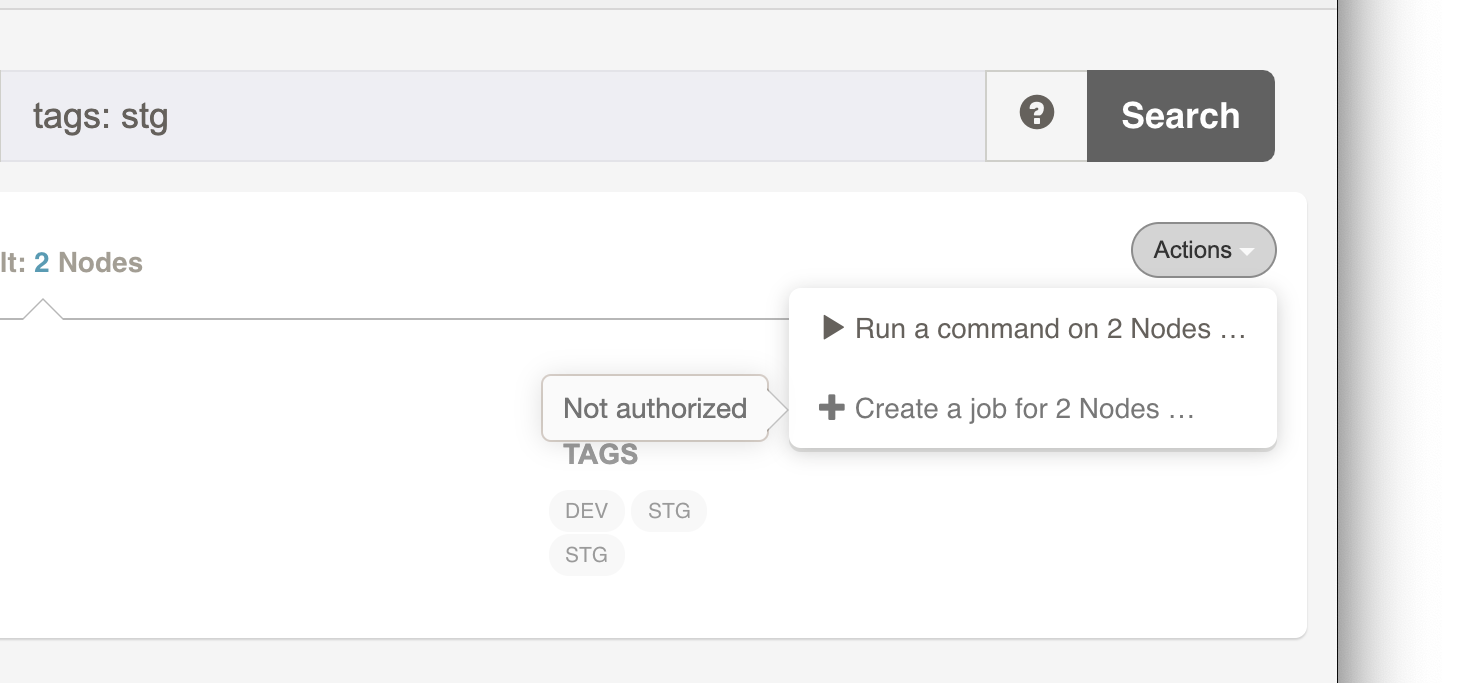
Users that don't have sufficient privileges granted by the ACL will show that menu item disabled.
The example below shows that the user can't create Job for those nodes.
Related Command line tools
- rd nodes
- List nodes via the
rdtool.