Get the Welcome Project Up and Running
Get the Welcome Project Up and Running
The Rundeck Welcome Projects are sample projects that show how to configure and use Rundeck. In this guide we show you how to set up, start and run the key parts of the Welcome Projects.
There are two Welcome Projects, a Community Welcome Project focused on the Rundeck Open Source and a Welcome Project focused on Runbook Automation. Once you have the environment set up, you will want to follow the steps in the Getting Started Tutorial.
Disclaimer
The Welcome Projects are meant to show users how Rundeck works and are not designed to be used in production. Some of the setup/installation methods used in this environment are not recommended for production deployments. Do not run this environment for production purposes or with sensitive data. For installation best practices follow our documentation (https://docs.rundeck.com/docs/) site and guidance from our world-class Support team.
Rundeck Basic Terminology
Before starting, knowing basic Rundeck terminology is useful. All basic concepts are summarized here.
Pre-requisites
- Docker Desktop - the open platform for developing, shipping, and running applications on containers, find information on installing it on your operating system here.
Installing the Welcome Project
To install the Welcome Project you need to download the latest release:
Navigate to: https://github.com/rundeck/welcome-project-community
- Click on the “latest” release in the right,
- Download the Source Code (.zip) file.
- Extract the contents to a folder on your local hard drive.
Navigate to: https://github.com/rundeckpro/welcome-project
- Click on the “latest” release in the right,
- Download the Source Code (.zip) file.
- Extract the contents to a folder on your local hard drive.
WARNING: A license is required for the Runbook Automation Welcome Project. A Runbook Automation Trial license can be requested from here https://www.rundeck.com/see-demo.
Building the Environment
Use your terminal program and navigate to the directory where the Source Code was extracted.
From the command line, build the docker base images.
docker-compose build
The initial build can take a few minutes.
NOTE: Building is not mandatory the first time. Use 'build' to update the images used to the latest version.
Starting the Environment
Start the environment with the following command. Running this command starts all the container components in the background and leaves them running.
docker-compose up -d
This process can take some time. To check if Rundeck is ready to use, follow the logs using the commands in the next section.
Monitoring Rundeck
If you want to see Rundeck logs in real-time, open a new terminal window and execute the following command:
docker logs -f rundeck
Alternatively leave off the
-dfrom thedocker-compose upcommand above and all the logs will be printed on screen.
Accessing Welcome Project (note the images are for the Enterprise Welcome Project)
To access Rundeck, head to http://localhost:4440 in your web browser.
Log in using the following credentials: username: admin and password: admin

Navigating Welcome Project
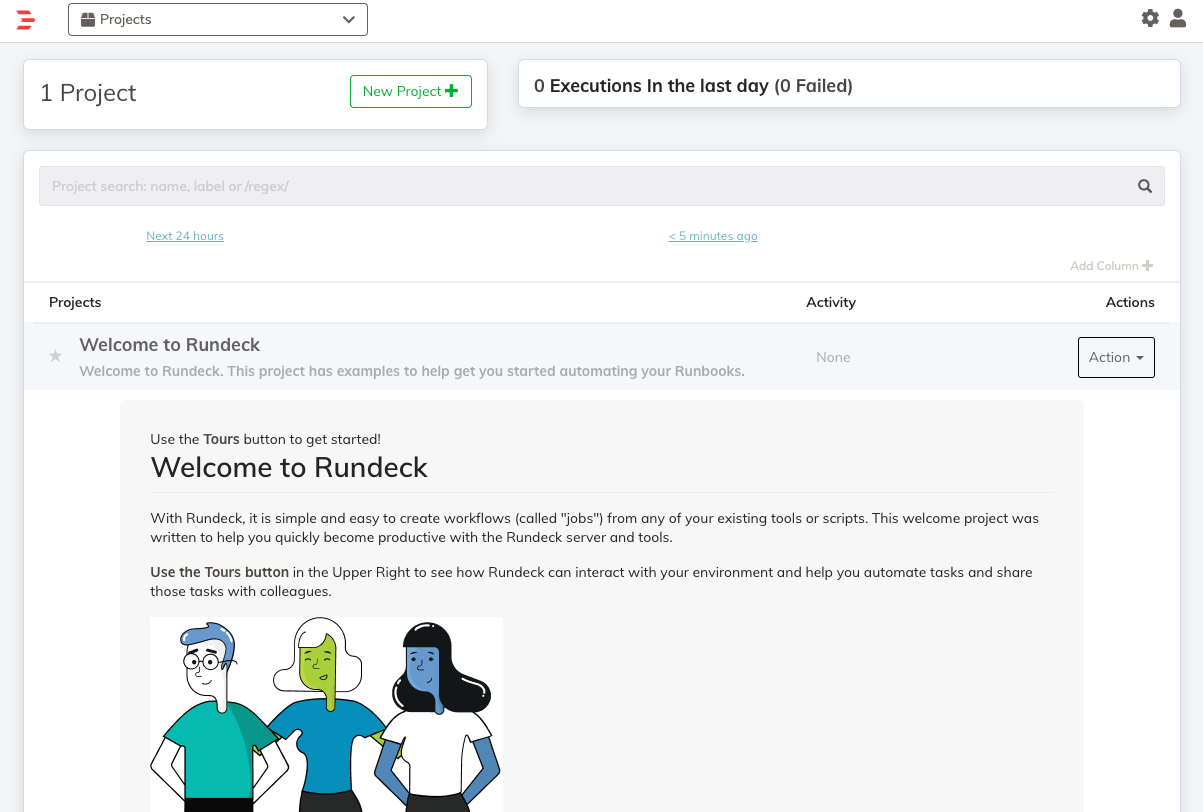
After logging in, you will see the following screen:

Click the project name.

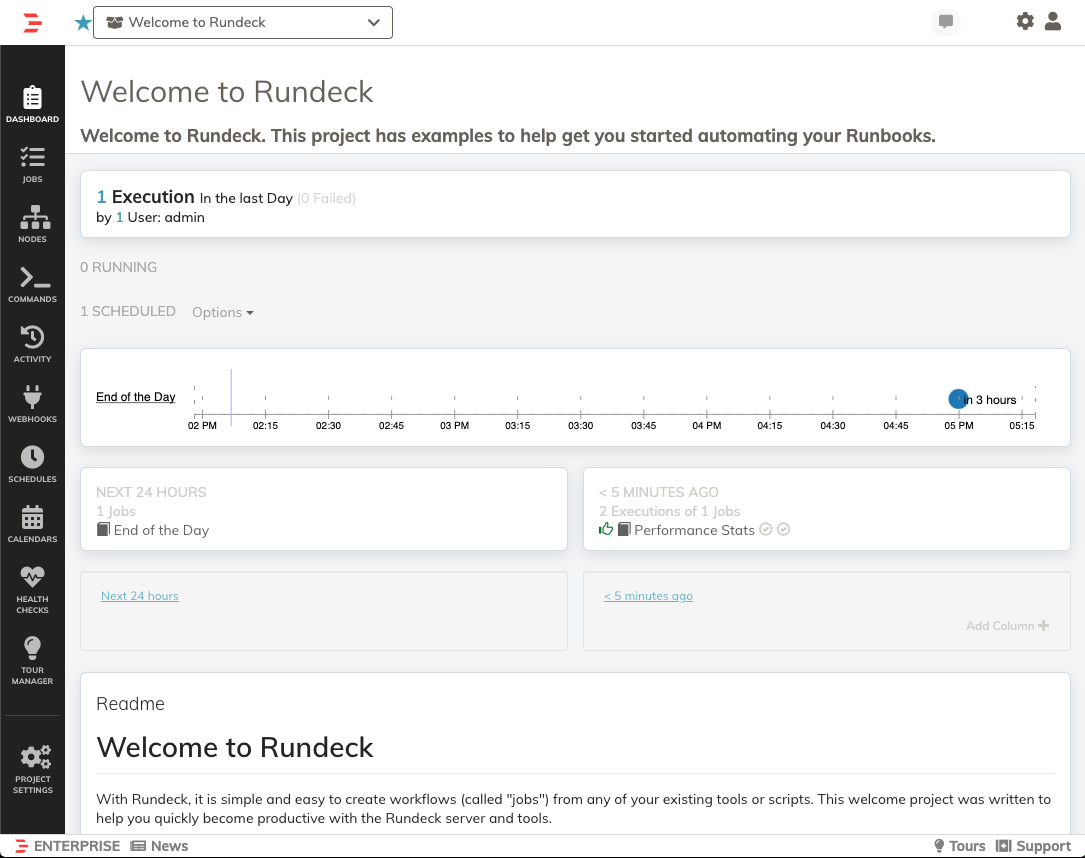
In the left nav bar the options available are:
- Dashboard, to view the project description, Readme, and executions summary. Runbook Automation users may see additional visualizations for schedules and execution history.
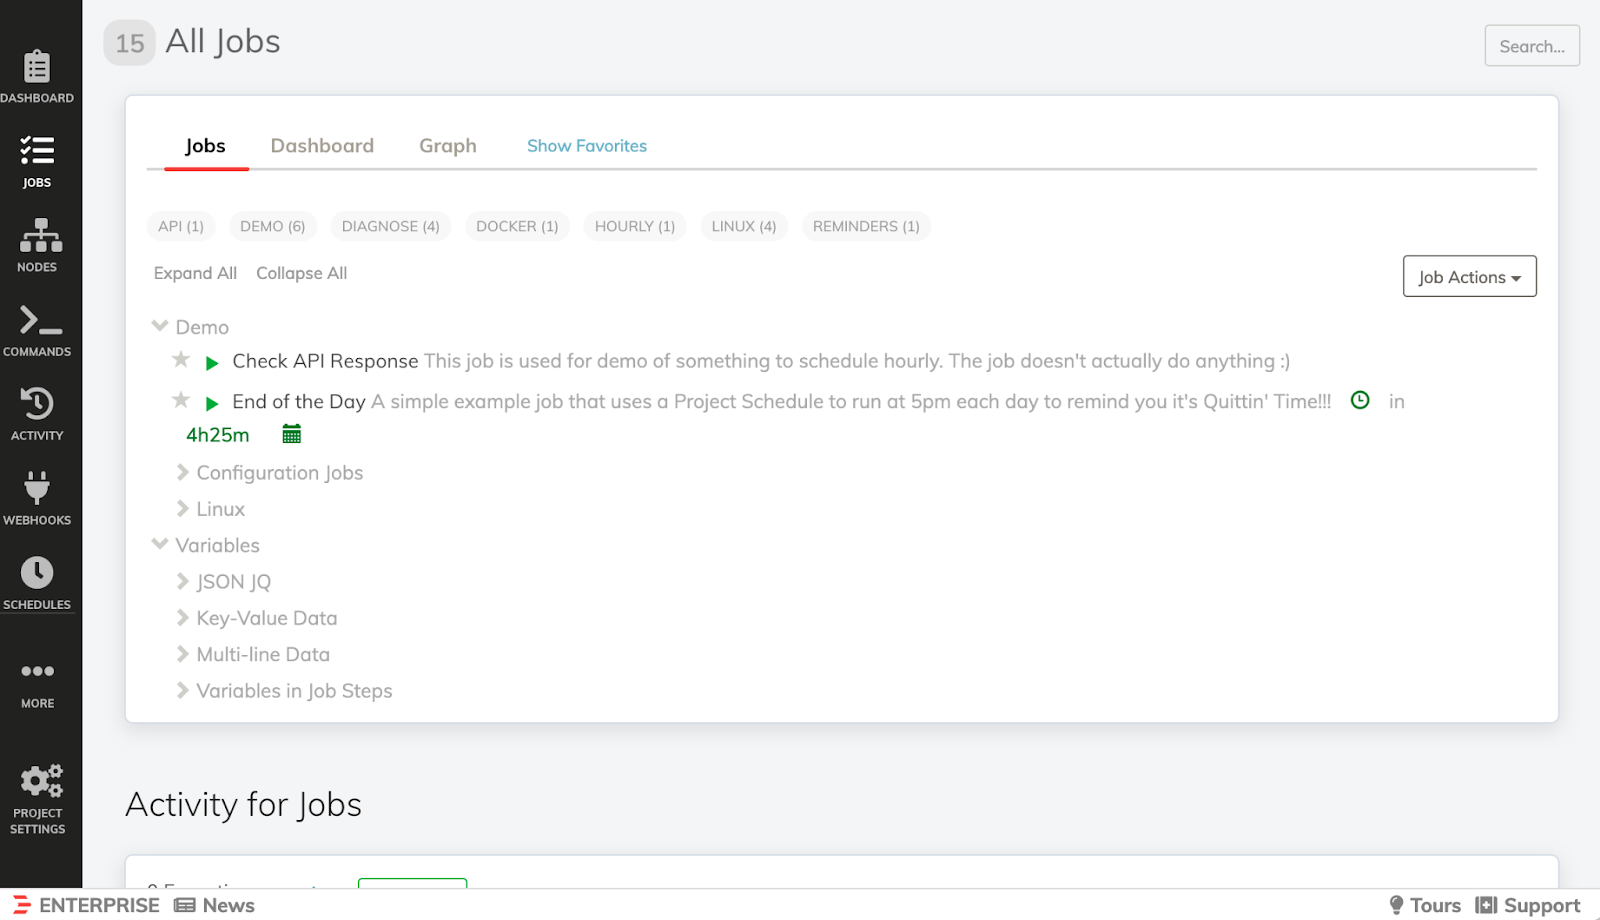
- Jobs, the welcome project available jobs.

- Nodes: where rundeck displays all nodes
- Commands: dispatch individual commands to available nodes
- Activity: see all job executions
- Webhooks: define and view all Rundeck webhooks
- Schedule (Enterprise-exclusive): define and see specific schedules for jobs
- More:
- Calendars (Enterprise-exclusive): define and see specific calendars for jobs
- Health Checks (Enterprise-exclusive): define the node’s health checks
- Tour Manager (Enterprise-exclusive): define and see the Rundeck guided tours
- Project Settings
- Edit Configuration: all current project configurations
- Key Storage: where Rundeck stores keys and passwords
- Edit Nodes: define and configure Rundeck node sources
- Access Control: define Project-specific ACL rules
- Edit Readme: define the readme project content
- Edit Message of the Day: craft the Project “message of the day”
- Setup SCM: Setup the Source Control Manager
- Export Archive: export a Project's database contents into an archive file
- Import Archive: import the contents of an exported archive
- Delete Project: delete the current project
- Plugins Control (Enterprise-exclusive): enable or disable installed plugins
Familiarize Yourself with Rundeck!
Once your environment is fully operational, start the Tutorial here.
Stop the Environment
Use the following command to stop the system, but keep the work you've done so far:
docker-compose stop
To remove the containers that were built and free up space on your machine:
docker-compose down
Cleaning up the Environment
This command will remove all associated volumes and images as well.
docker-compose down --volume --rmi all
