
Capturing Debug Data from Apps in Kubernetes
Automated Diagnostics
Capturing Debug Data from Apps in Kubernetes
Similar to how applications are analyzed in non-containerized environments, it is possible to debug and examine the state of programs running inside Kubernetes containers. This is helpful for identifying failure points, memory leaks, and other types of issues.
To accomplish this, the manual process could be messy: launch the pod shell and then execute some debugging commands like netstat inside the container.
With the Kubernetes plugins, commands can be issued directly to a Kubernetes pod, and the output can be captured and persisted in various services like S3, an email, an SFTP server, or an HTTP web service, all of this in a single workflow.
This article demonstrates how to automate this process using Rundeck or Runbook Automation.
Pre-requisites & Environment Setup
Basic requisites to learn and test this example job:
A Kubernetes cluster like minikube, self-hosted Kubernetes, or a managed Kubernetes - such as AWS EKS.
A valid Kubernetes config stored in your userspace (at /home/your_user/.kube/config path, in this article will see how to create this file against an AWS EKS Kubernetes cluster). This is needed by the plugin to dispatch Kubernetes steps against the pods.
Follow the instructions below for a sample setup of this environment
Skip Ahead
If you already have a Kubernetes cluster to test with, skip to Step 4 of this section.
This section outlines how to create a sample Kubernetes (EKS) cluster that can be used to test the template Job.
1. AWS CLI Configuration
The first tool to configure an EKS cluster is the aws cli. Follow these instructions to install it.
Now execute:
aws configure
If working locally, provide an AWS Profile Access Key and Secret Key - otherwise it is recommended to use IAM Roles.
2. EKSCTL Configuration
EKCTL is the command-line tool to interact with AWS EKS clusters. To download and install follow the steps outlined here.
EKS CLI is linked to the AWS CLI configuration. With the AWS CLI configured in the previous step, an EKS cluster can be created with the following command:
eksctl create cluster --name test-cluster --version 1.23 --region eu-north-1 --nodegroup-name test-workers --node-type t3.xlarge --nodes 3 --nodes-min 1 --nodes-max 4 --managed
3. Create the Kubernetes config
This step allows you to configure the kubectl using AWS CLI:
aws eks update-kubeconfig --region eu-north-1 --name test-cluster
This creates the Kubernetes config file in the /home/user/.kube/config file path by default. This file is needed by the Kubernetes plugin configuration.
4. Create a specific namespace
Now let's create a namespace called auto-diagnostics for our demo pods.
kubectl create namespace auto-diagnostics
5. Deploy a simple Tomcat pod
After configuring the entire environment let's deploy a simple Tomcat pod using the kubectl tool:
- Create a YAML file named
tomcat.yamlwith the following content.This file contains the tomcat definition to deploy.apiVersion: v1 kind: Pod metadata: name: tomcat spec: containers: - name: tomcat image: tomcat:latest ports: - containerPort: 8080 - To deploy the tomcat app execute:Now the tomcat pod is running in the cluster.
kubectl apply -f tomcat.yaml --namespace=auto-diagnostics - To see the running pods in the
auto-diagnosticscluster namespace:Output:kubectl get pods --namespace=auto-diagnosticsWith the Tomcat pod now running, we can retrieve diagnostics using Rundeck or Runbook Automation.NAME READY STATUS RESTARTS AGE tomcat 1/1 Running 0 42s
Plugin installation
Skip Ahead
You can skip this section if you have using Runbook Automation version 4.11 (or greater) or Runbook Automation, or if you have already uploaded the latest Kubernetes plugins.
To install the Kubernetes plugins just check the following steps:
- Navigate to the latest plugin release on Github and download the
kubernetes-X.X.XX.zipfile. - In the Rundeck or Runbook Automation instance, click the Gear Icon and then click the Plugins > Upload Plugin:
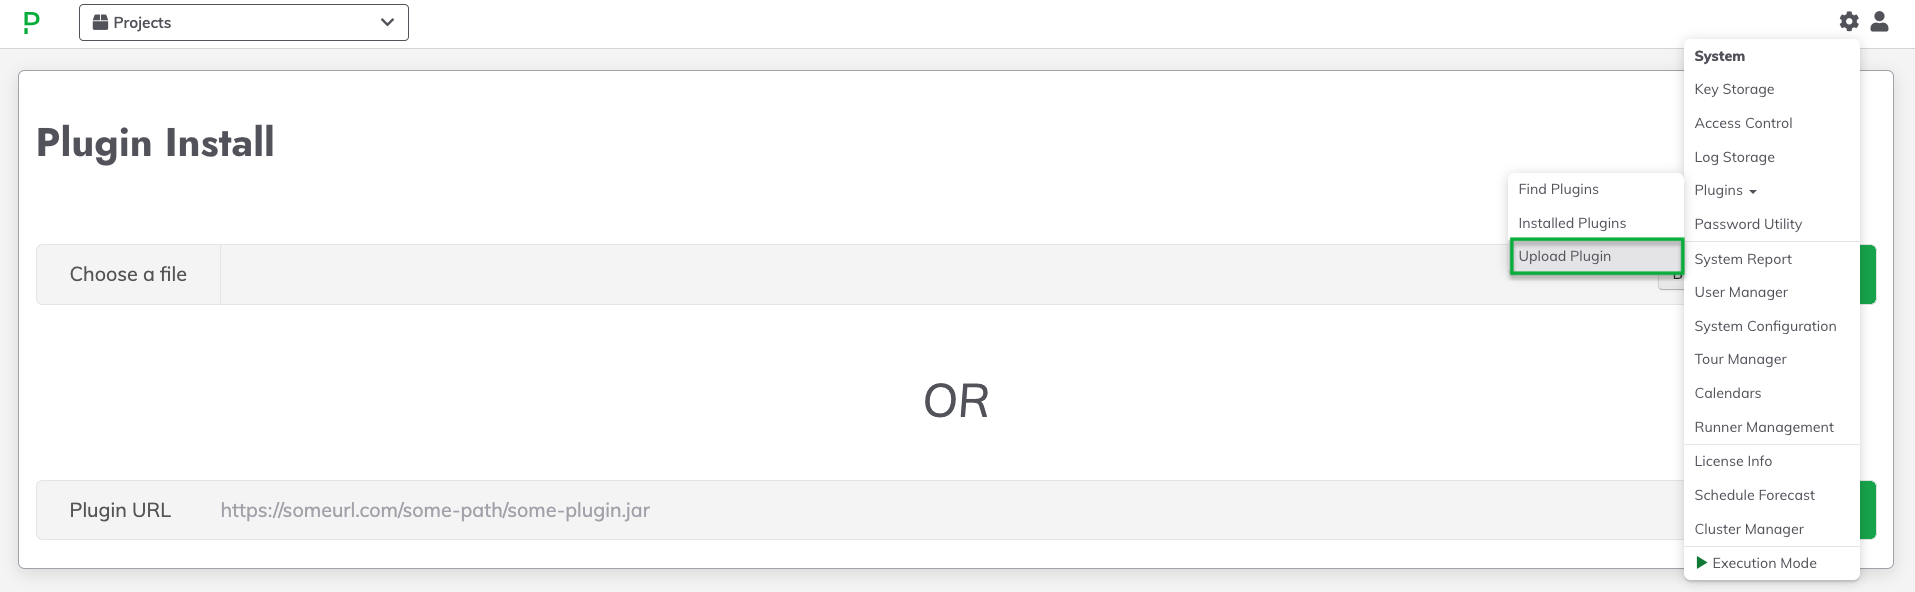
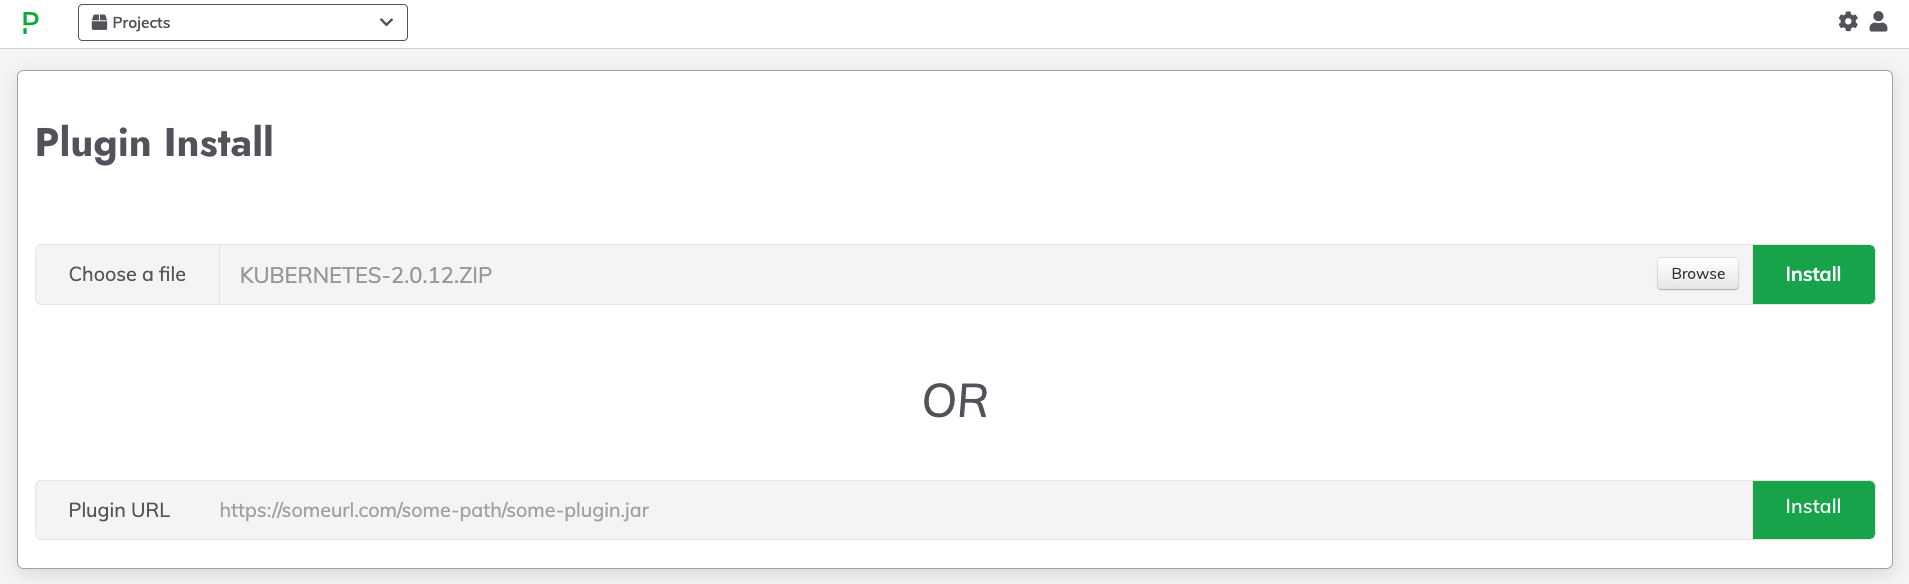
- Click Browse and select the downloaded
.zipfile from Step 2. - Click Install:
Running Commands in Pods and Capturing Output
Skip Ahead
If you are using Runbook Automation, simply look for and select the Java Thread Dump from Kubernetes Pod job in the Automated Diagnostics project. If you do not have the Automated Diagnostics project, you can download and import it here.
Then, skip to Step 5.
- Download the template job by right-clicking and selecting
Save Link As...here. - Navigate to the Jobs tab and click on Job Actions -> Upload Definition.
- From the Choose File prompt, select the
.yamlfile downloaded in Step 1. Choose YAML Format then click Upload.Custom Kubernetes Configuration
If the KubeConfig file is not saved in the default location of
$HOME/.kube/configor if using a Kubernetes API Token is preferred, then follow the steps below for Custom KubeConfig Location or Token Auth. - If the steps were followed in the Pre-requisites & Environment Setup section, type
auto-diagnosticsinto the Namespace field. - Type
tomcatinto the Pod Name field. - (Optional) type
tomcatinto the Contaienr Name field: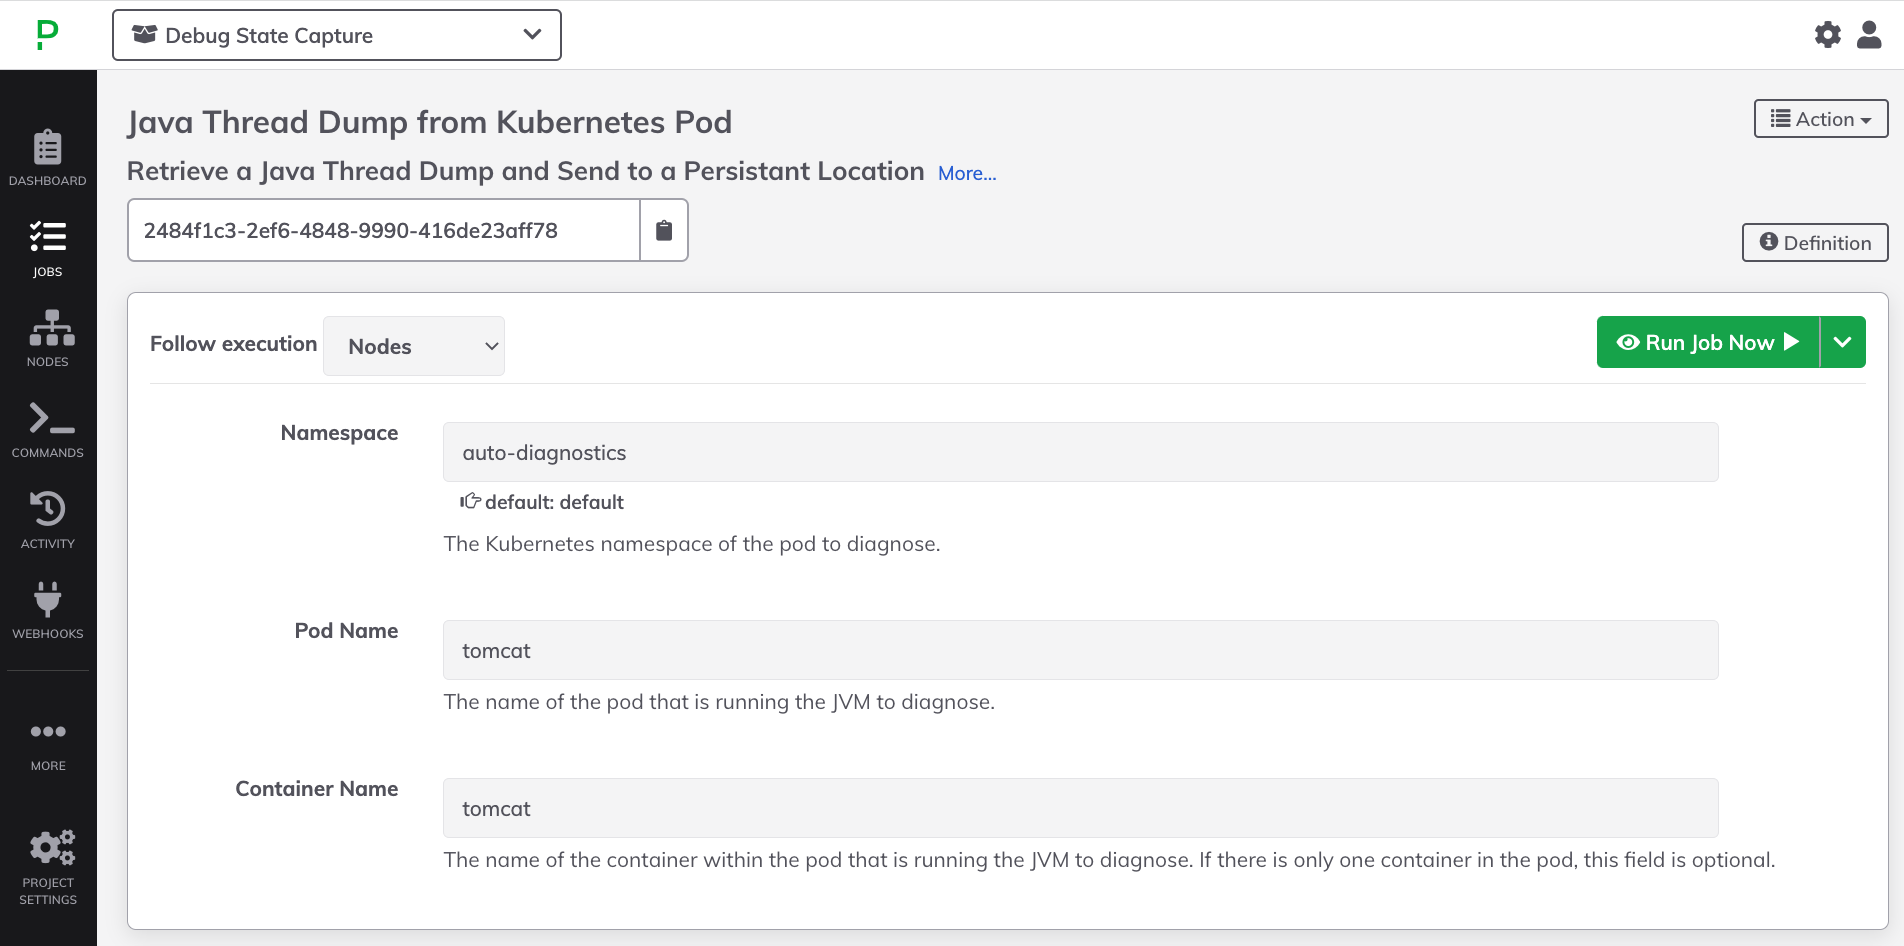
- Click Run Job Now.
Note
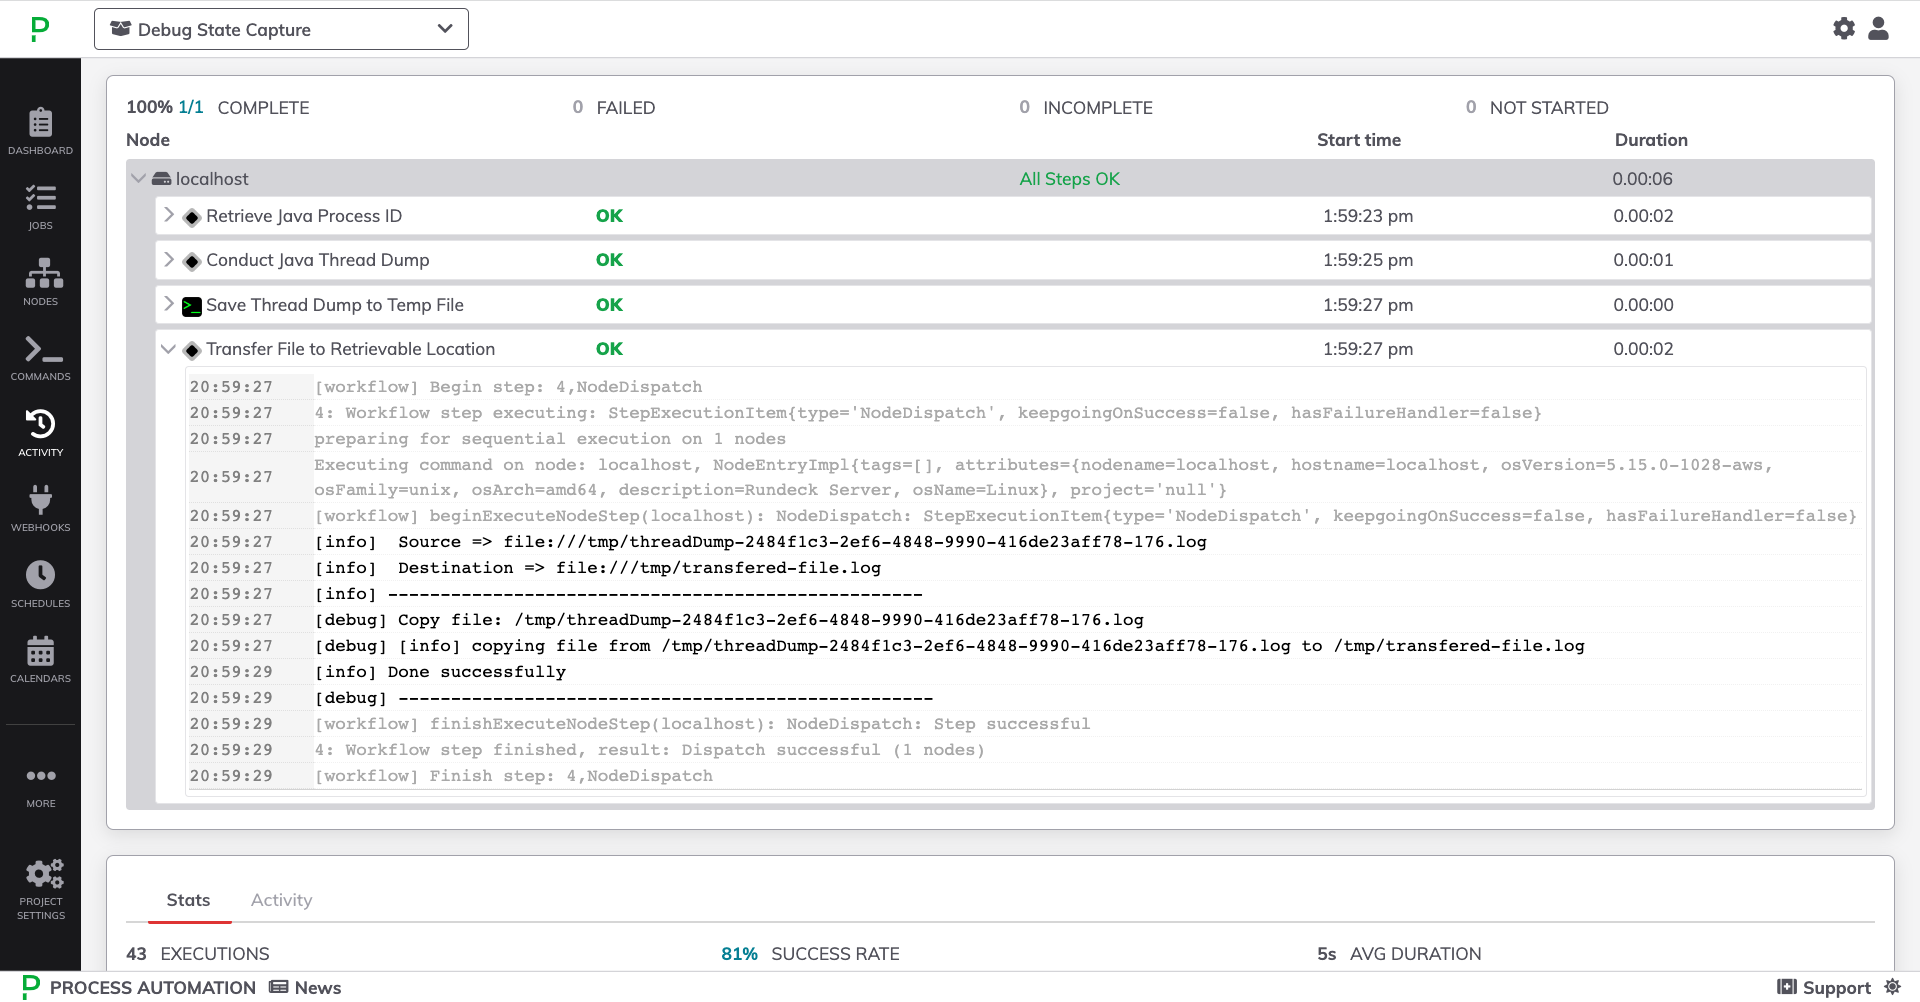
By default, the Java thread dump is not printed to the log output. Instead, it is saved as a file and can be configured to be sent to another location inside your network or to a storage-service like S3 or Blob Storage.
- Toggle open the specific job steps to view their detailed output:
Advanced Settings
Custom KubeConfig Location or Token Auth
If the KubeConfig file is in a non-standard location, then modify Steps 1 and 2 of the Job to point to the custom kubeconfig location:
- On the job-run page, click on Action -> Edit this Job...
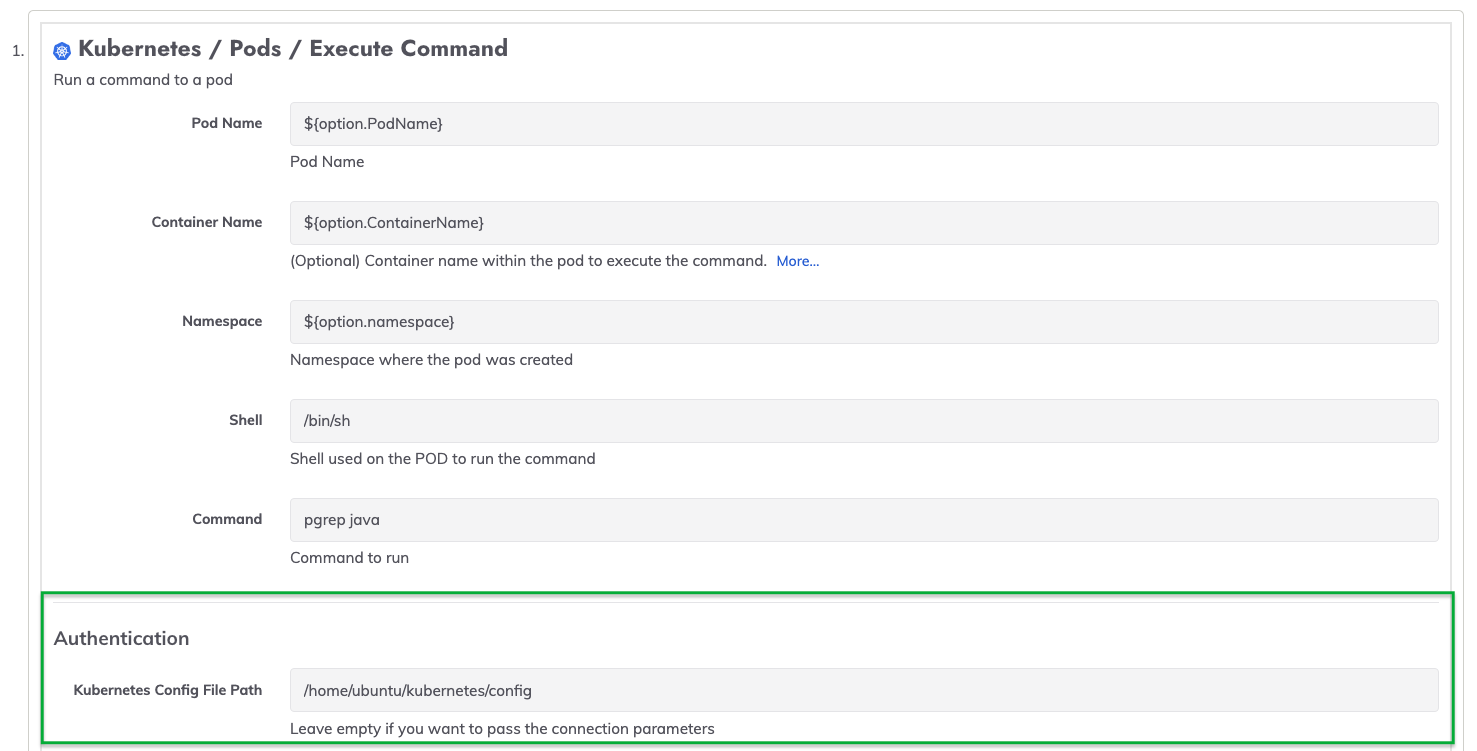
- Click on Step 1 and in the Authentication section, place the kubeconfig file path into the Kubernetes Config File Path field. Click Save for the specific job step:
- Repeat the prior step for Step 2.
If using an API Token for authentication is preferred over placing the KubeConfig on the Runbook Automation or Rundeck server, then place the token into the API Token field and also provide the Cluster URL.