
Azure Plugins
Azure Plugins
Overview
Runbook Automation integrates with Azure through a variety of plugins listed below. By integrating Runbook Automation with Azure, users can automate and provide self-service interfaces for operations of their infrastructure and applications. These integrations allow operations teams to provide self-service mechanisms to users throughout the business, as well as setup event-driven automation for workflows with Azure.
| Plugin Name | Plugin Type | Description |
|---|---|---|
| Azure Node Source | Node Source | Retrieve Azure virtual machines for Node Inventory. |
| Delete Azure VM | Node Step | Delete an virtual machine. |
| Start Azure VM | Node Step | Start (power on) an existing virtual machine. |
| Stop Azure VM | Node Step | Stop (power off) an existing virtual machine. |
| Restart Azure VM | Node Step | Restarts an existing virtual machine. |
| Capture VM Snapshot | Node Step | Capture a snapshot of an existing virtual machine. |
| Storage Copy | Workflow Step | Copy or get objects from Azure storage to/from Runbook Automation (Rundeck). |
| Storage Delete | Workflow Step | Delete blob storage from Azure storage container. |
| Storage List | Workflow Step | List blobs from Azure storage container. |
| Create Azure VM | Workflow Step | Create a new Azure virtual machine. |
| List Azure VMs | Workflow Step | List Azure virtual machines. |
| Start Azure VM | Workflow Step | Start (power on) an Azure virtual machines. |
| Stop Azure VM | Workflow Step | Stop (power off) an Azure virtual machines. |
| Azure Log Storage | Log Storage | Send execution log files to Azure Storage Account. |
| VM Health Check | Health Check | Check the status of Azure virtual machines. |
| Azure Active Directory SSO | Single Sign On | Use Azure Active Directory to authenticate users. |
Click to expand to see the full list of Runbook Automation plugins for Azure.
Setup
Create a New App Registration in Azure
Use the following steps to create and authorize an app in Azure to provide access to Runbook Automation plugins:
Tip
If you have already created an Azure AD application for Runbook Automation, skip to Existing App Registration.
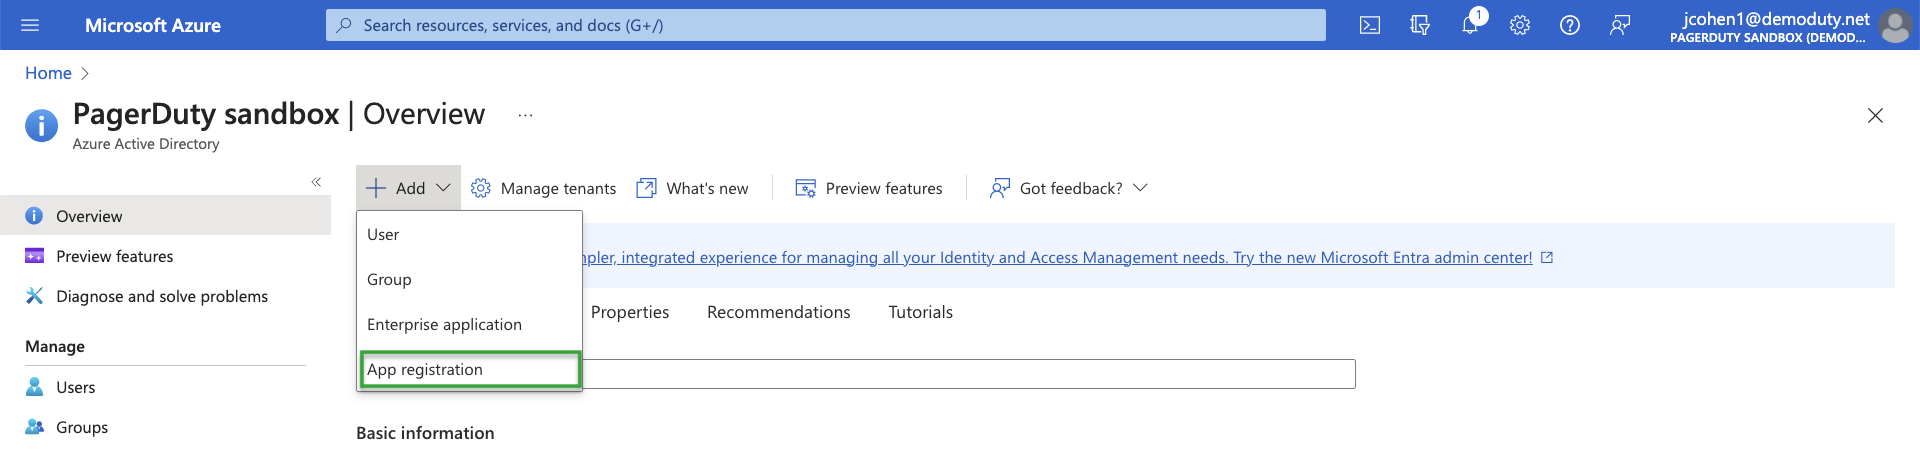
- Sign in to the Azure Portal
- Select Azure Active Directory
- Click the + Add dropdown and select App Registration
- On the Register an application page, provide a name for your application and then select Accounts in this organizational directory only.
- Click Register.
- On the Overview page, copy the Application (client) ID and the Directory (tenant) ID and save them to a secure location.
- Select Certificates & secrets and then select New client secret
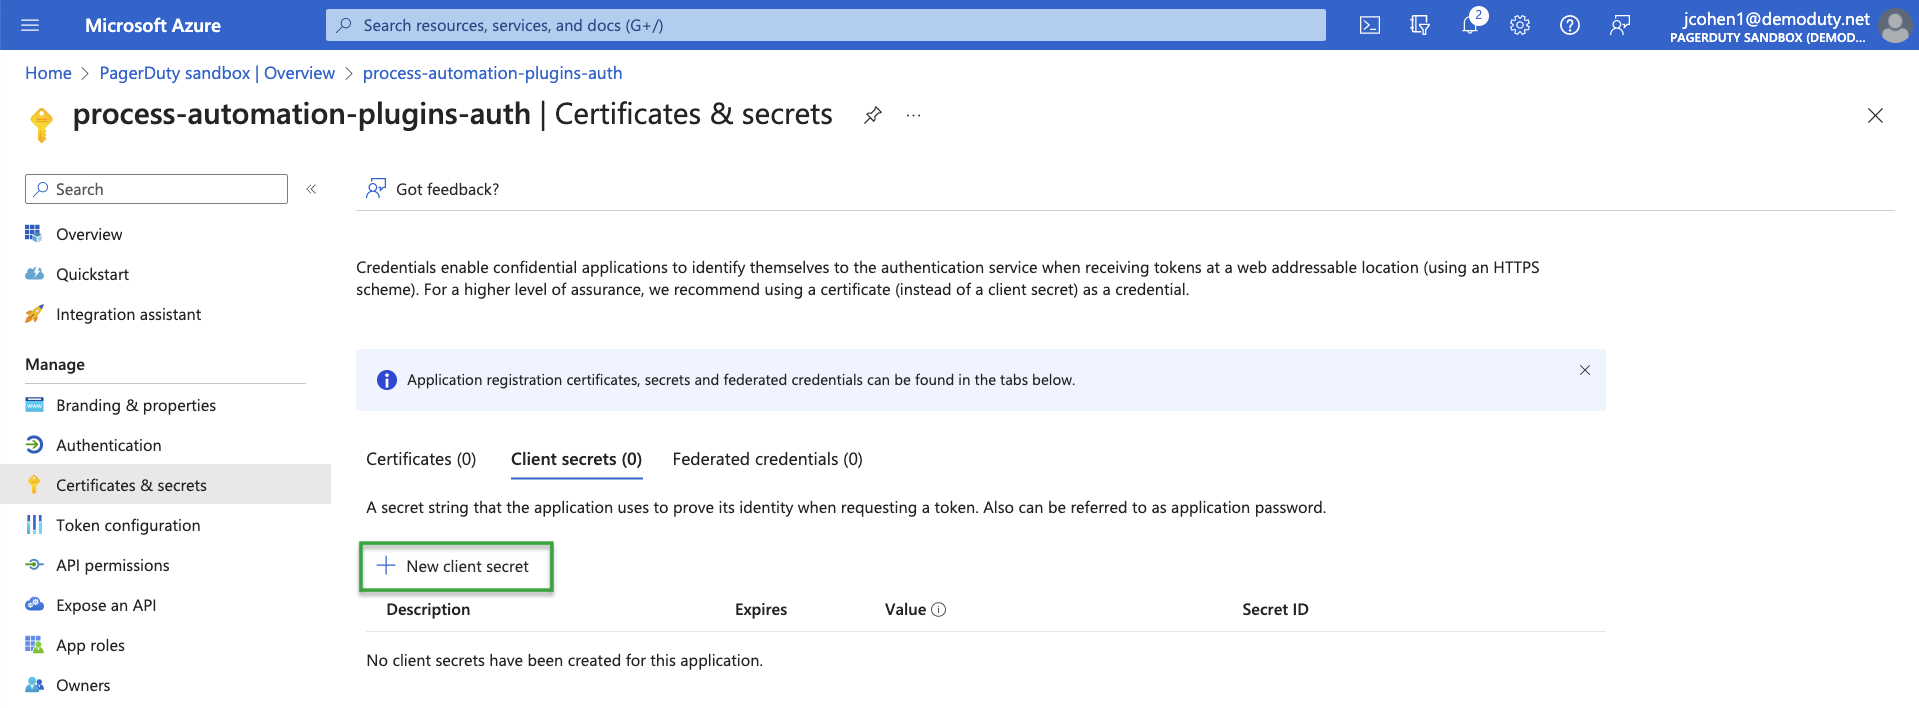
- On the Add a client secret panel, enter a Description and select an Expires value (in months).

- Click Add.
- Copy the Value and Secret ID from the Certificates & secrets page and save them to a secure location.
Heads Up!
Do not skip this step. These values will not be retrievable after you navigate away from this page. The Value is required when configuring the plugins in Runbook Automation.
- Navigate to Azure Services > Subscriptions and select the link for the Subscription name:
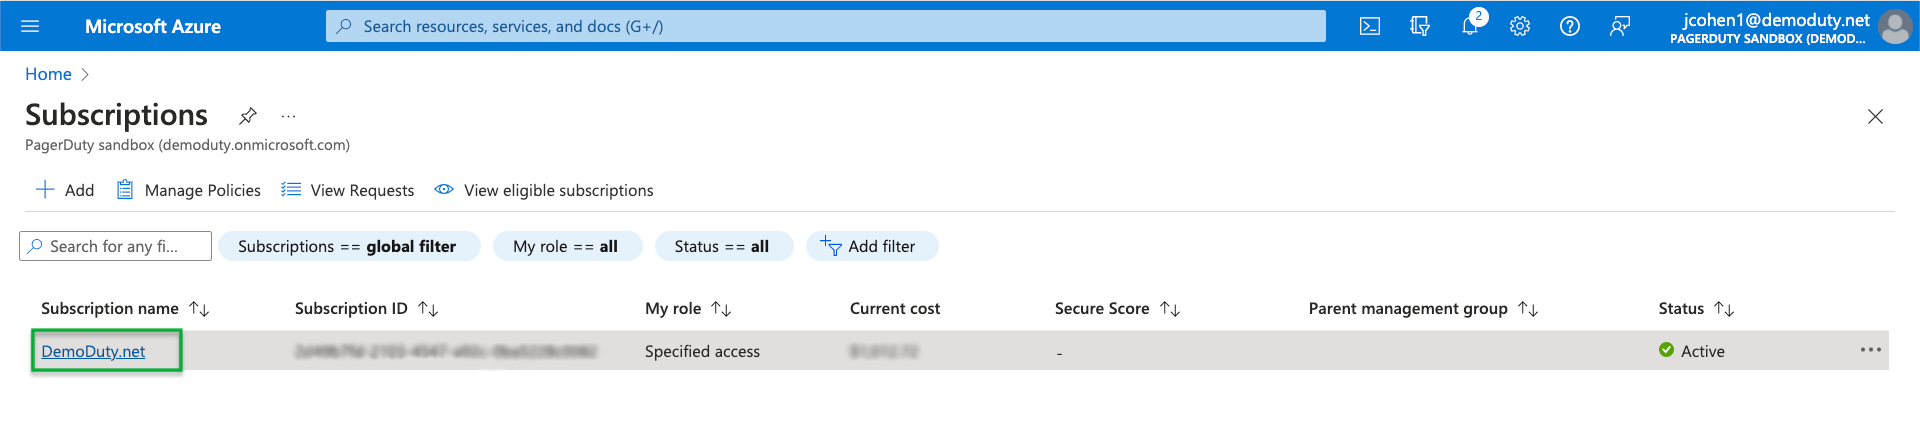
- On the Subscriptions page, copy the Subscription ID and save it to a secure location.
- Select Access control (IAM) and then select Add > Add role assignment:
- On the Add role assignment page, use the search field to find and select a Role. You must select at least a Reader role to continue.
- Select Next.
- On the Members tab, click Select members.
- On the Select members panel, search for and select the App Registration (member) that you added in Step 5.
- Review the information on the Members tab and then select Next.
- Review the information on the Review + assign tab and then select Review + assign.
Use Existing App Registration
Tenant ID: This is the ID for the trust relationship between the Azure subscription and Azure Active Directory.
- Sign in to the Azure portal.
- Select Azure Active Directory.
- Select Properties.
- Then, scroll down to the Tenant ID field. Your Tenant ID will be in the box.
Client ID: This is also referred to as the Application ID
- Select Azure Active Directory in the left sidebar.
- Click Enterprise Applications.
- Click All Applications.
- Select the application which you have created.
- Click Properties.
- Copy the Application ID .
Subscription ID:
- Select Subscriptions in the left sidebar.
- Select whichever subscription is needed.
- Click on Overview.
- Copy the Subscription ID.
Generating Azure Client Key
- Sign in to the Azure portal.
- Select Azure Active Directory in the left sidebar.
- Click App Registrations.
- Select the application which you have created.
- Click on Certificates and Secrets.
- Add a new Client Secret.
- Provide a memorable Key Description and choose an Expiration.
- Click Add.
- Copy and store the key value in a temporary location
Heads Up!
You won't be able to see this value again after you leave this page.
Configure Azure Plugin Suite in Runbook Automation
Authentication for the Azure plugins can be configured for the entire system or for an individual project. Credentials can be optionally be overwritten on a per-plugin basis, such as an individual Job Step.
Project Level Configuration
Use the following steps to configure authentication for the Azure plugins for a specific project:
- In the specific project, click on Project Settings in the lower left.
- Click on Edit Configuration then click on Plugins.
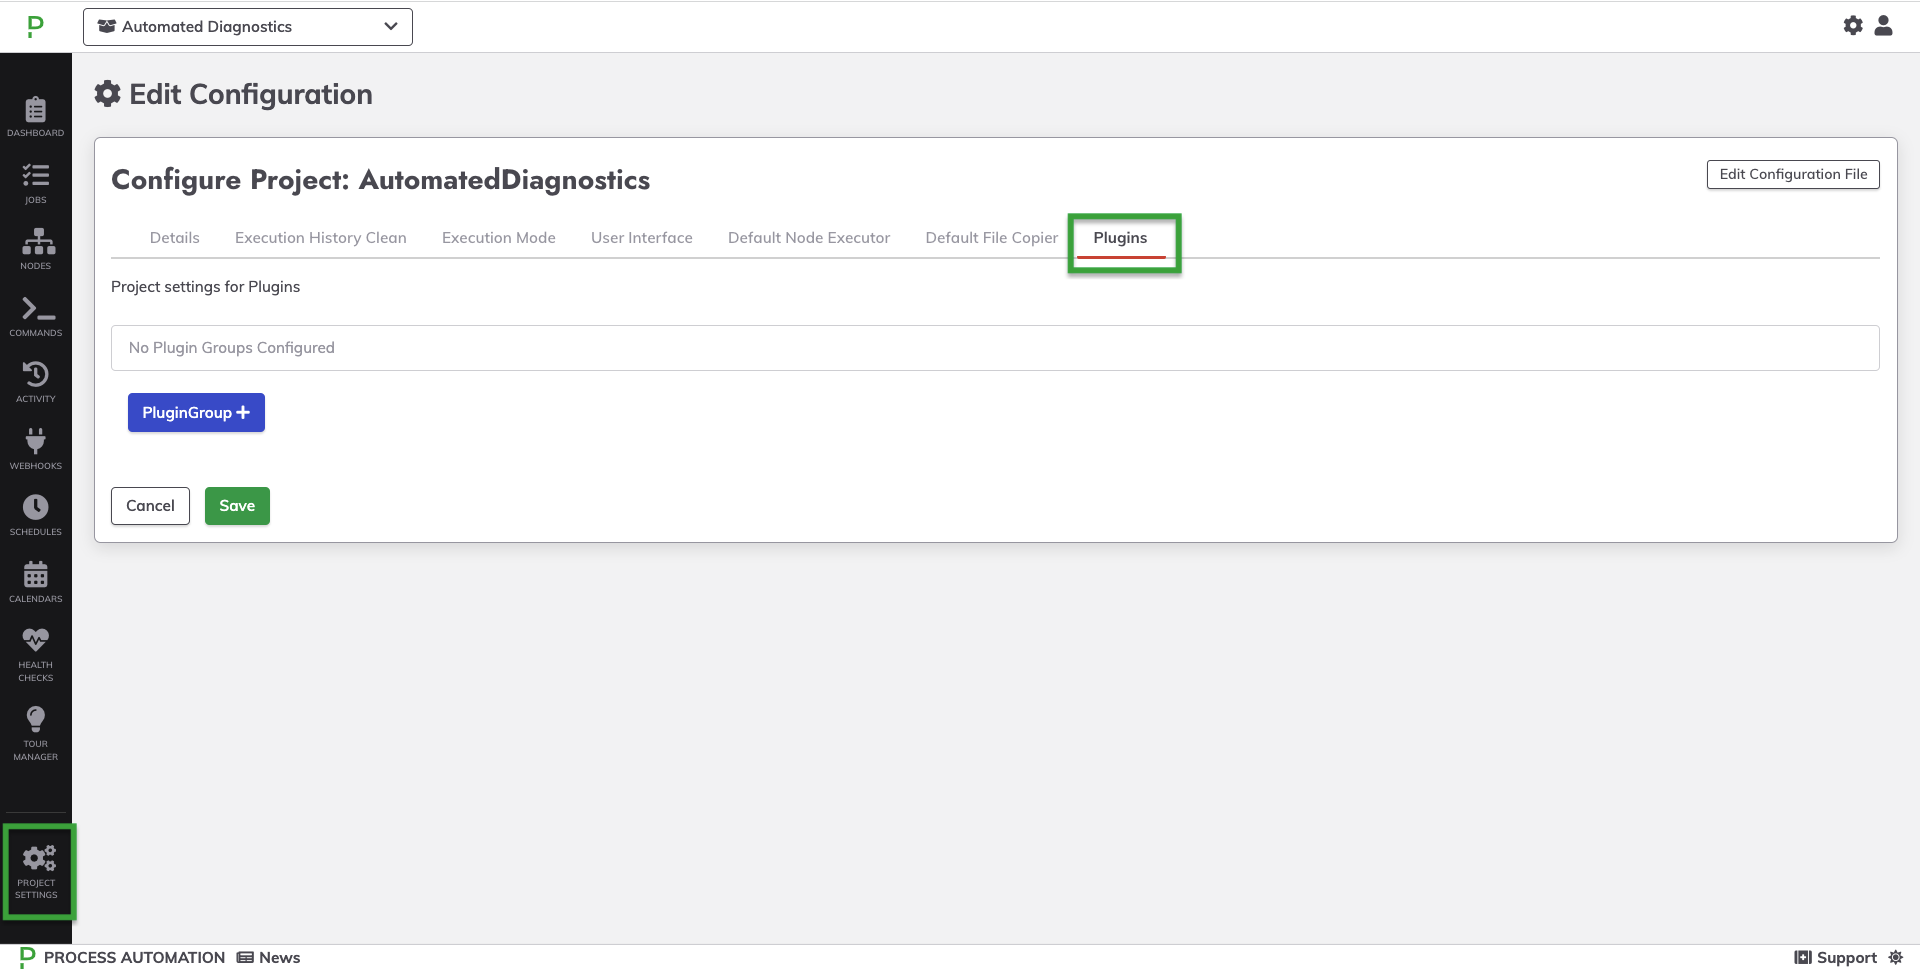
- Click on +PluginGroup.
- Select Azure from the list.
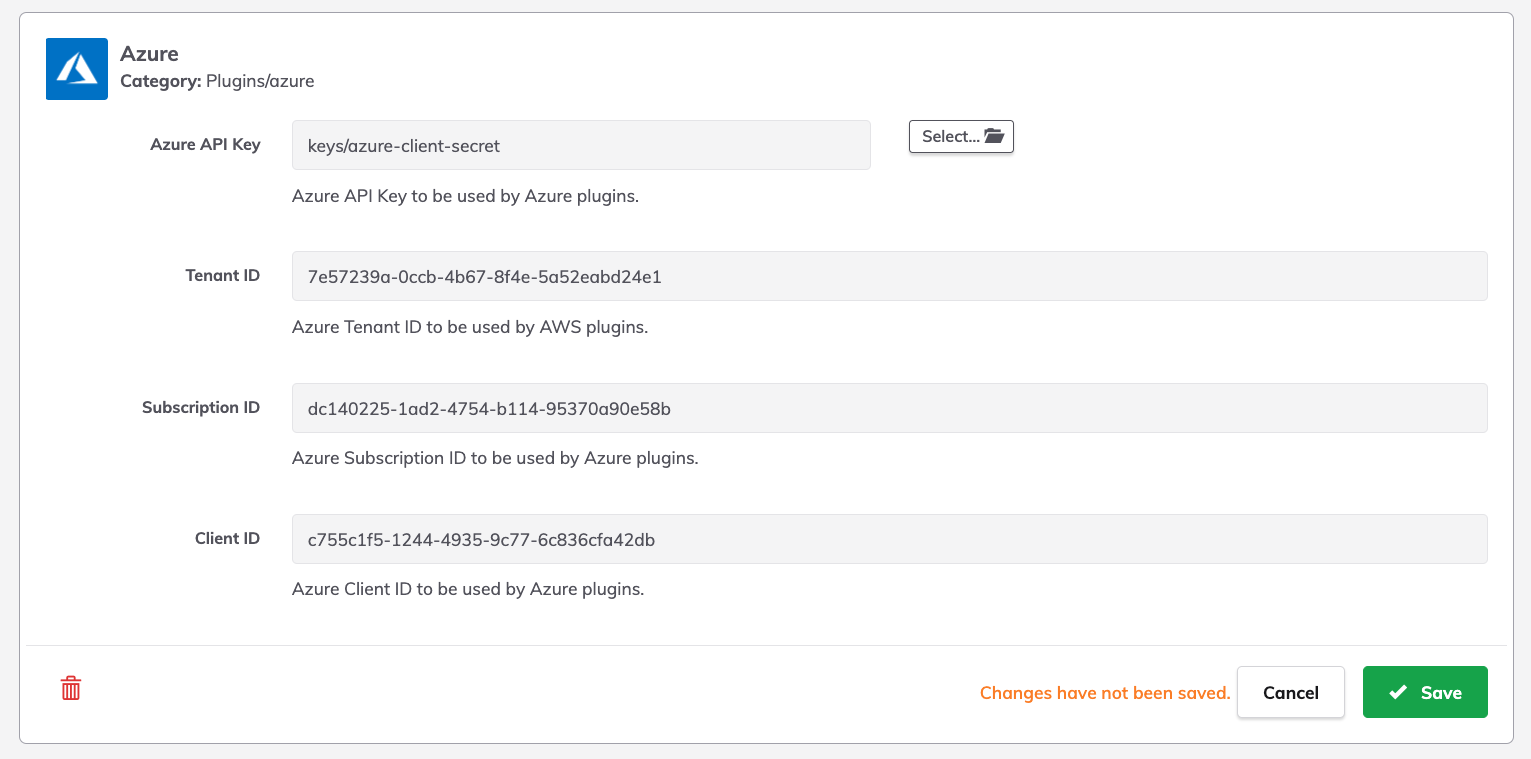
- Click Select next to the Azure API Key field.
- Click + Add or Upload a Keys
- For the Key Type dropdown, choose the Password option.
- Enter the Client Secret value from Step 10 above.
- Provide a Name for the secret and click Save.
- Click Save to now use the saved secret from Key Storage.
- Enter the Tenant ID, Subscription ID and Client ID from the prior sections into their associated fields:
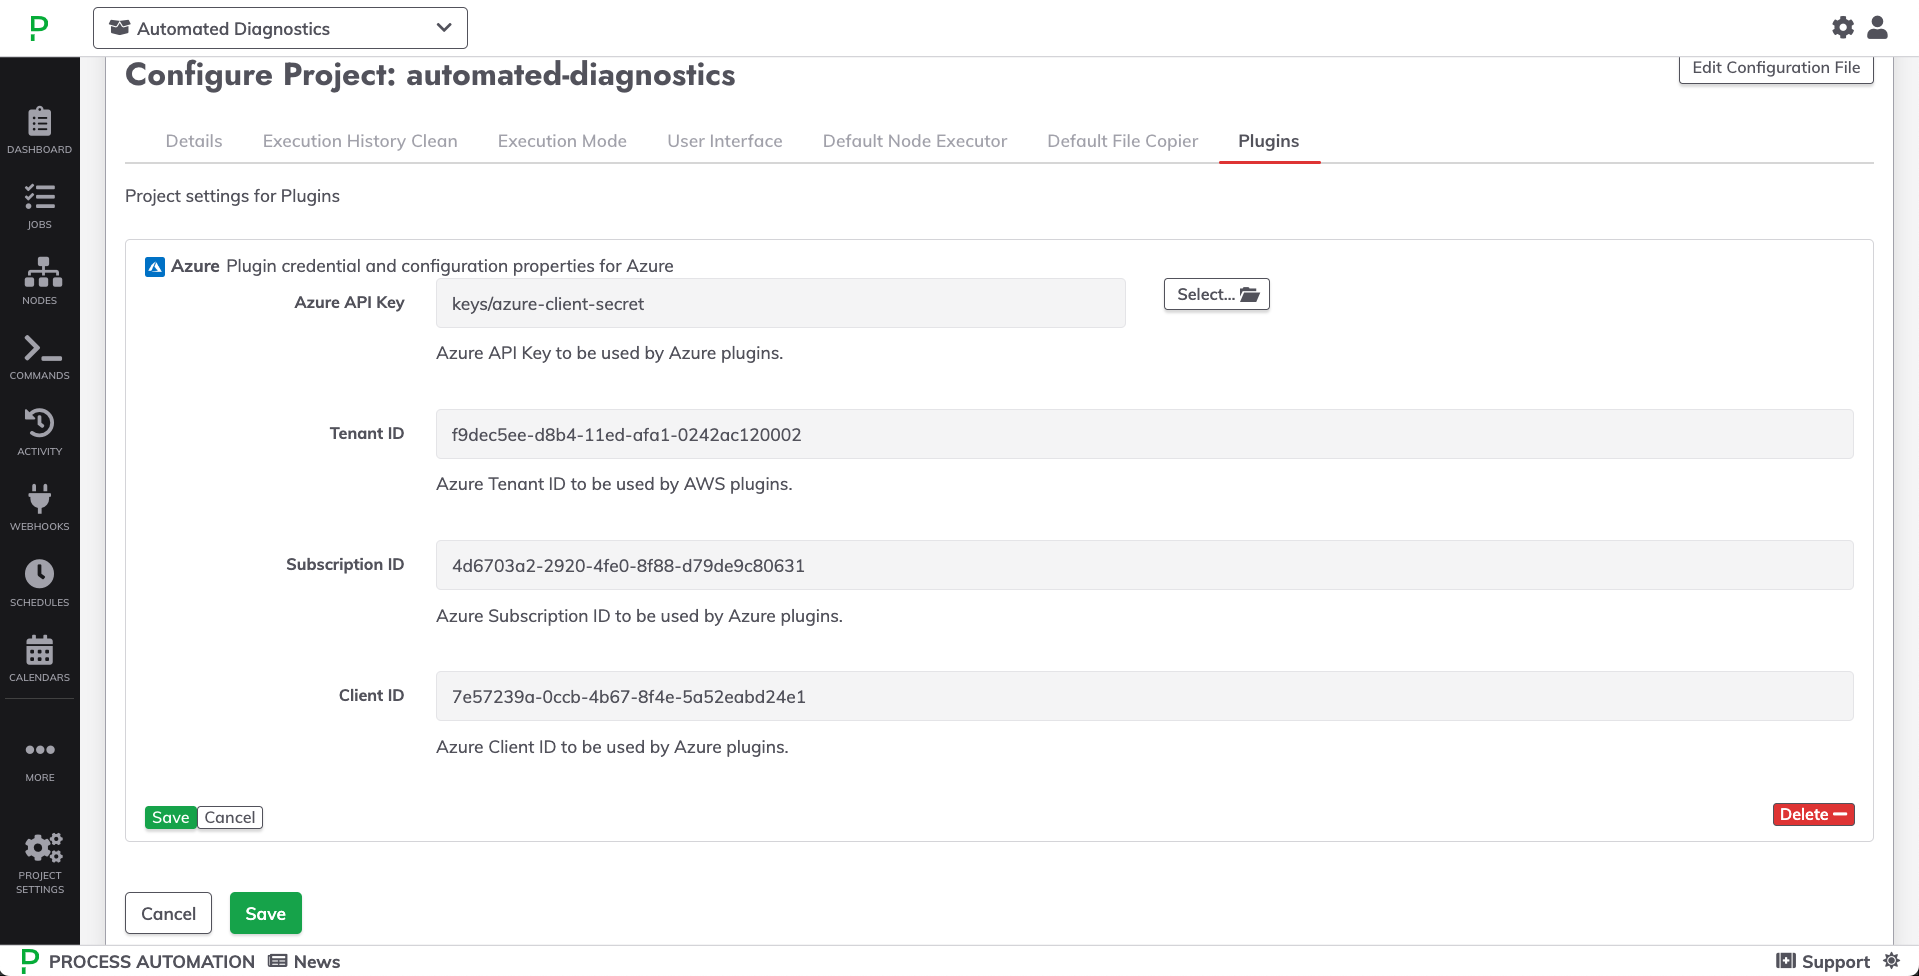
- Click Save for the plugin configuration.
- Click Save for the Project Settings.
System Level Configuration
Use the following steps to configure authentication for the Azure plugins for the whole Runbook Automation system.
- Click on the System Menu (gear icon) in the upper right.
- Click on System Configuration.
- Navigate to the Azure section and click on the Pencil Icon in the upper right:
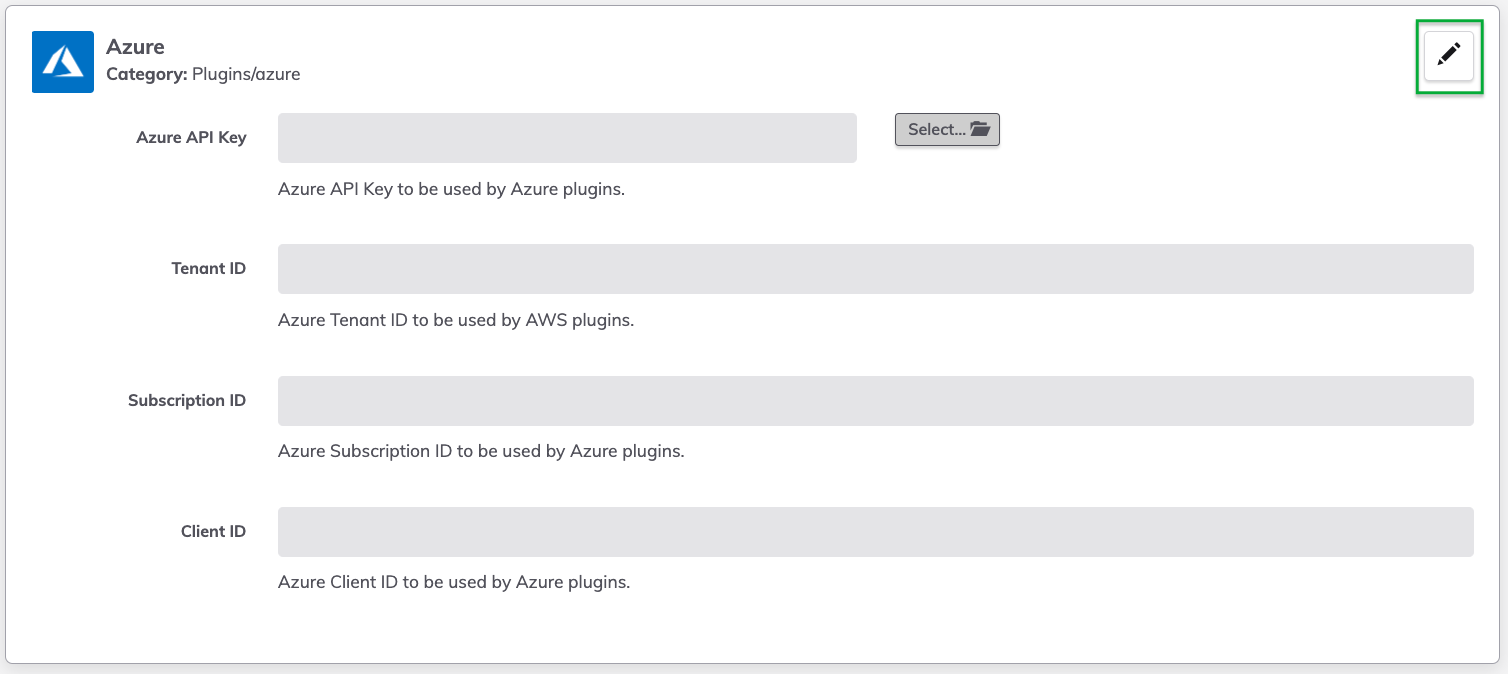
- Click Select next to the Azure API Key field.
- Click + Add or Upload a Keys
- For the Key Type dropdown, choose the Password option.
- Enter the Client Secret value from Step 10 above.
- Provide a Name for the secret and click Save.
- Click Save to now use the saved secret from Key Storage.
- Enter the Tenant ID, Subscription ID and Client ID from the prior sections into their associated fields:
- Click Save to commit these changes to the System Configuration.