
AWS Plugins
AWS Plugins
Overview
Runbook Automation integrates with Amazon Web Services (AWS) through a variety of plugins listed below. By integrating Runbook Automation with AWS, users can provide a centralized, self-service interface for both simple and complex tasks spanning multiple cloud environments.
Click to expand to see the full list of Runbook Automation plugins for AWS:
Setup
The steps for integrating with AWS will vary depending on the product you are using:
Runbook Automation - Integration steps for Runbook Automation (Cloud) product.
Runbook Automation on EC2 - For Runbook Automation hosted on EC2
Runbook Automation on ECS - For Runbook Automation hosted on ECS
Access Key & Secret Key - For Runbook Automation when Access Keys are permitted.
Warning
Using the Access Key and Secret Key method is the least recommended approach for integrating with AWS and is the least secure. The other methods of integration are highly recommended in place of using Access Key and Secret Key.
AWS Integration for Runbook Automation
Runbook Automation can be integrated with one or more AWS Accounts using an IAM role with a Trust Relationship. More details on this authentication mechanism can be found in this AWS documentation. Here is a diagram that outlines this setup process:
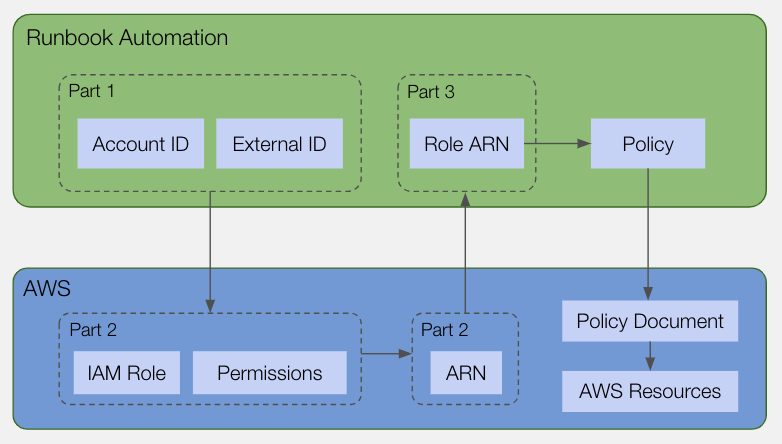
Steps for setting up the integration for the entire Runbook Automation instance or for individual projects are outlined below:
Part 1: In Runbook Automation:
To configure the AWS integration for the whole Runbook Automation instance:
- Click on the System Menu (gear icon) in the upper right.
- Click on System Configuration.
- Navigate to the AWS section and click on the Pencil Icon in the upper right.
- In the IAM Role Delegation section, copy the Account ID and External ID so that they may be used in subsequent steps:
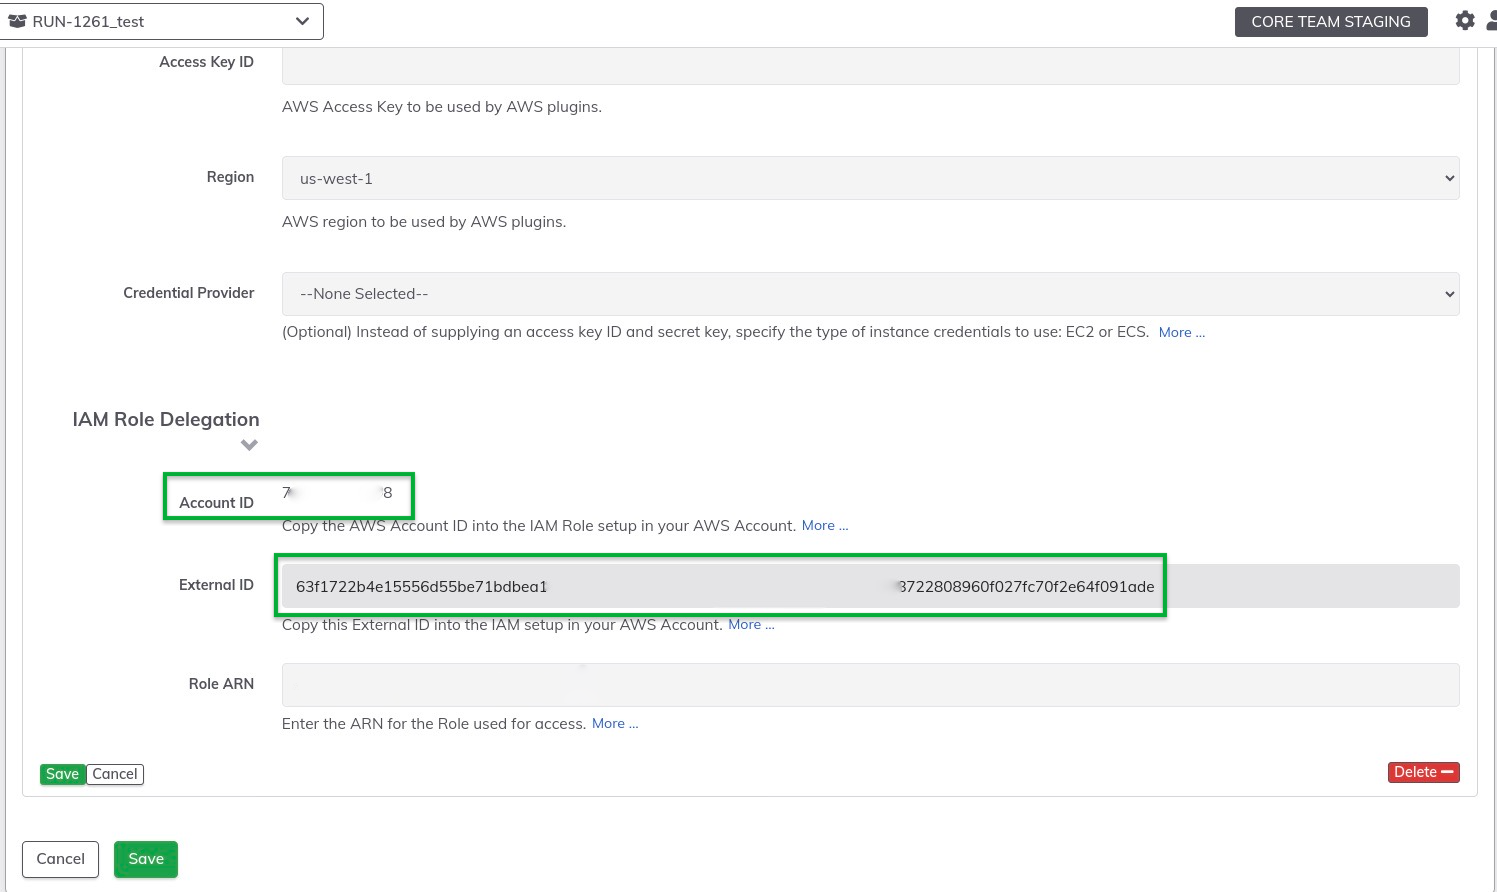
- Leave open this page so that the
Role ARNcan be filled in later.
To configure the AWS integration for an individual project:
- Navigate to Project Configuration within the specific project.
- Click on Edit Configuration then click on Plugins.
- Click on + Plugin Config and select AWS
- In the IAM Role Delegation section, copy the Account ID and External ID so that they may be used in subsequent steps.
- Leave open this page so that the
Role ARNcan be filled in later.
Part 2: In AWS Console:
- Go to the AWS Management Console and open the IAM console at https://console.aws.amazon.com/iam/.
- In the navigation pane of the console, click Roles and then click Create New Role.
- For the Trusted Entity Type select AWS Account and then select Another AWS Account.
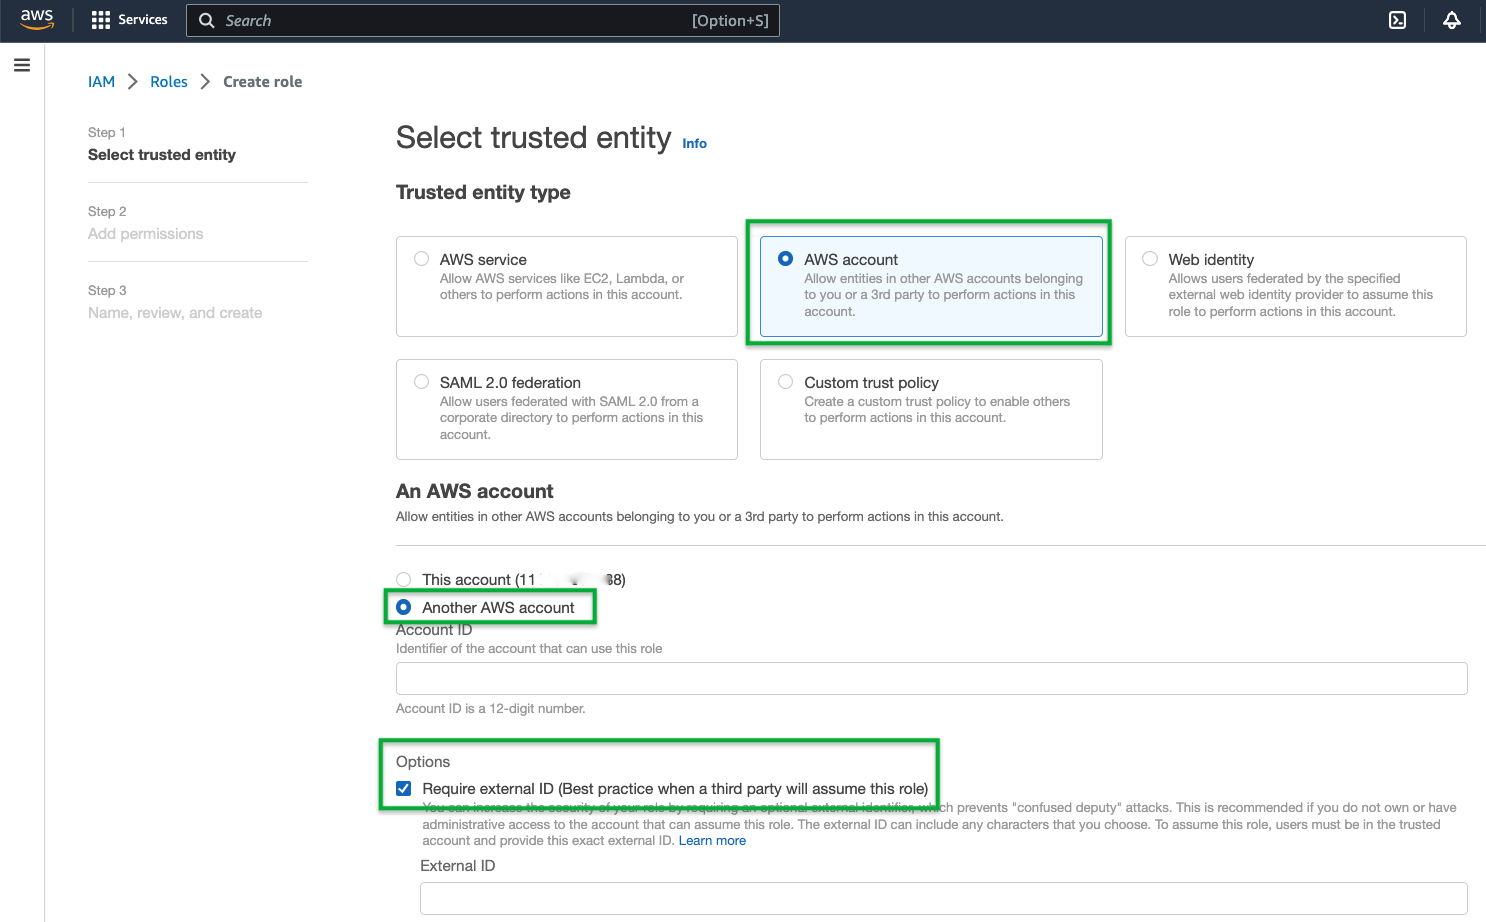
- Paste in the AWS Account ID that was copied from Step 4 in the prior section into the Account ID field.
- Click on Require External ID.
- Paste in the External ID that was copied from Step 4 in the prior section into the External ID field.
- Click Next
- Select the Permissions Policies to attach to the role.
Policy Selection
The selection should align with the specific automation use-case tasks for Runbook Automation. For example, if Runbook Automation will be used to retrieve and push data to S3, then be sure to include a policy that include the
s3:GetObjectands3:PutObjectpermissions. - Assign the Role Name and optionally add a description. Do not modify the
Select trusted entitiessection. - Click Create Role.
- In the IAM Roles list, find and select the newly created IAM Role.
- Copy the
ARNto be used in subsequent steps:
Part 3: In Runbook Automation:
- Paste the
ARNcopied from the prior section into theRole ARNfield. - Click Save to add this plugin configuration.
- Click Save to commit the configuration changes to the proejct.
The AWS authentication can be tested using the Validate Credentials Job step plugin. Otherwise, being using the rest of the AWS plugins that align with the permissions allocated to the IAM Role.
AWS Integration for Runbook Automation hosted on EC2
When self-hosting Runbook Automation on EC2, the recommended method for integrating with AWS is to assign an IAM role to the EC2 virtual-machines:
- Go to the AWS Management Console and open the IAM console at https://console.aws.amazon.com/iam/.
- In the navigation pane of the console, click Roles and then click Create New Role.
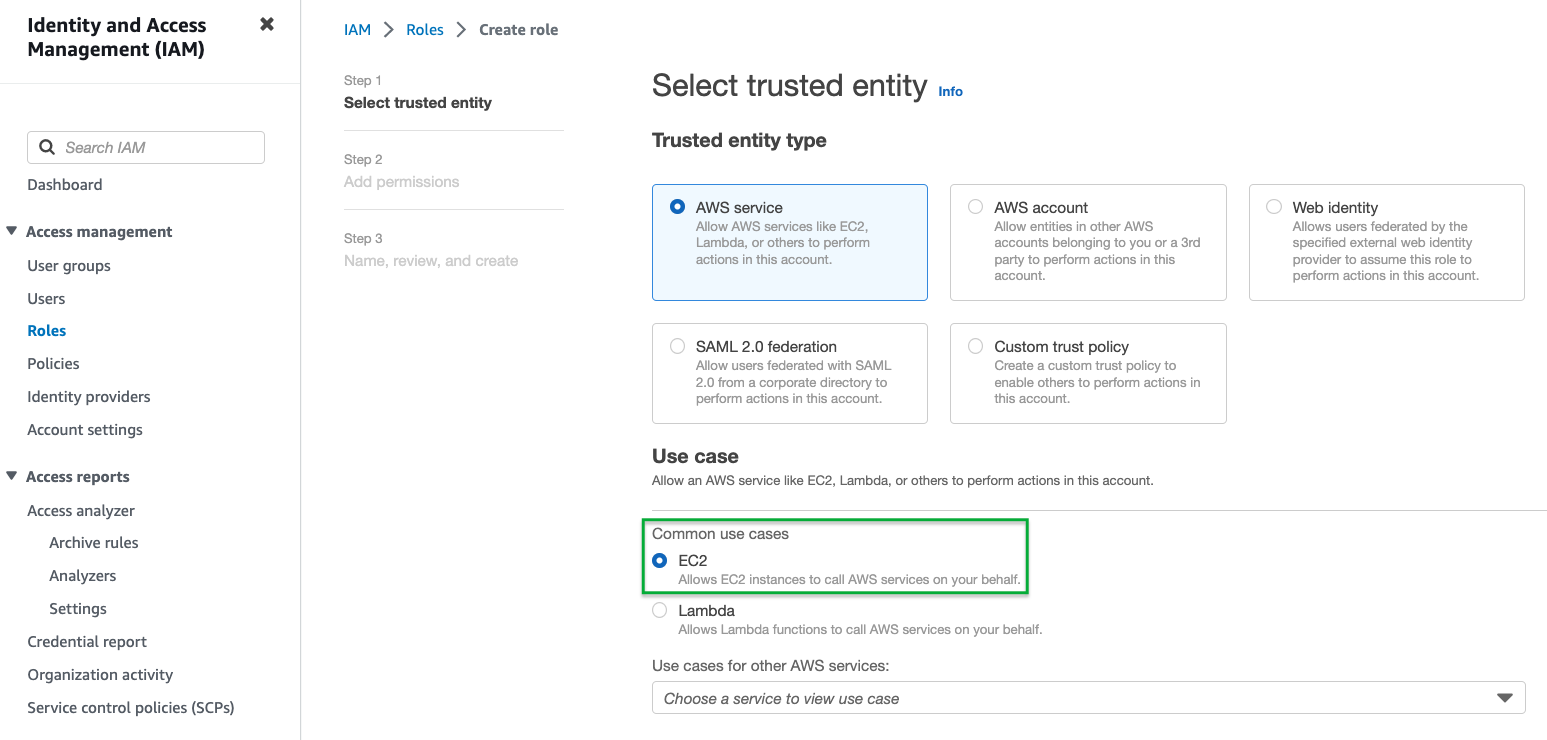
- For the Trusted Entity Type select AWS service.
- Under Common use cases select EC2 then click Next.
- In the Permissions policies, select the permission-sets based on the plugins you intend to use.
- For example, all of the CloudWatch Logs Plugins require
logs:StartQueryandlogs:GetQueryResultswhile the Execute Saved Query also requireslogs:DescribeQueryDefinitions.
Then click Next.
- For example, all of the CloudWatch Logs Plugins require
- Specify a Role Name and a Description. Do not change the Select trusted entities.
- Click Create Role.
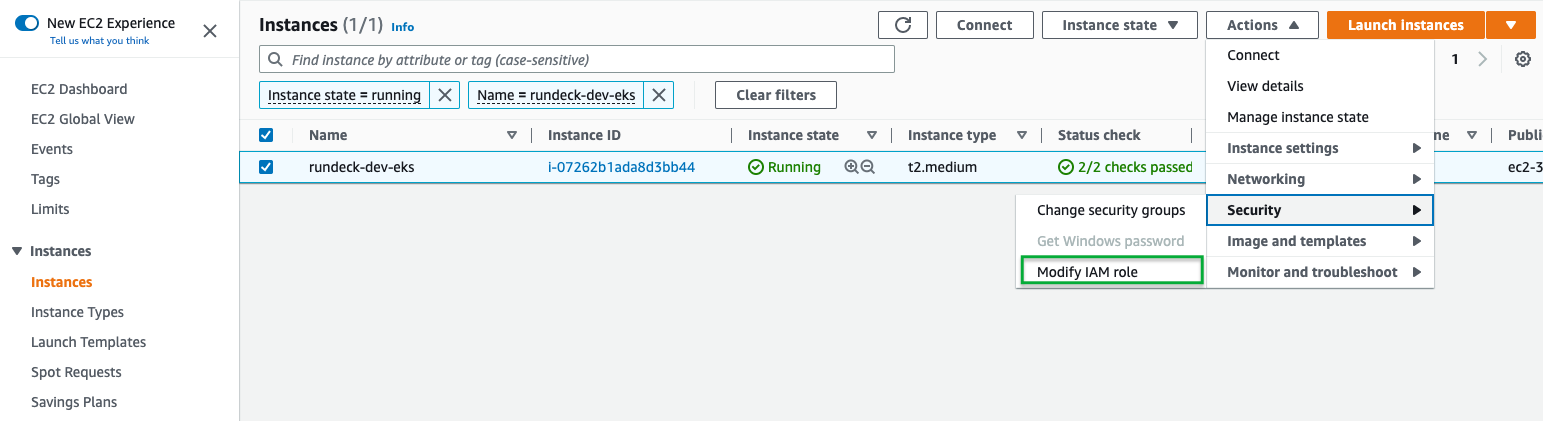
- Navigate to the EC2 console and click on Instances.
- Click on the EC2 (or multiple instances if running a clustered setup) and click on Actions -> Security -> Modify IAM Role:
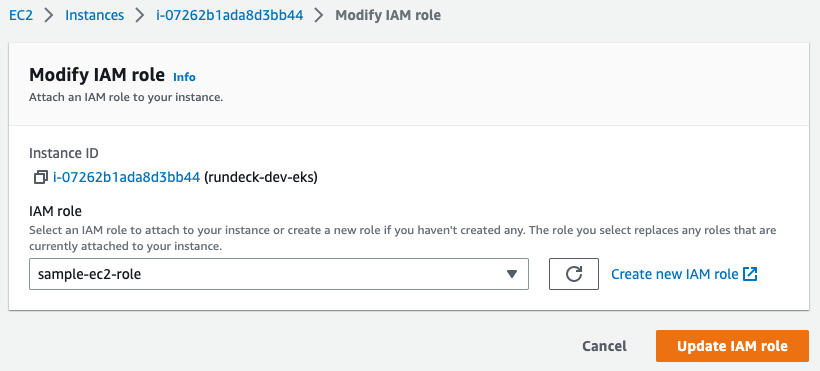
- Click on Choose IAM Role and find the IAM Role you created in Step 6 then click Update IAM Role:
Now that the IAM Role is attached to the EC2, use the following steps to define this authentication method in Runbook Automation:
System Level
- Click on the System Menu (gear icon) in the upper right.
- Click on System Configuration.
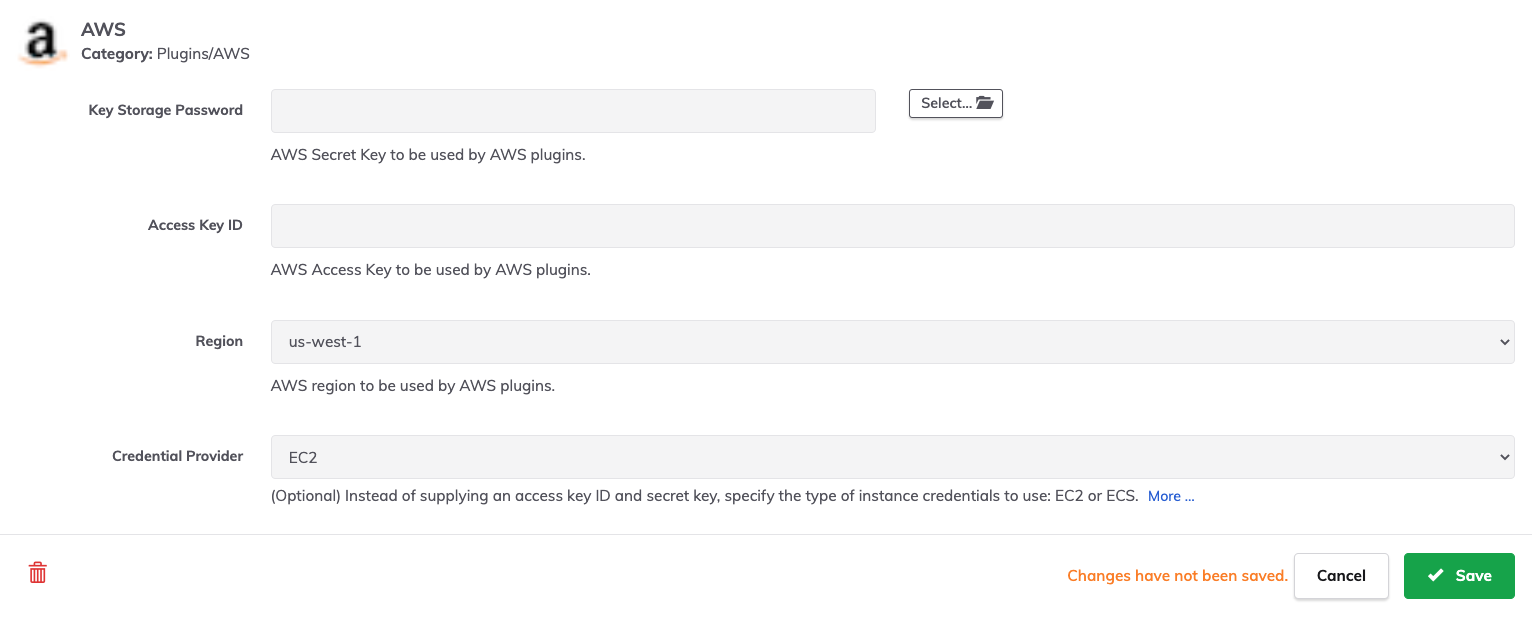
- Navigate to the AWS section and click on the Pencil Icon in the upper right.
- (Optional) Set a default Region to be used for all plugins.
- From the Credential Provider field dropdown, select EC2.
- Click Save in the lower right:
Project Level
- In the specific project, click on Project Settings in the lower left.
- Click on Edit Configuration then click on Plugins.
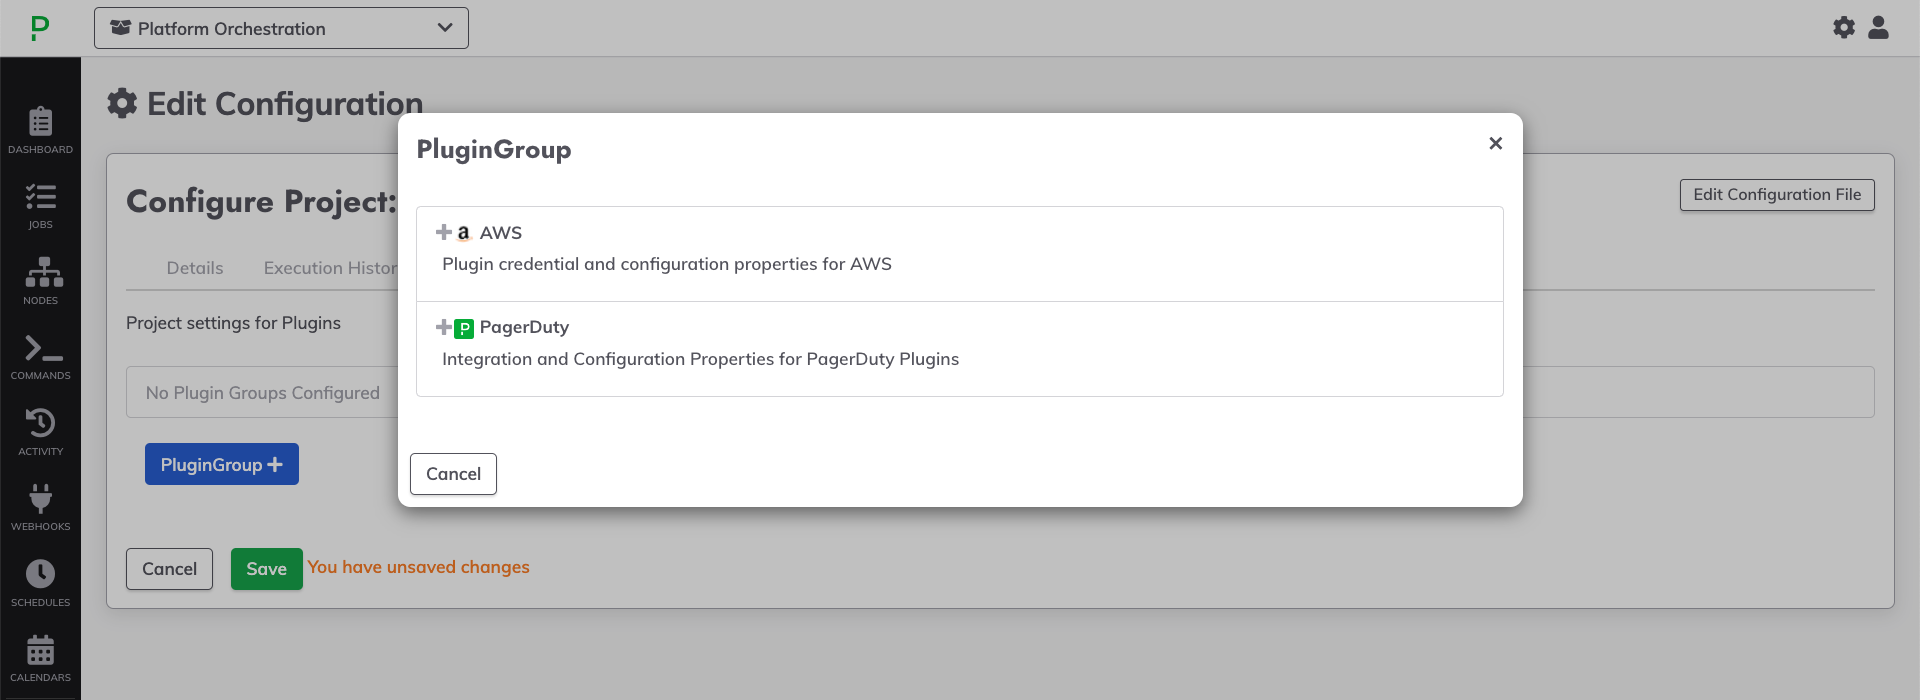
- Click on +PluginGroup.
- Select AWS from the list:
- (Optional) Select the default Region to be used for all plugins within this project.
- From the Credential Provider field dropdown, select EC2.
- Click Save in the lower right.
Runbook Automation hosted on ECS
When self-hosting Runbook Automation on ECS, the recommended method for integrating with AWS is to assign an IAM role to the ECS Task Role:
- Go to the AWS Management Console and open the IAM console at https://console.aws.amazon.com/iam/.
- In the navigation pane of the console, click Roles and then click Create New Role.
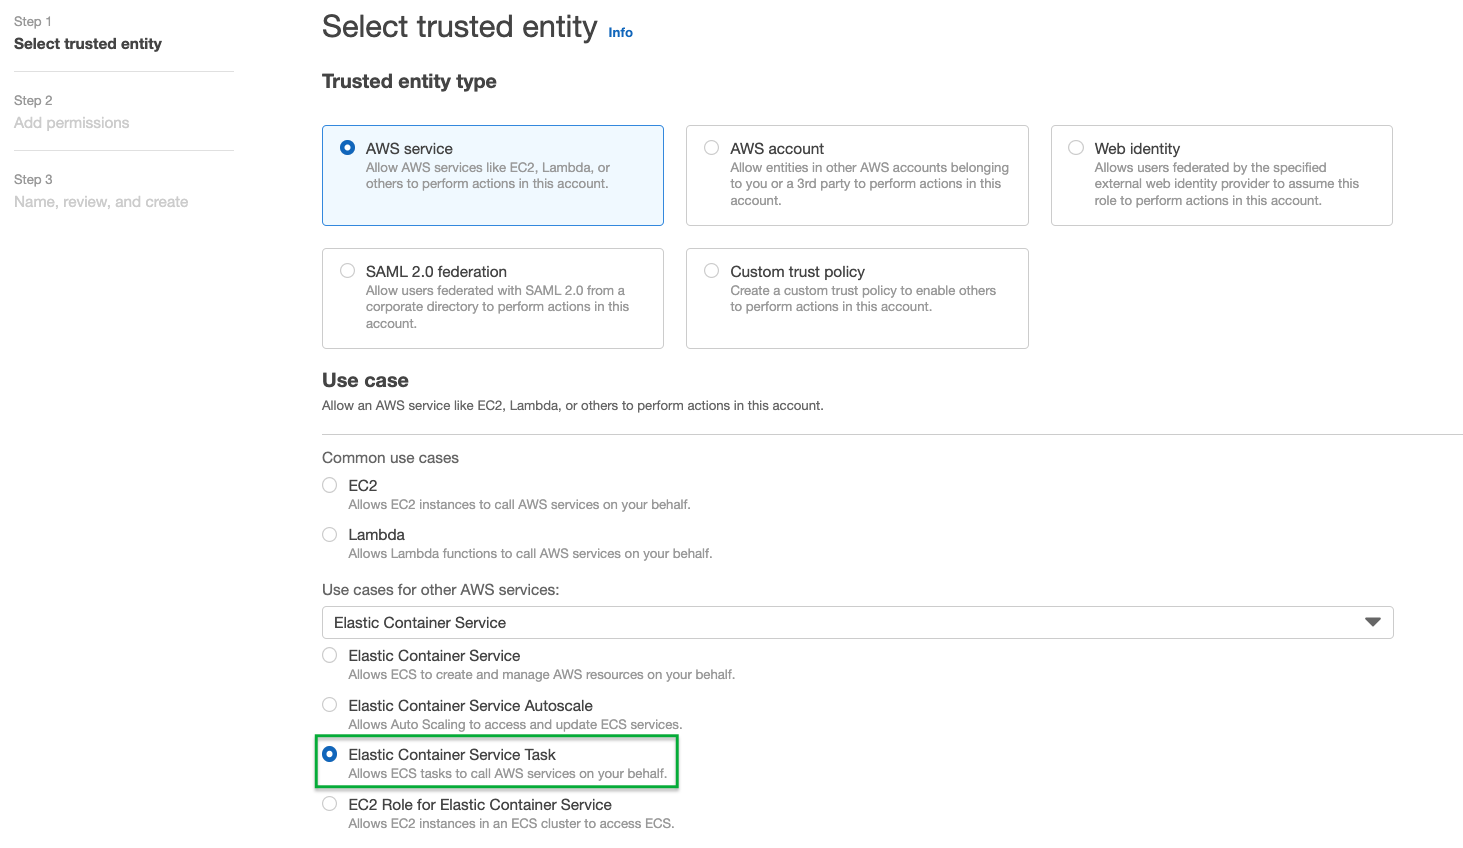
- For the Trusted Entity Type select AWS service.
- Under Common use cases find Elastic Container Task in the dropdown under User cases for other AWS services:
- In the Permissions policies, select the permission-sets based on the plugins you intend to use.
- For example, all of the CloudWatch Logs Plugins require
logs:StartQueryandlogs:GetQueryResultswhile the Execute Saved Query also requireslogs:DescribeQueryDefinitions.
Then click Next.
- For example, all of the CloudWatch Logs Plugins require
- Specify a Role Name and a Description. Do not change the Select trusted entities.
- Click Create Role.
- Navigate to the ECS console and click on Task Definitions.
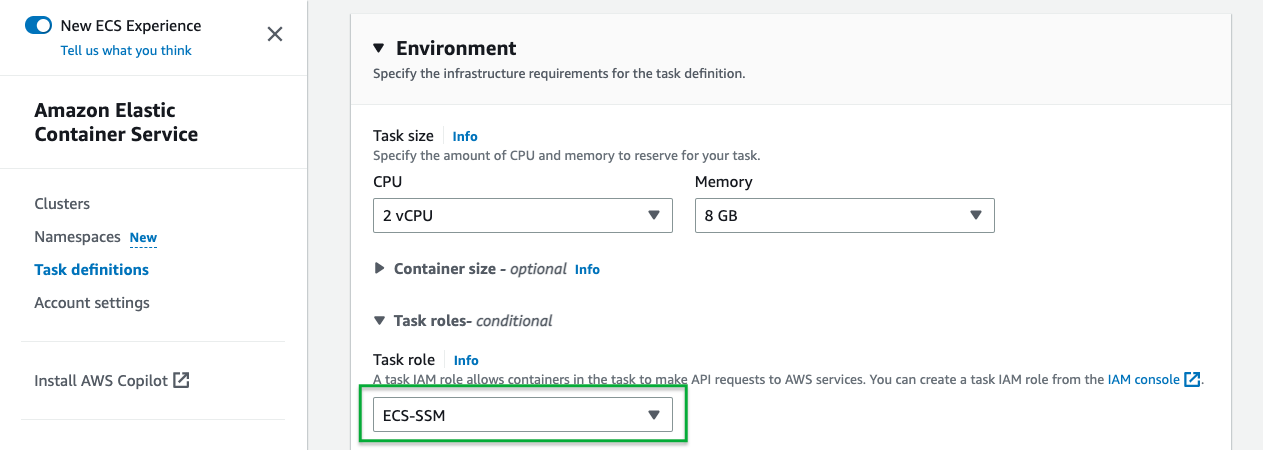
- Select the Task Definition used for Runbook Automation and Create new revision.
- Scroll down to the Environment section and select the role you created for the Task Role field:
Now that the IAM Role is attached to the ECS Task, use the following steps to define this authentication method in Runbook Automation:
System Level
- Click on the System Menu (gear icon) in the upper right.
- Click on System Configuration.
- Navigate to the AWS section and click on the Pencil Icon in the upper right.
- (Optional) Set a default Region to be used for all plugins.
- From the Credential Provider field dropdown, select ECS.
- Click Save in the lower right:
Project Level
- In the specific project, click on Project Settings in the lower left.
- Click on Edit Configuration then click on Plugins.
- Click on +PluginGroup.
- Select AWS from the list:
- (Optional) Select the default Region to be used for all plugins within this project.
- From the Credential Provider field dropdown, select ECS.
- Click Save in the lower right.
Alternative AWS Authentication: Access Key & Secret Key
- Create an AWS Access Key and Secret Key that is associated with an IAM Role, follow these instructions.
- Once the keys have been downloaded, add the Secret Key into Project or System Key Storage using the Password key type, following these instructions.
Tip
If using a third party credential-store, such as Hashicorp Vault, then skip step 2.
Now that the AWS Secret Key has been added to Key Storage, use the following steps to configure authentication for either the entire system or for a specific project:
System Level
- Click on the System Menu (gear icon) in the upper right.
- Click on System Configuration.
- Navigate to the AWS section and click on the Pencil Icon in the upper right.
- Click the Select button next to Key Storage Password and find the AWS Secret that was saved in step 2 above.
- Place your AWS Access Key into the Access Key ID field.
- (Optional) Set a default Region to be used for all plugins

- Click Save in the lower right.
Project Level
- In the specific project, click on Project Settings in the lower left.
- Click on Edit Configuration then click on Plugins.
- Click on +PluginGroup.
- Select AWS from the list:
- Click the Select button next to Key Storage Password and find the AWS Secret that was saved in step 2 above.
- Place your AWS Access Key into the Access Key ID field.
- (Optional) Select the default Region to be used for all plugins within this project.
- Click Save in the lower right.