
Google Cloud Platform Plugins
Google Cloud Platform Plugins
Available in PagerDuty Runbook Automation Commercial products.
Overview
Runbook Automation integrates with Google Cloud through a variety of plugins listed below. By integrating Runbook Automation with Google Cloud, users can automate and provide self-service interfaces for operations of their infrastructure and applications. These integrations allow operations teams to provide self-service mechanisms to users throughout the business, as well as setup event-driven automation for workflows with Google Cloud.
| Plugin Name | Plugin Type | Description |
|---|---|---|
| Start VM | Workflow Step | Start a Google Compute instance. |
| Stop VM | Workflow Step | Stop a Google Compute instance. |
| Restart VM | Workflow Step | Restart a Google Compute instance. |
| Delete VM | Workflow Step | Delete a Google Compute instance. |
| Restart SQL Instance | Workflow Step | Restart a Google Cloud SQL instance. |
| Capture VM Snapshot | Workflow Step | Capture a snapshot of a Google Compute instance. |
| Update Autoscaling Policy | Workflow Step | Update an autoscaling policy of Google Compute instances. |
| Enable VPC Network Peering | Workflow Step | Enable VPC connections between networks using VPC peering. |
| Create Resource | Workflow Step | Create a new Google Compute instance. |
| Configure VPC Log | Workflow Step | Enable flow logs for GCP Compute instance. |
| Compute VM Node Source | Node Source | Retrieve Google Compute instances and populate them into the Node Inventory. |
| Compute VM Health Check | Health Check | Provide health status on Compute instance based on whether the instance is running. |
| Start VM | Node Step | Start a Google Compute instance. |
| Stop VM | Node Step | Stop a Google Compute instance. |
| Restart VM | Node Step | Restart a Google Compute instance. |
| Delete VM | Node Step | Delete a Google Compute instance. |
Click to expand to see the full list of Runbook Automation plugins for Google Cloud.
Setup
GCP Service Account Keys
This section outlines how to retrieve the Service Account keys from Google Cloud. The background for these steps is covered in detail on Google's support site here: Creating and Managing Service Account Keys.
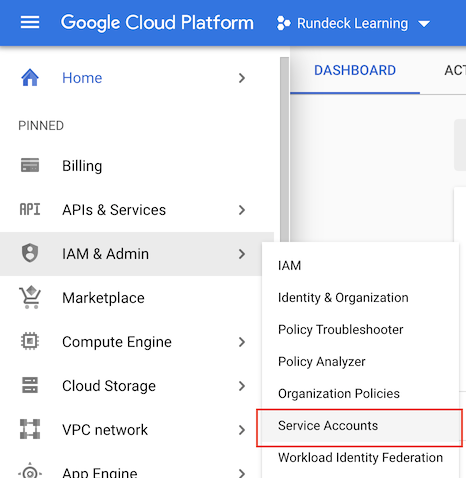
- Login to your Google Cloud Console at https://console.cloud.google.com
- Navigate to IAM & Admin > Service Accounts
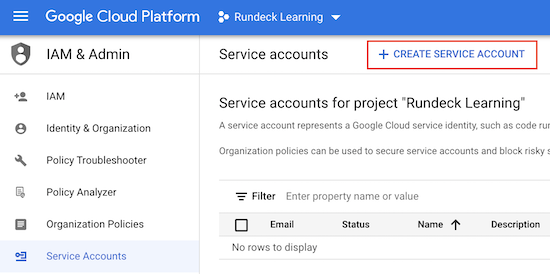
- Click the Create Service Account button to start the wizard
- Assign the account a Name and ID.
- When selecting Roles ensure the role(s) provide enough access to Runbook Automation to perform the desired tasks.
- Click Done
- Click on the newly created account and navigate to the Keys tab.
- Click Add Key > Create new key
- Choose JSON for Key Type and click Create
- Save the JSON file somewhere safe where it can be used in a future step.
Project ID
While in the Google Cloud Console, click on the project list in the upper left, next to Google Cloud: 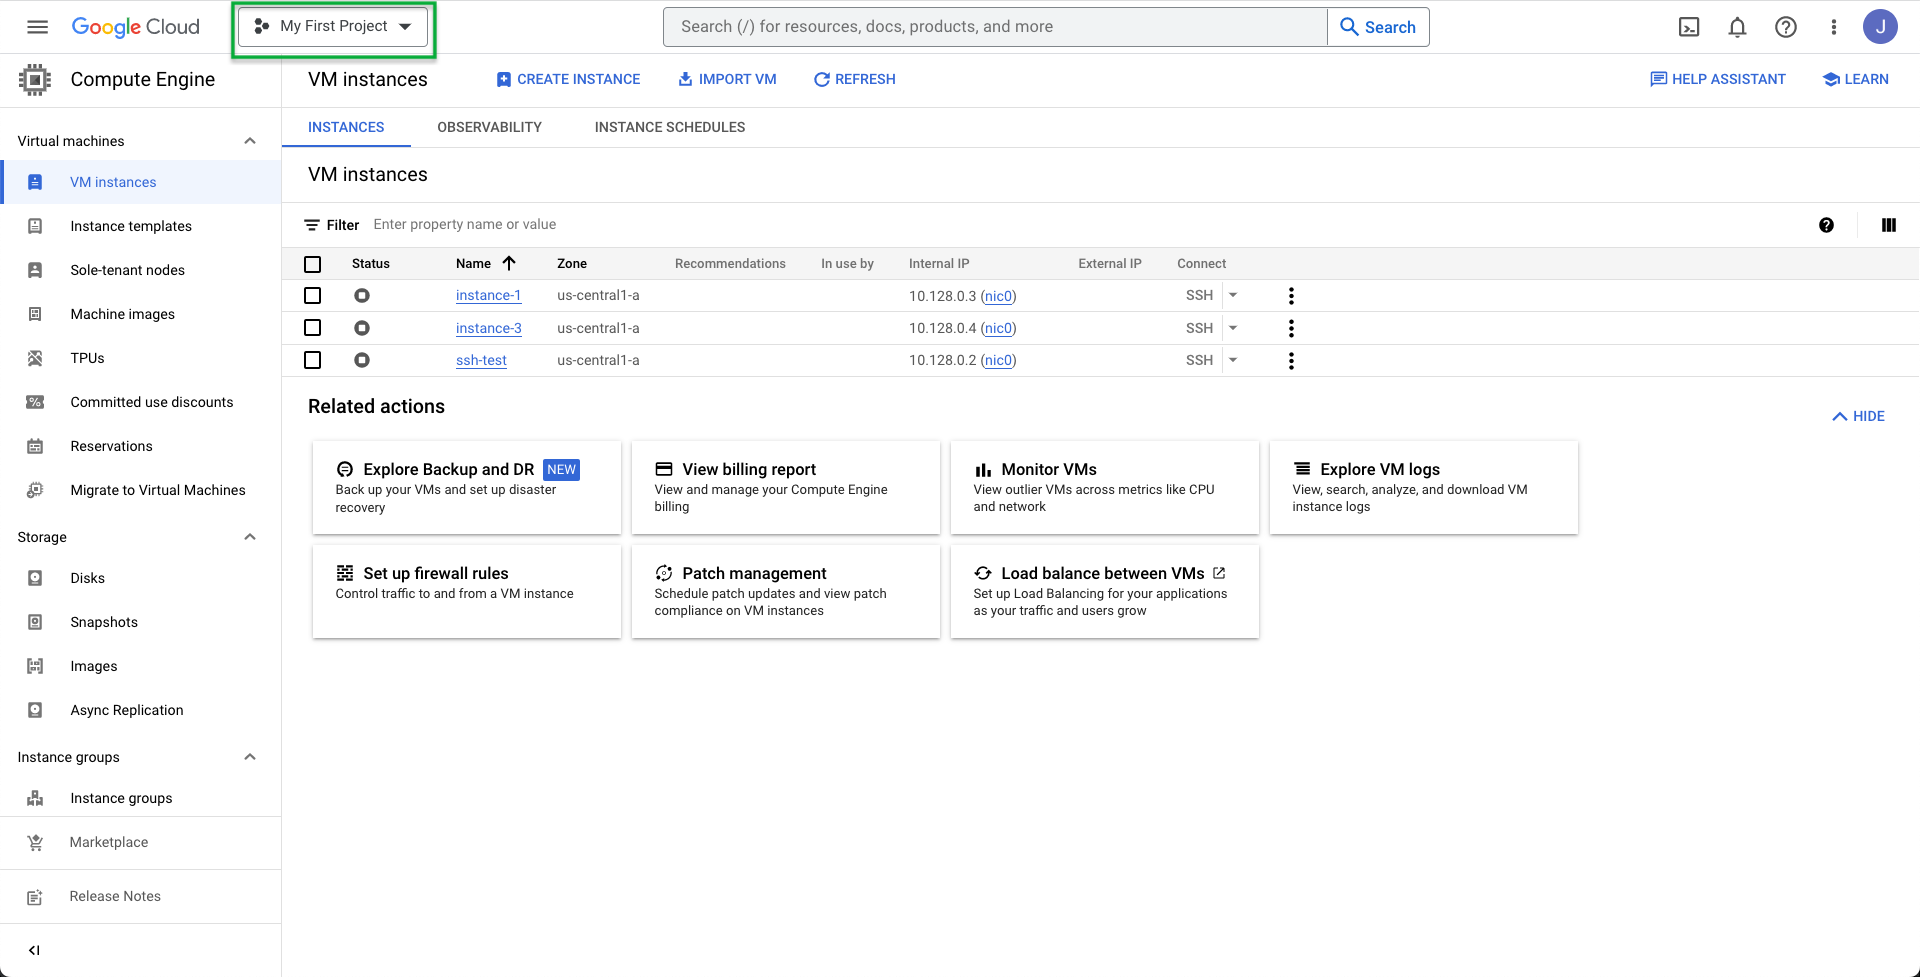
From the popup, copy the Project ID from the ID column: 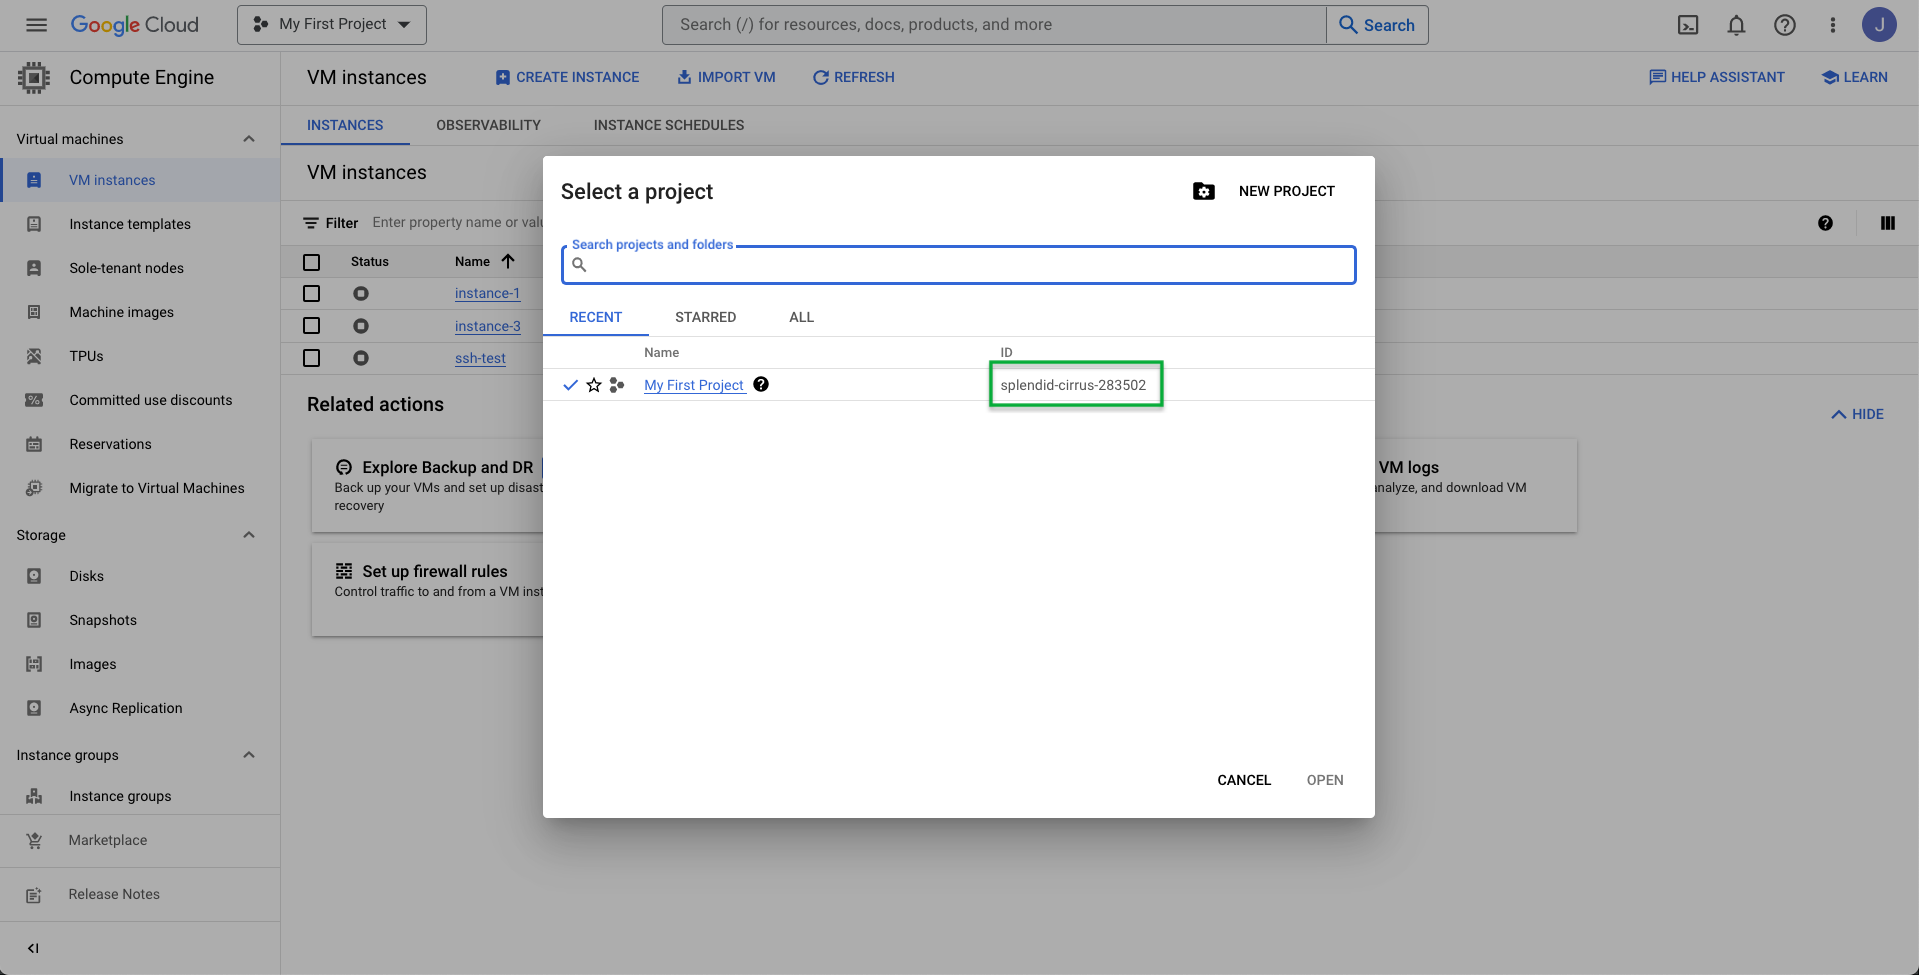
Configure Google Cloud Plugin Suite in Runbook Automation
Authentication for the Google Cloud plugins can be configured for the entire system or for an individual project. Credentials can be optionally be overwritten on a per-plugin basis, such as an individual Job Step.
Project Level Configuration
Use the following steps to configure authentication for the Google Cloud plugins for a specific project:
- In the specific project, click on Project Settings in the lower left.
- Click on Edit Configuration then click on Plugins.
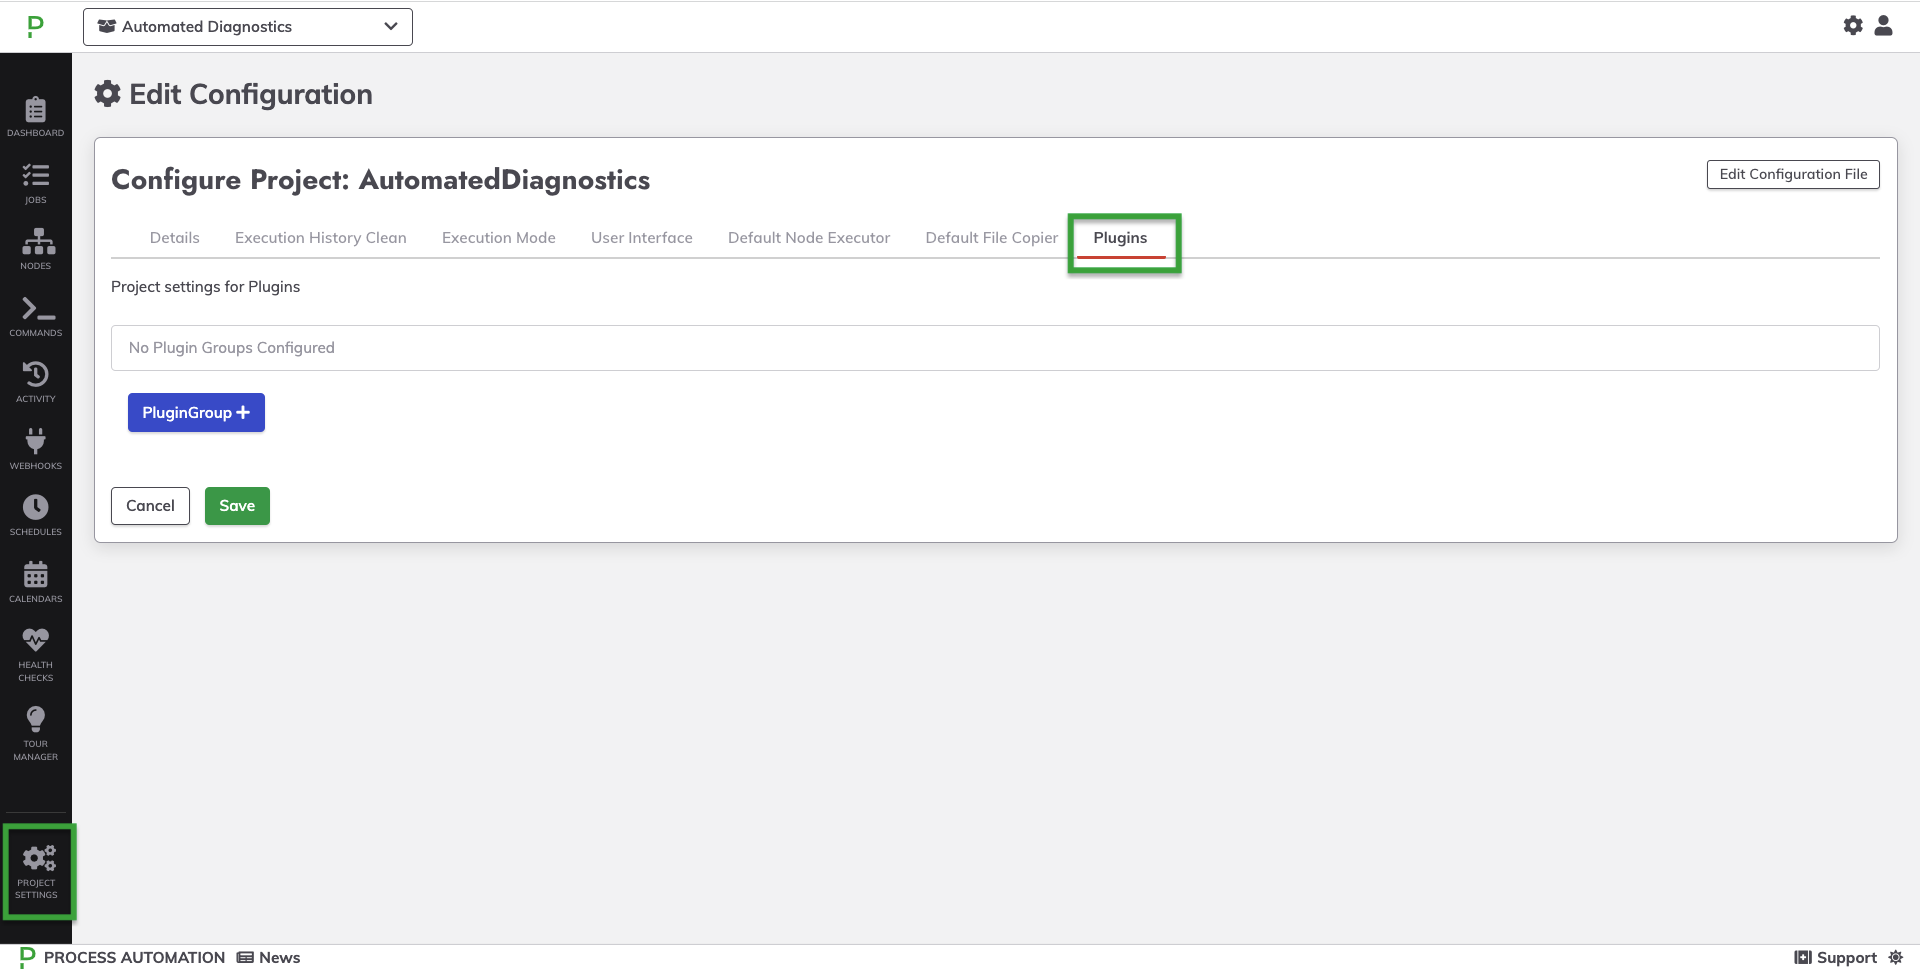
- Click on +PluginGroup.
- Select GCP from the list.
- Click Select next to the Key File field.
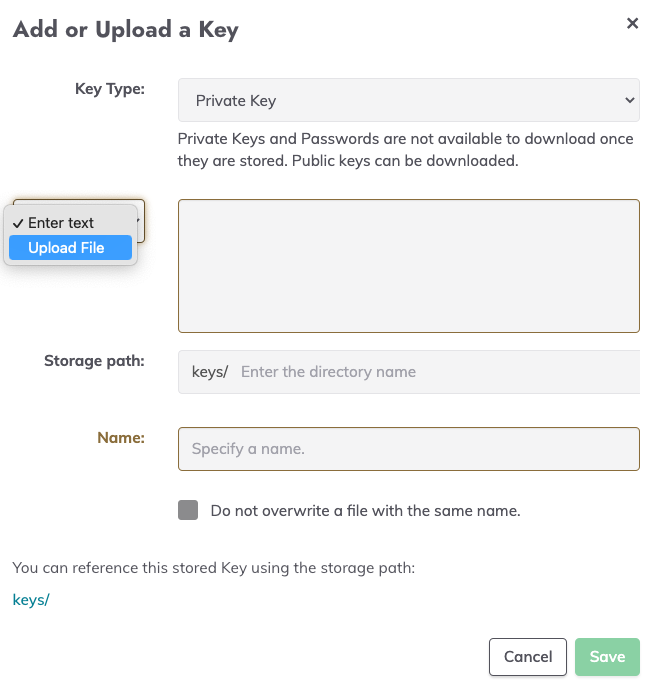
- Click + Add or Upload a Key
- For the Key Type dropdown, choose the Private Key option.
- Click the Enter text dropdown and choose the Upload file option:
- Click on Choose File and select the
.jsonfile saved from the prior section. - Click Save to add this secret to Key Storage.
- Click Save to now use the saved secret from Key Storage.
- Enter the Project ID captured from the prior section into the Project ID field.
- Select the Zone to set the default zone used by the plugins.
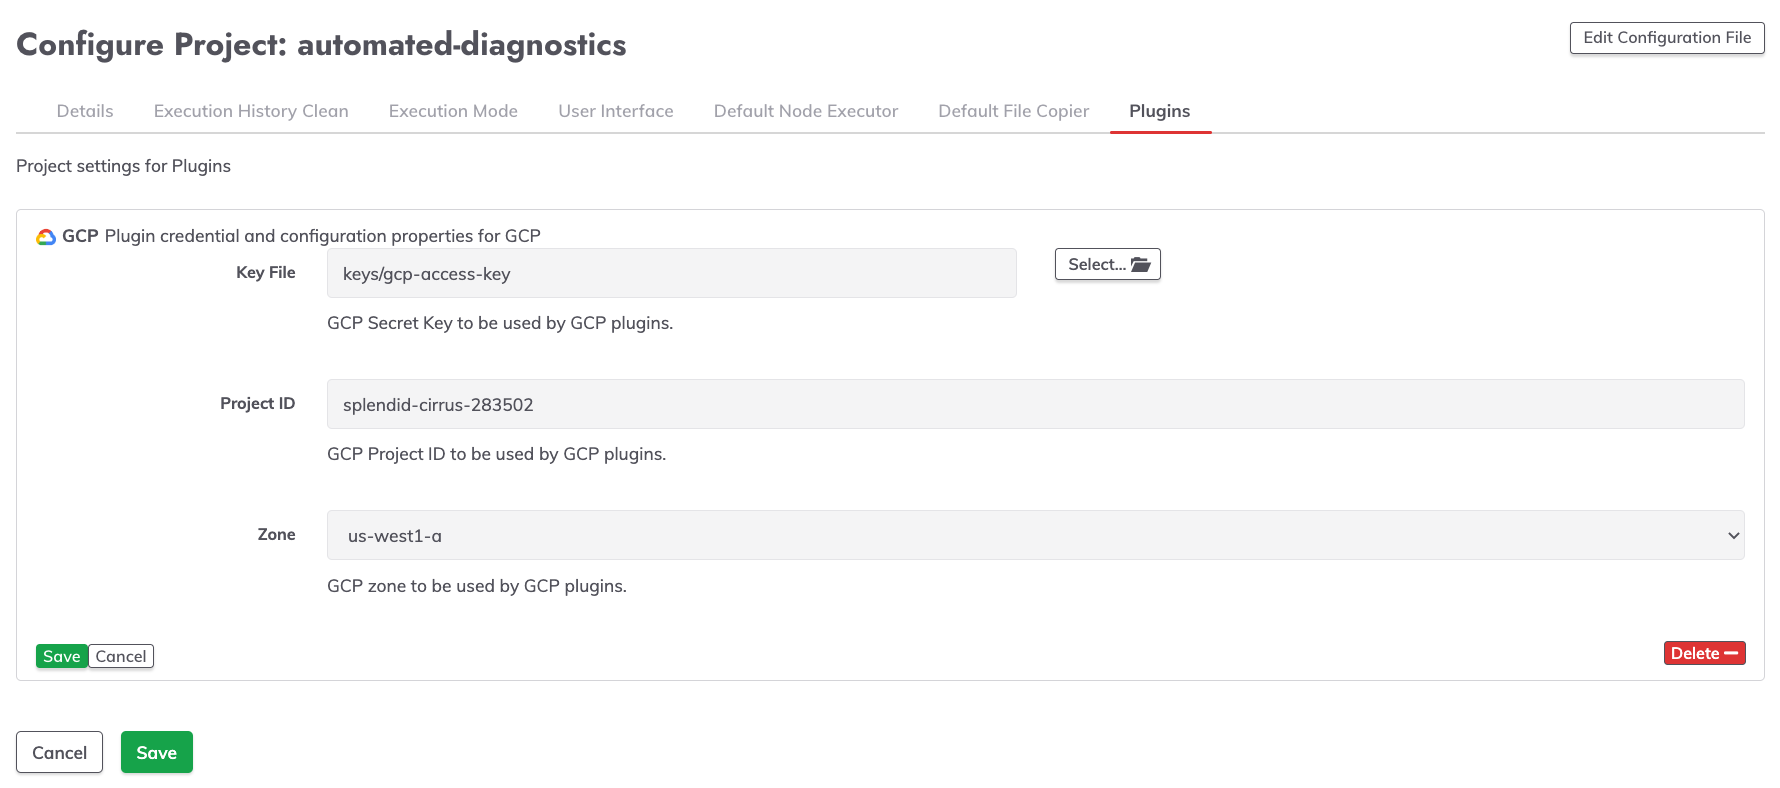
- Click Save for the plugin configuration.
- Click Save for the Project Settings.
System Level Configuration
Use the following steps to configure authentication for the Google Cloud plugins for the whole Runbook Automation system.
- Click on the System Menu (gear icon) in the upper right.
- Click on System Configuration.
- Navigate to the GCP section and click on the Pencil Icon in the upper right:
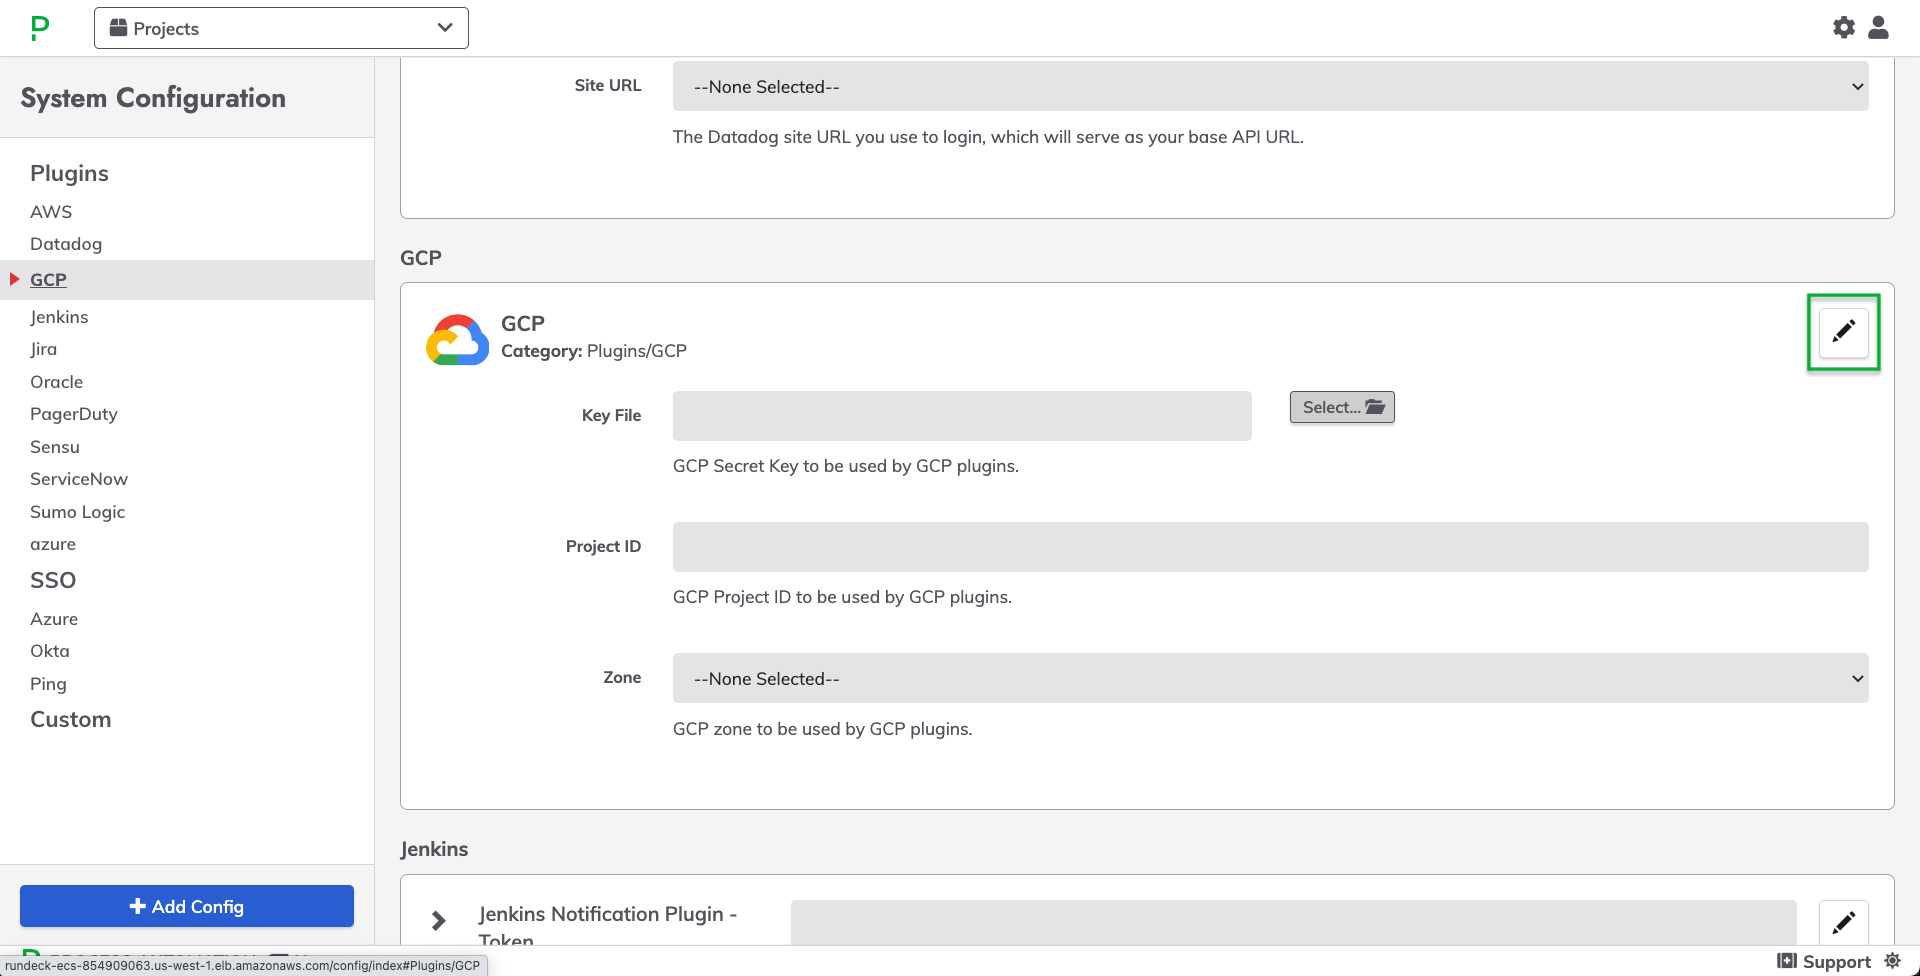
- Click Select next to the Key File field.
- Click + Add or Upload a Key
- For the Key Type dropdown, choose the Private Key option.
- Click the Enter text dropdown and choose the Upload file option:
- Click on Choose File and select the
.jsonfile saved from the prior section. - Click Save to add this secret to Key Storage.
- Click Save to now use the saved secret from Key Storage.
- Enter the Project ID captured from the prior section into the Project ID field.
- Select the Zone to set the default zone used by the plugins:
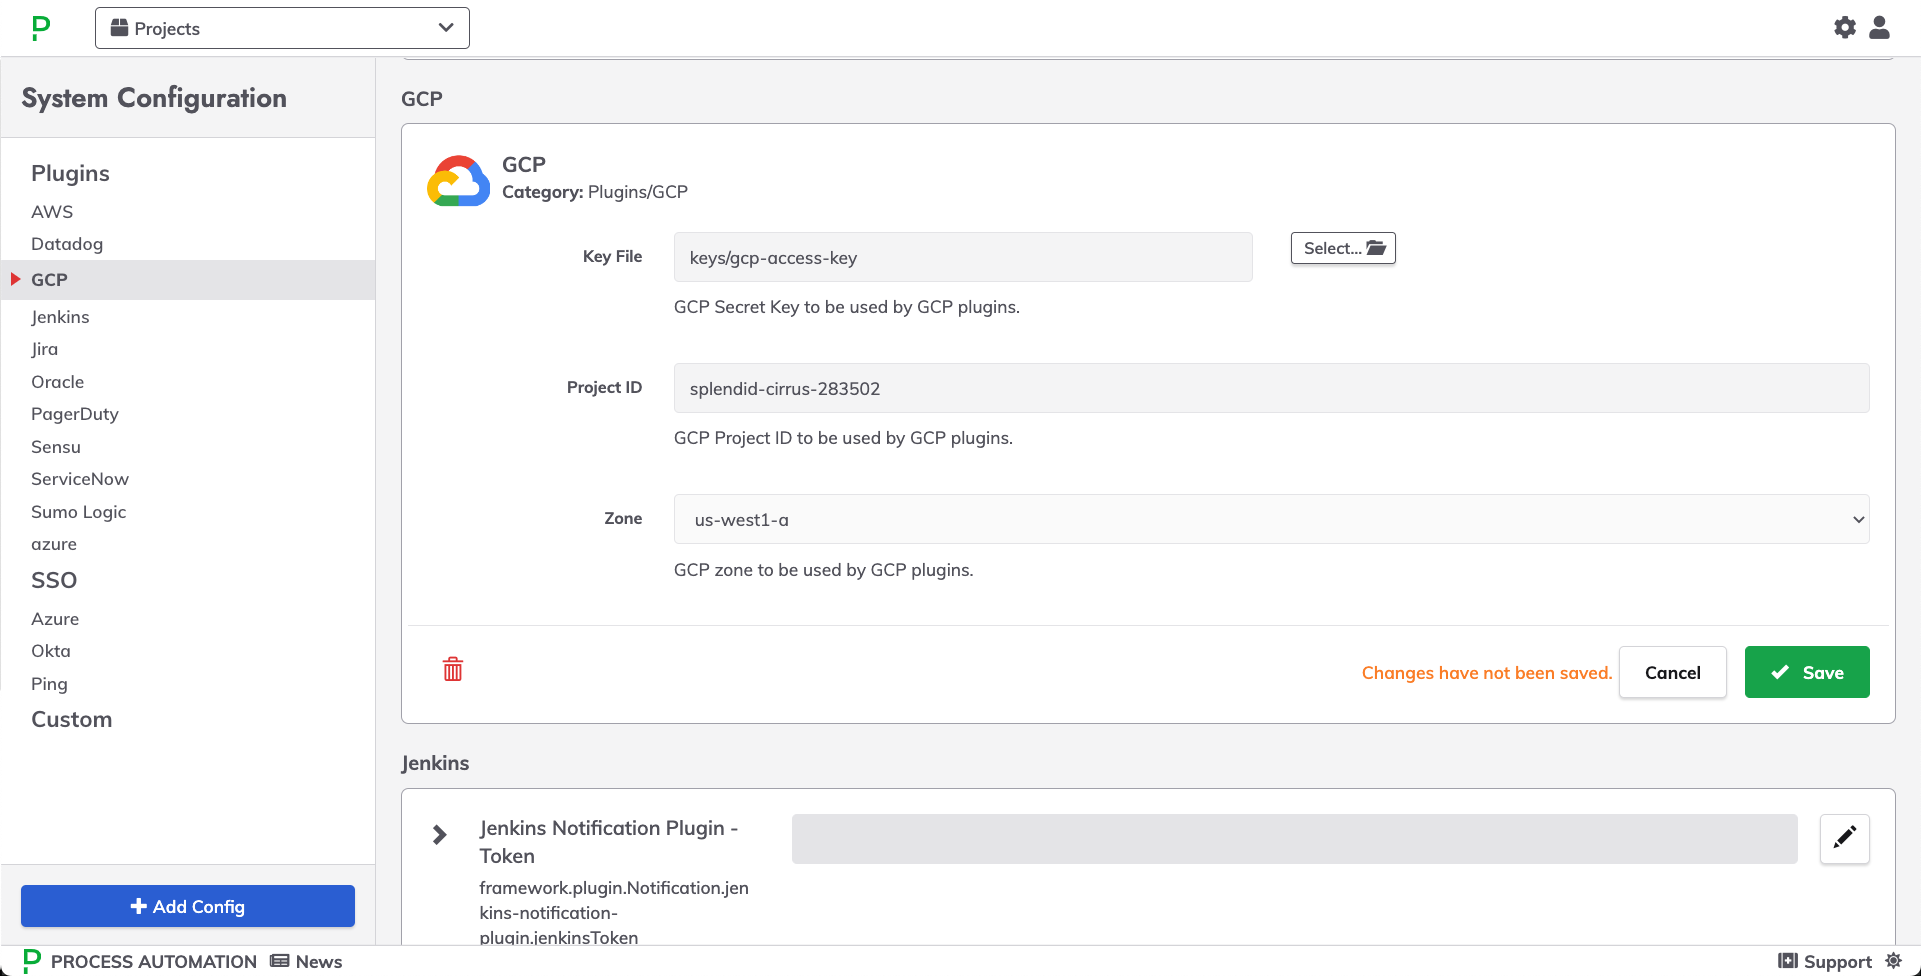
- Click Save to commit these changes to the System Configuration.