Jira Plugins
Jira Plugins
Overview
Runbook Automation integrates with Jira through a variety of plugins listed below. By integrating Runbook Automation with Jira, users can automate many of their operations around Issues, Projects, IT Service Requests, and much more. These integrations allow operations teams to provide self-service mechanisms to users throughout the business, as well as setup event-driven automation for workflows that involve Jira Software and Jira Service Management.
| Plugin Name | Plugin Type | Description |
|---|---|---|
| Search Assigned Issues | Job Step | Search assigned issues by user. |
| Check Issue Exists | Job Step | Check if the Jira issue exists by key. |
| Comment on Issue | Job Step | Append comments to a Jira issue. |
| Create Issue | Job Step | Creates a new Jira issue. |
| Update Issue | Job Step | Updates an existing Jira issue. |
| Retrieve Issue | Job Step | View the data of an existing Jira issue. |
| Comment on Issue | Notification | Append comments to a Jira issue. |
| Create Issue | Notification | Creates a new Jira issue. |
Click to expand to see the full list of Runbook Automation plugins for Jira.
Setup
Authentication for the Jira plugins can be configured for the entire system or for an individual project.
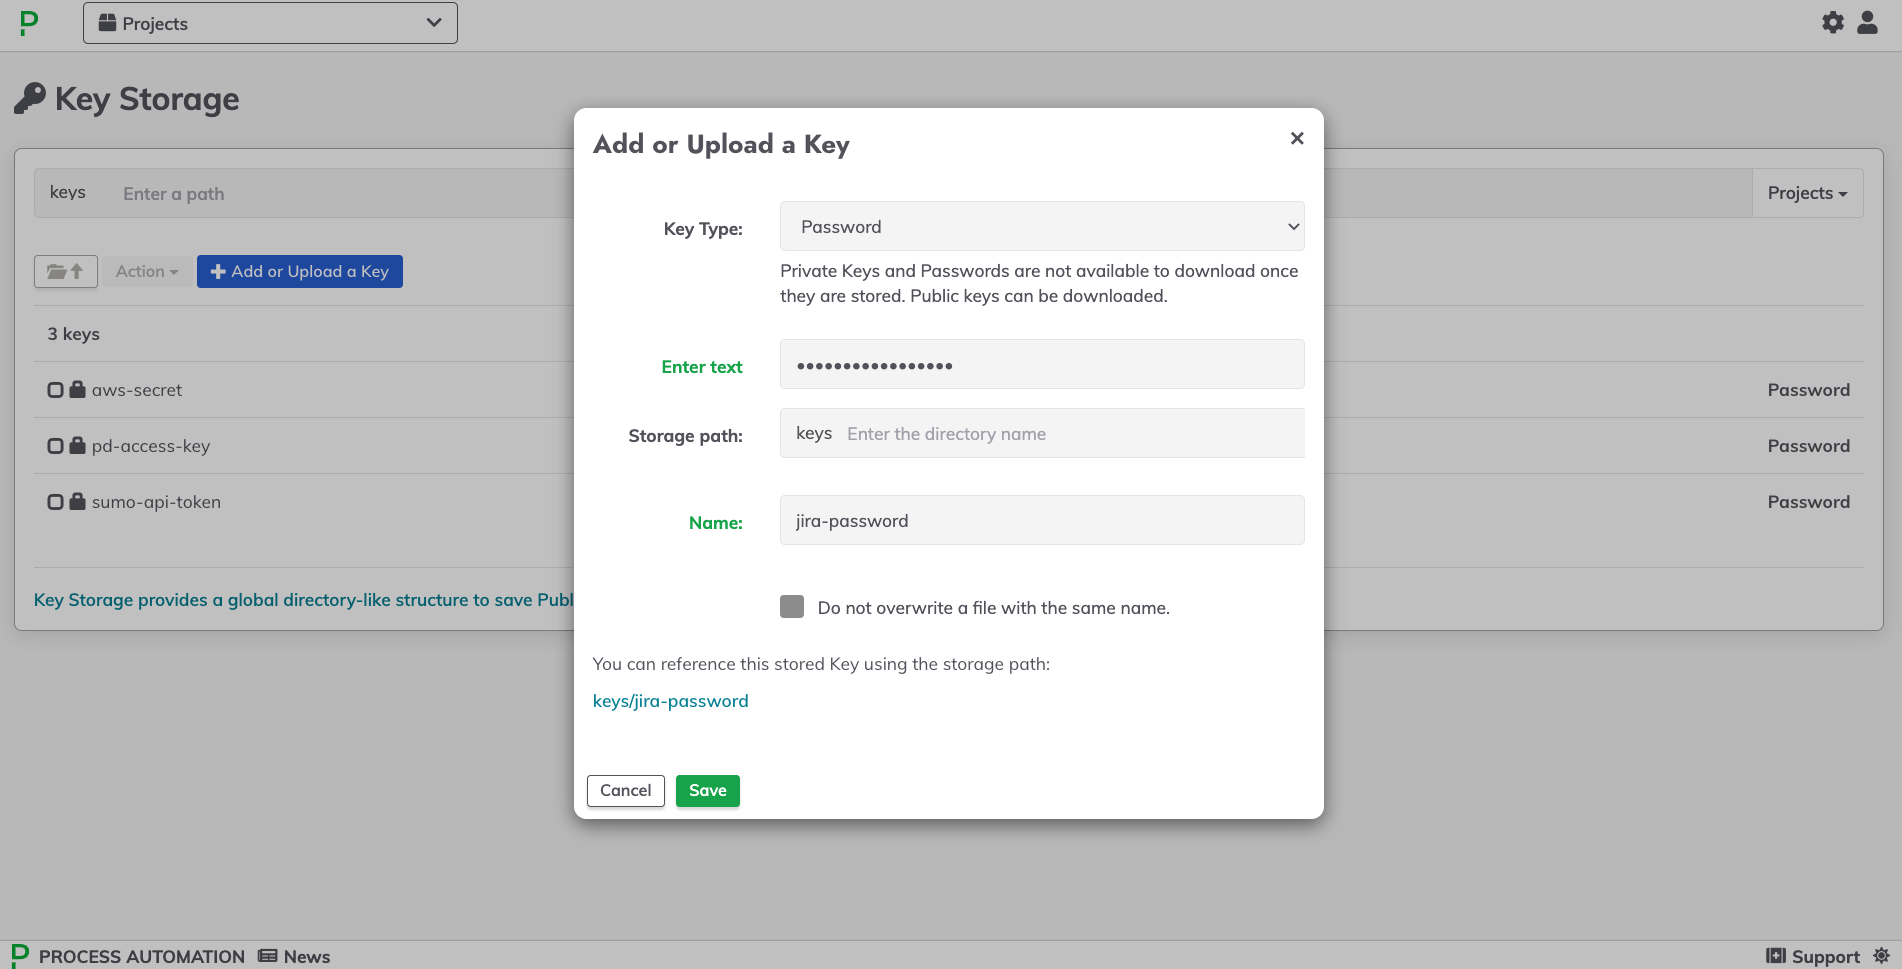
Add Jira Account Password or Auth Token to Key Storage
System Key Storage
Place the Jira credentials into the System Key Storage if all Runbook Automation Projects will share the same Jira credentials.
- Click on the System Menu (gear icon) in the upper right.
- Click on Key Storage
- Click +Add or Upload a Key. Select Password for the Key Type.
- Paste the Jira password or auth token into the field.
- Click Save:
Project Key Storage
Place the Jira credentials into the Project Key Storage if only a specific project should use these Jira credentials.
- In the specific project, click on Project Settings in the lower left.
- Click on Key Storage.
- Click +Add or Upload a Key. Select Password for the Key Type.
- Paste the Jira password into the field.
- Click Save.
Now that the Jira password or auth token has been added to Key Storage, the plugin suite can be configured at a Project or System level:
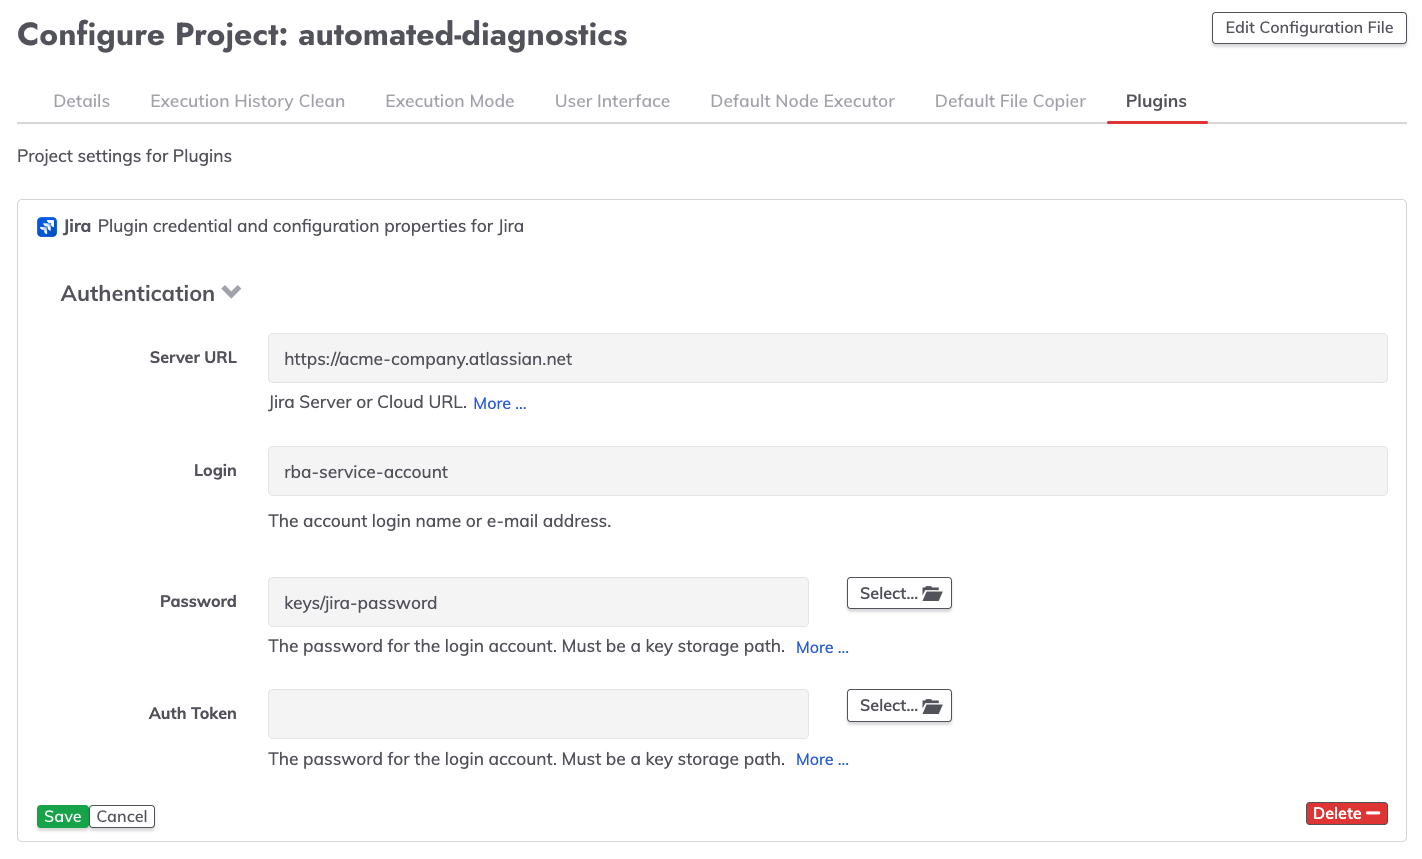
Project Level Configuration
Use the following steps to configure authentication for the Jira plugins for a specific project:
- In the specific project, click on Project Settings in the lower left.
- Click on Edit Configuration then click on Plugins.
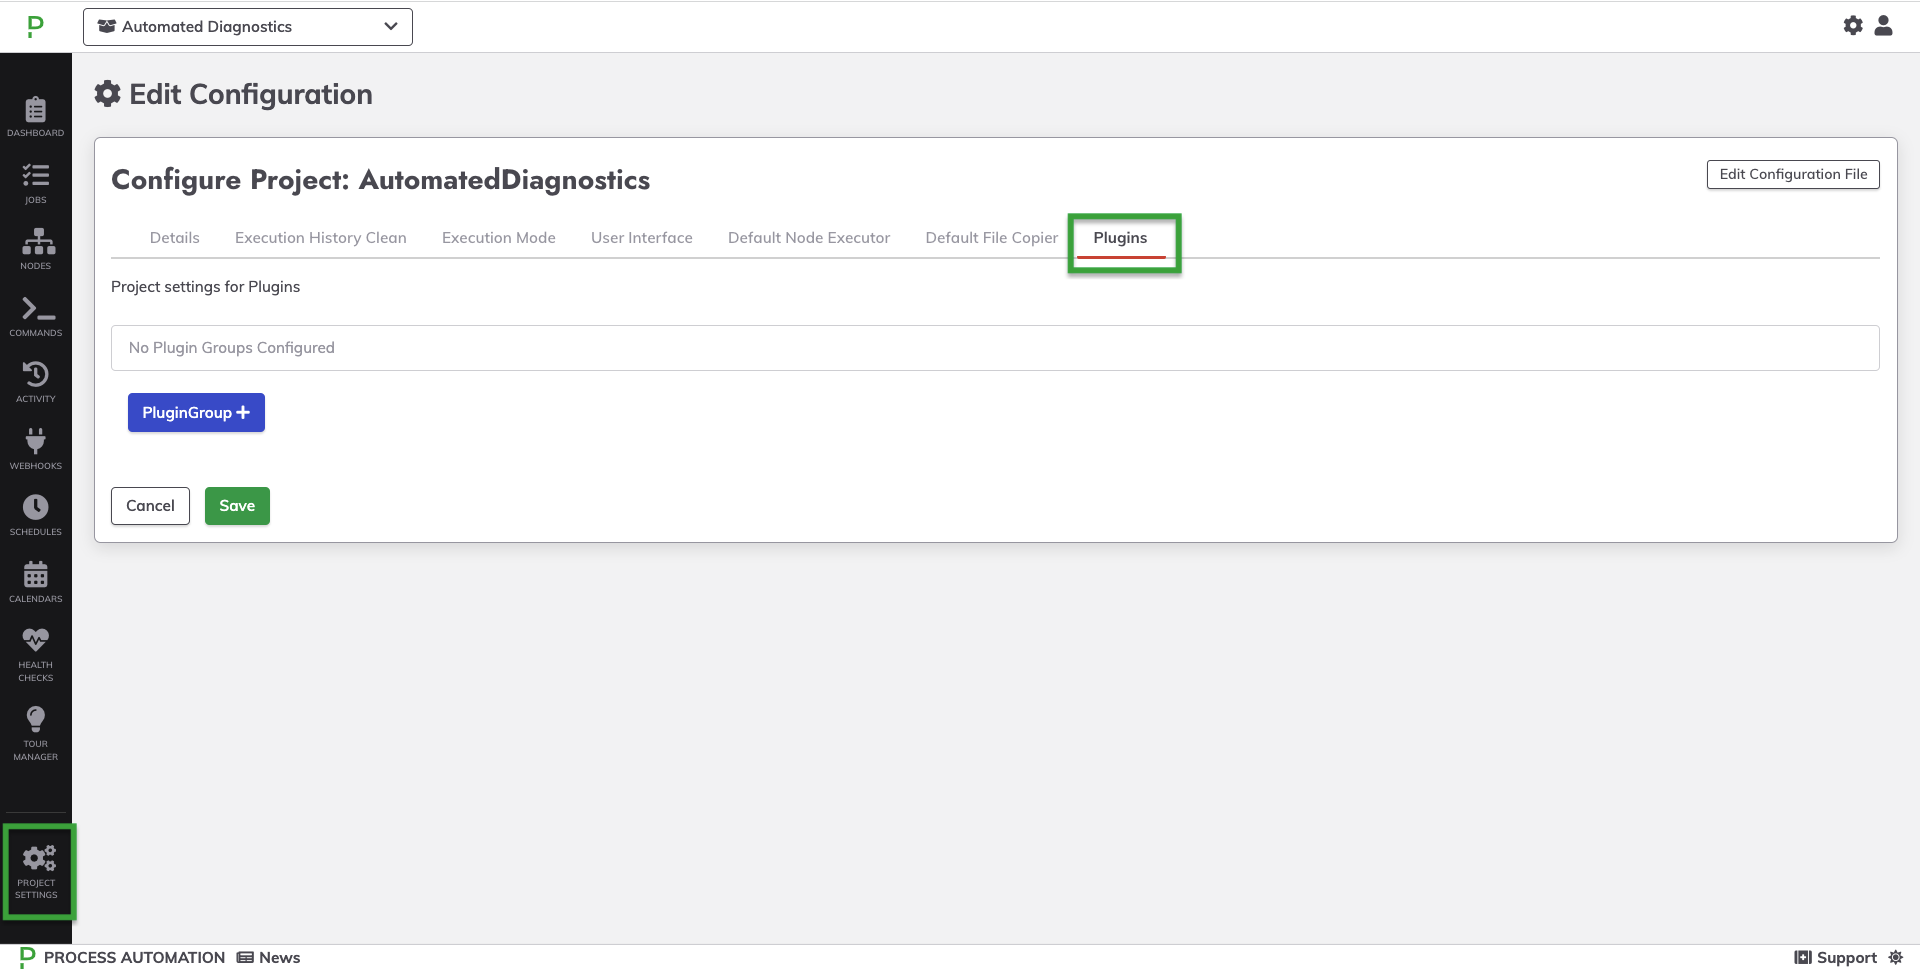
- Click on +PluginGroup.
- Select Jira from the list.
- Add your Jira instance URL to the Server URL field. For example,
https://acme-company.atlassian.net - Place an active Jira username into the Login field. This user must have sufficient permissions to perform the actions that will be automated by Runbook Automation.
- Click Select next to the Password field and find the Jira password from the prior section stored in Key Storage.
- (Optional) If using an Auth Token is preferred over a Password, then click Select next to the Auth Token field and select the Jira auth token from Key Storage.
- Click Save for the plugin configuration.
- Click Save for the Project Settings:
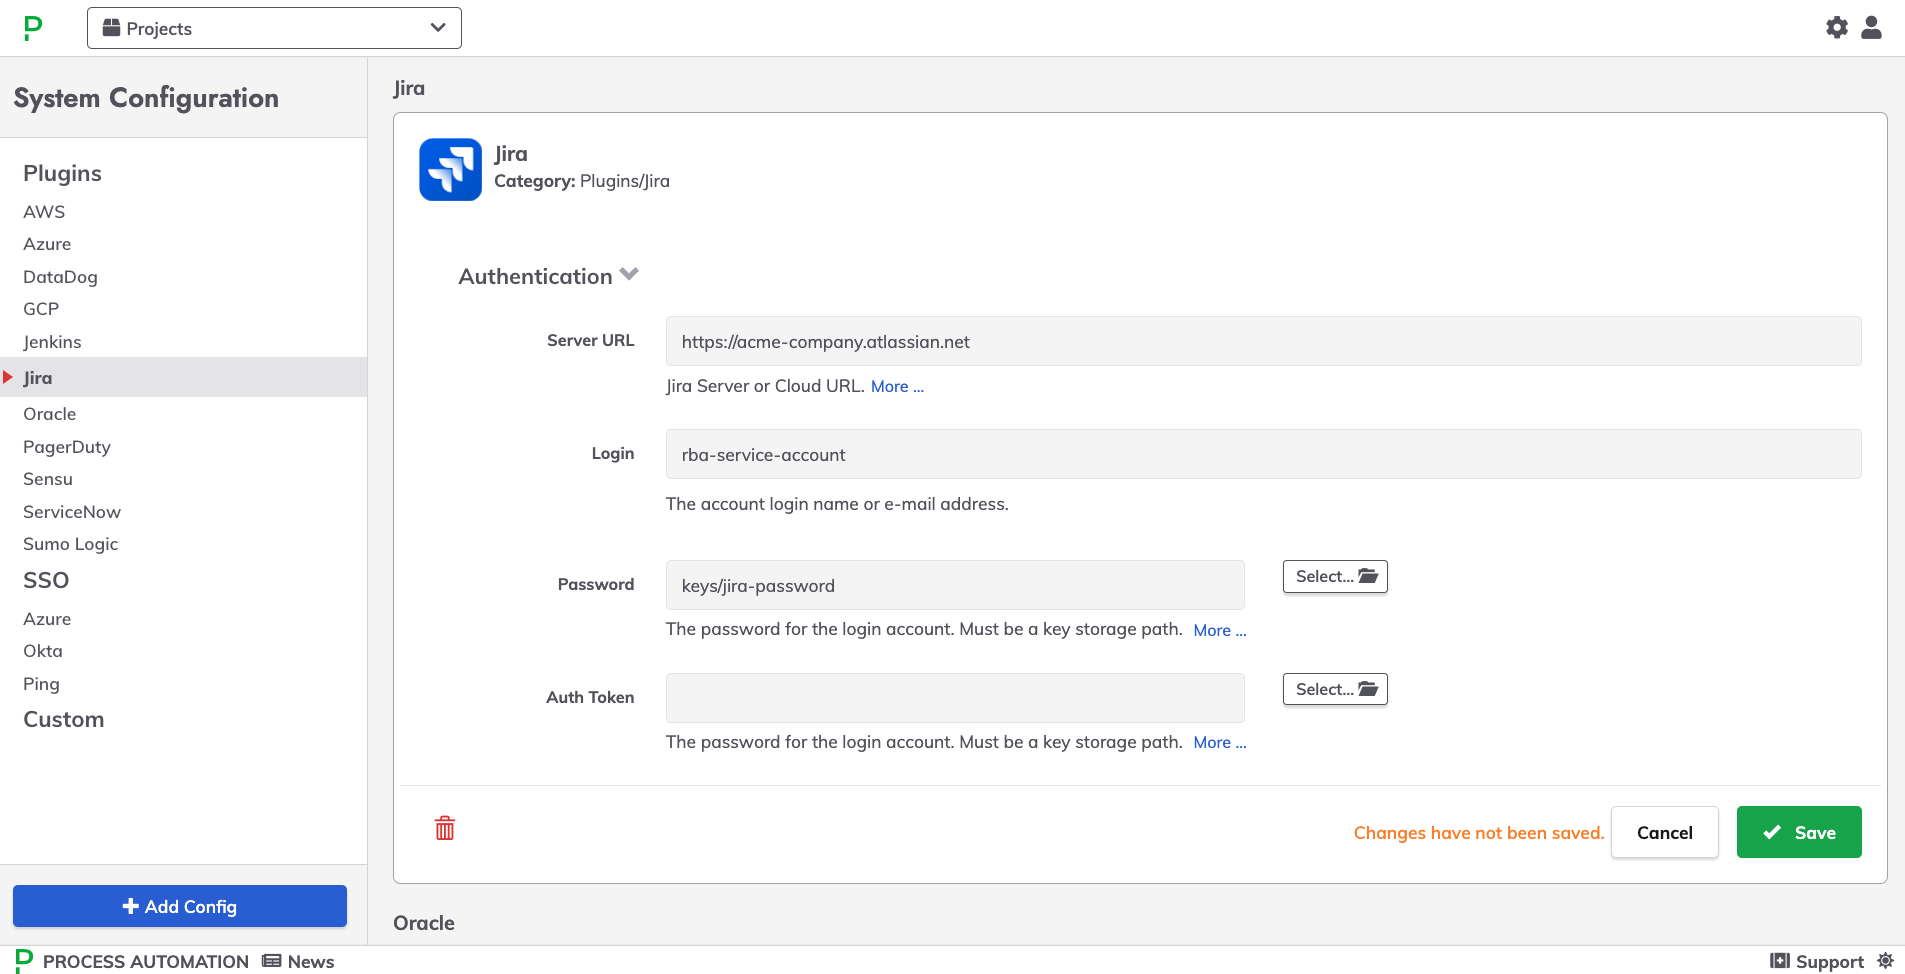
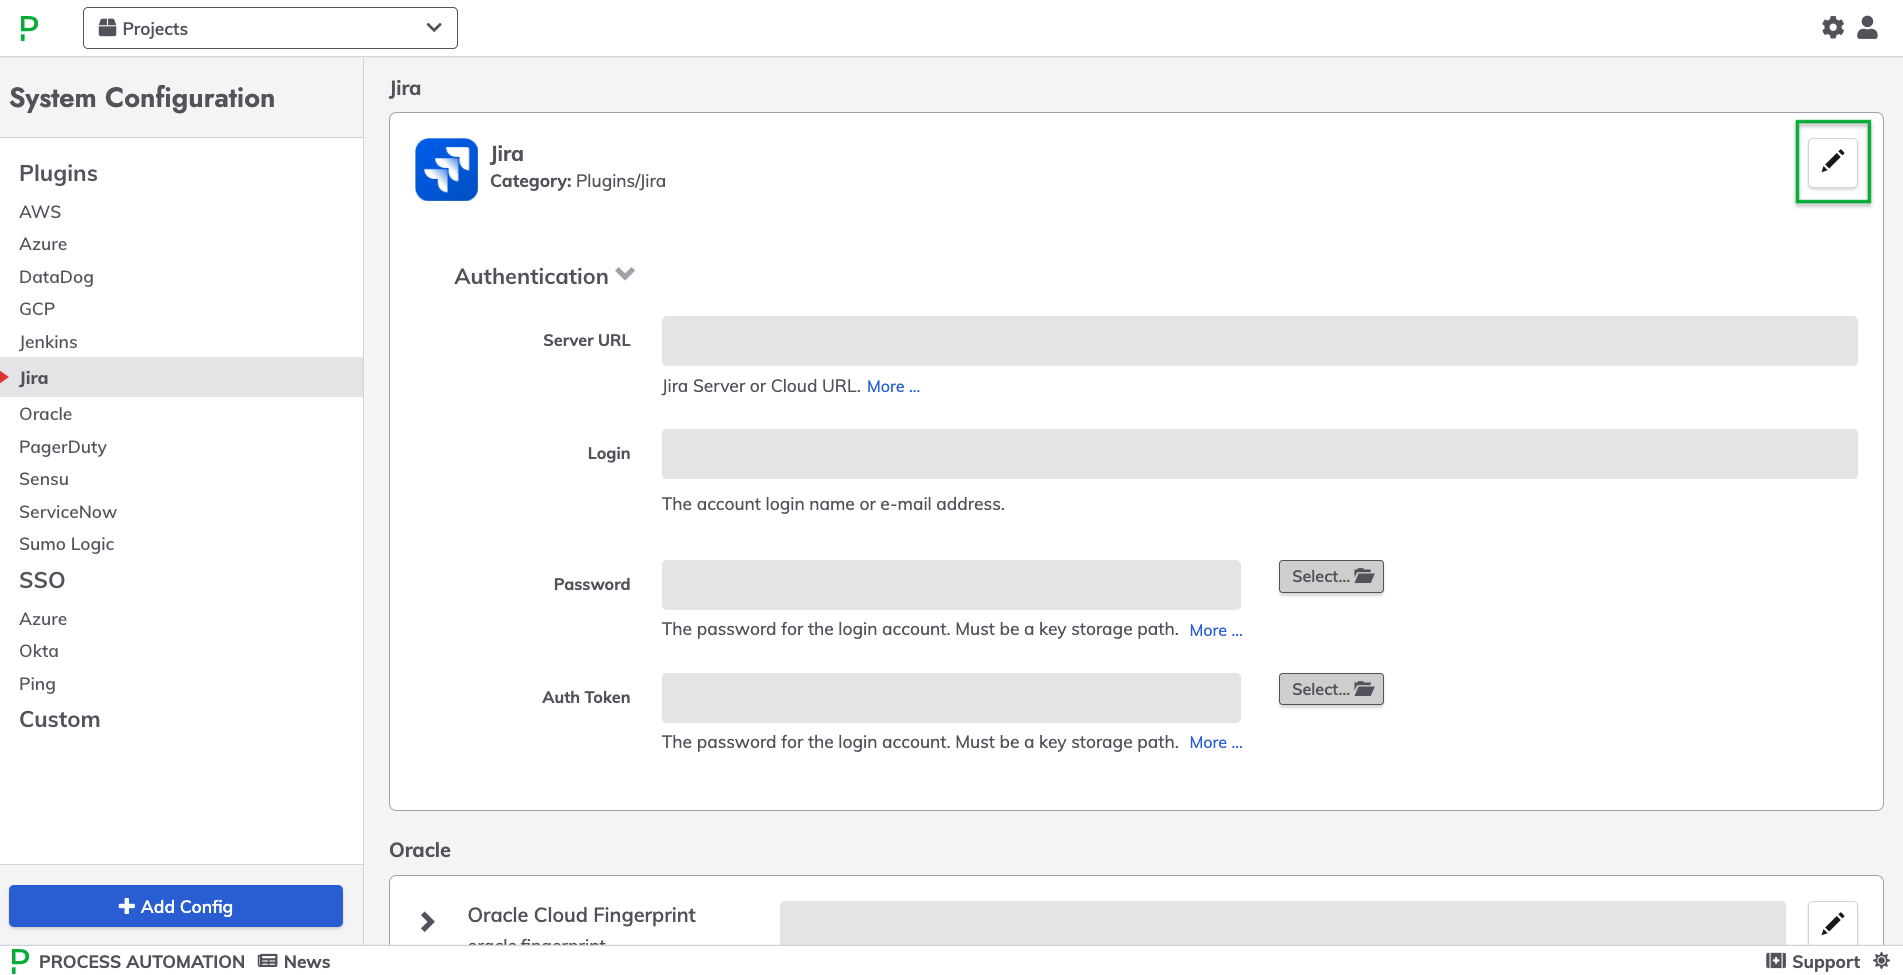
System Level Configuration
Use the following steps to configure authentication for the Jira plugins for the whole Runbook Automation system.
- Click on the System Menu (gear icon) in the upper right.
- Click on System Configuration.
- Navigate to the Jira section and click on the Pencil Icon in the upper right:
- Add your Jira instance URL to the Server URL field. For example,
https://acme-company.atlassian.net - Place an active Jira username into the Login field. This user must have sufficient permissions to perform the actions that will be automated by Runbook Automation.
- Click Select next to the Password field and find the Jira password from the prior section stored in Key Storage.
- (Optional) If using an Auth Token is preferred over a Password, then click Select next to the Auth Token field and select the Jira auth token from Key Storage.
- Click Save for the plugin configuration.