Node Wizard (Commercial)
Node Wizard (Commercial)
Available in PagerDuty Runbook Automation Commercial products.
The Node Wizard allows Runbook Automation admins to manually create Node entries in the Rundeck database using a graphical interface fill in values.

Adding the Node Source
To add the Node Wizard Resource Model source open the Project where the Node Source will be added and follow these steps:
- Click Project Setttings to expand the menu.
- Click Edit Nodes.
- Click Sources tab.
- Click Add a new Node Source+ button.
- Select the Node Wizard option.
- Click Save.
Creating Nodes
- Click Project Setttings to expand the menu.
- Click Edit Nodes.
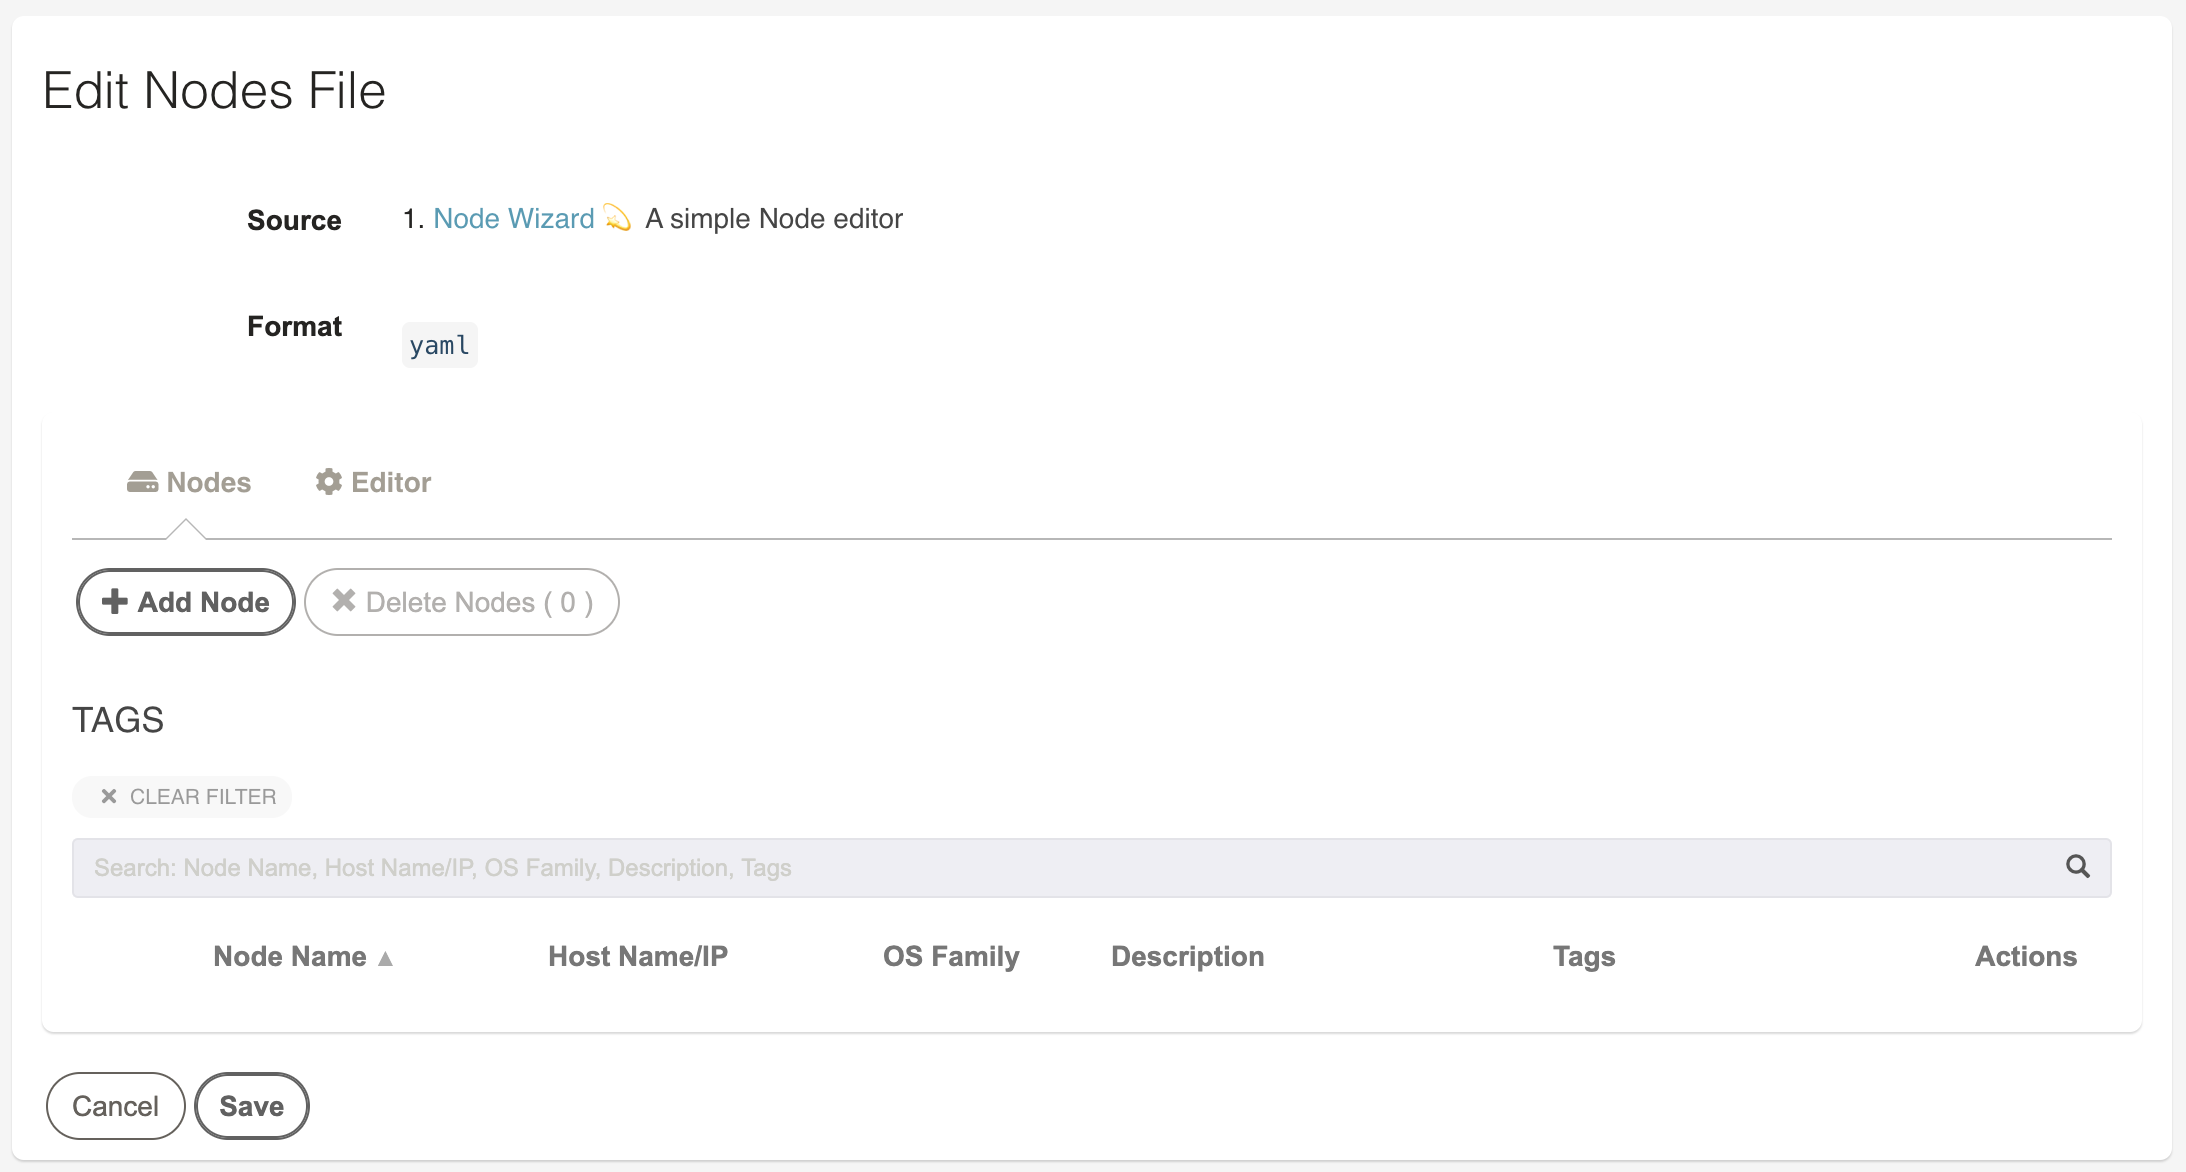
- Click Modify button in the Node Wizard entry on the Edit tab.

4. Click Add Node

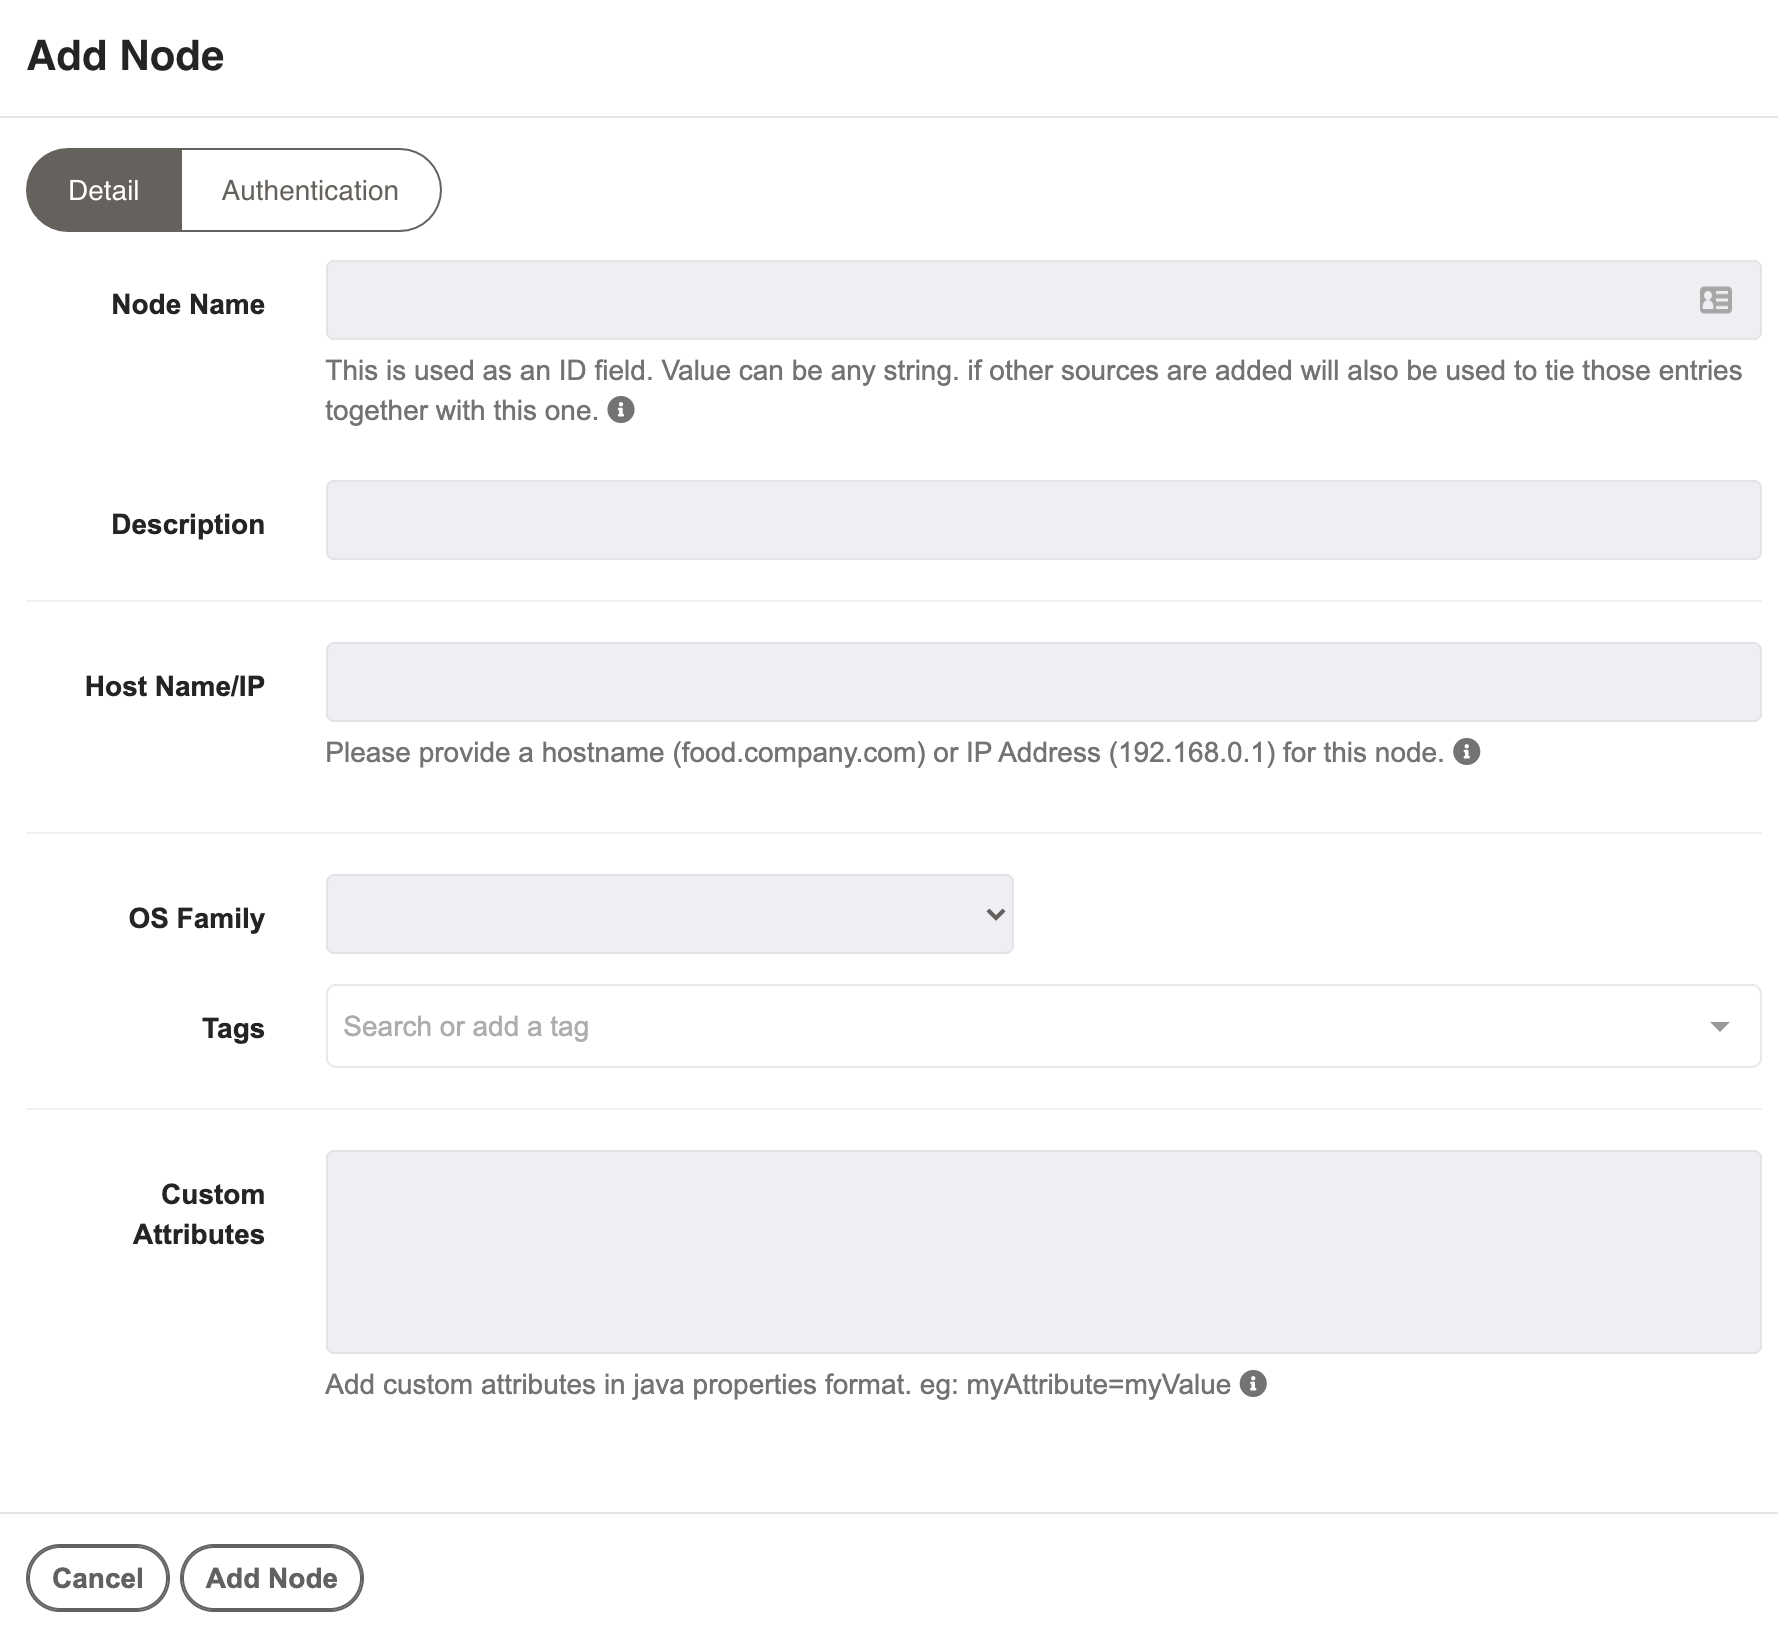
- Node Name: This is used as an ID field. Value can be any string. if other sources are added will also be used to tie those entries together with this one.
- Description: A user friendly description of the Node.
- Host Name/IP: Provide a DNS hostname or IP address that will be used for the Rundeck Server to connect to the node.
- OS Family: Select Windows, Unix, or Other. Note: this must be set so the proper Node Executor and File Copier are used.
- Tags: Can be used to help in search filters.
- Custom Attributes: Add custom attributes in java properties format. eg:
myAttribute=myValue. One entry per line.
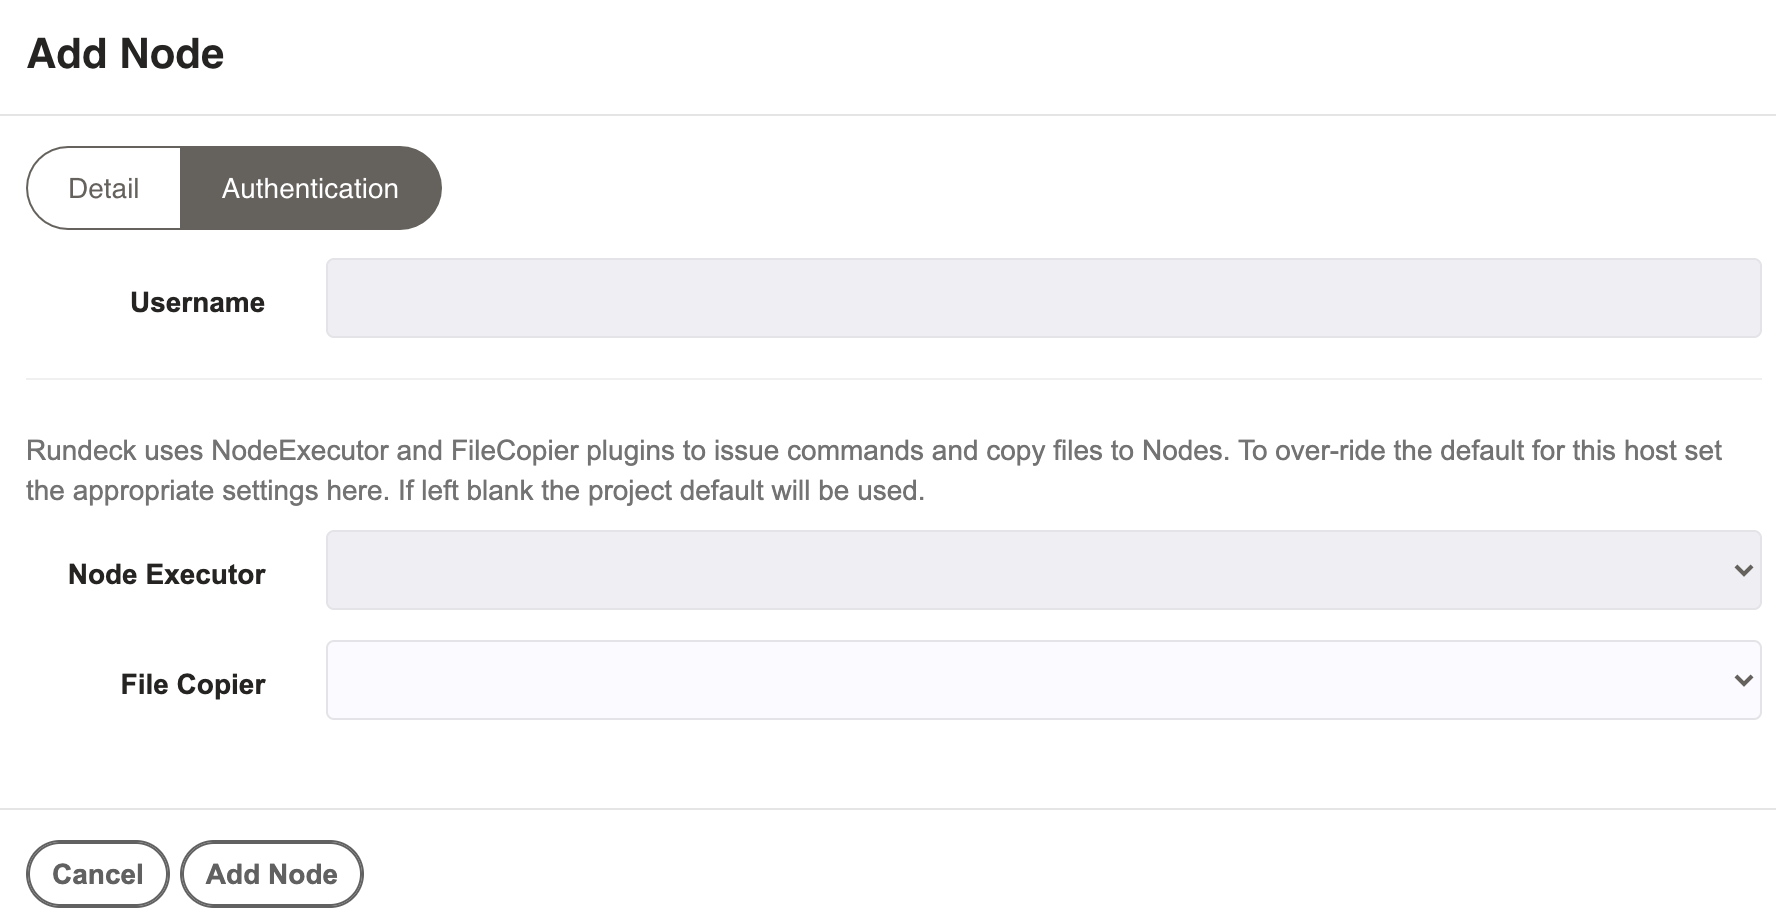
The Authentication tab has some optional fields. If left blank defaults from the project will be used.

- Username: Specify the user name used when authenticating to this Node.
Defaults will be pre-populated for the following settings after selecting the OS Family entry on the Detail tab.
- Node Executor: Specify a custom Node Executor if needed. More Details
- File Copier: Specify a custom File Copier if needed. More Details
There may be additional selections to select the key entry to use with the authentication mechanism.
After filling in all the fields save that entry and be sure to click Save on the main Node List to ensure all changes are written.
