
Integrate with Ansible
Integrate with Ansible
It’s common for Rundeck users to integrate Ansible into their Rundeck. Like Rundeck, Ansible's straightforward design and learning curve make it Operations friendly.
What does Rundeck do for Ansible users? Rundeck gives them a great GUI front-end experience and ties together their Ansible automation alongside different tools used by other groups. Rundeck's powerful access control capabilities can be used to safely provide other users and teams with self-service access to run automation (including Ansible playbooks) https://docs.ansible.com/ansible/latest/user_guide/playbooks.html.
What is Ansible?
Ansible is an automation solution developed by RedHat Inc, that handles configuration management, application deployment, cloud provisioning, ad-hoc task execution, network automation, and multi-node orchestration.
The Ansible basic configuration is extremely easy. Ansible just needs two files to work: the configuration file (ansible.cfg, usually at /etc/ansible path) and the inventory file (where Ansible stores their remote nodes in this format, usually at /etc/ansible path too).
Ansible uses playbooks (essentially a defined blueprint for automation tasks), to manage configurations and deployments to remote machines.
The full Ansible documentation is available here https://docs.ansible.com/.
How to Integrate Ansible with Rundeck
Note: This How To assumes readers are very familiar with Rundeck. It is suggested to review and fully understand the Tutorial Exercises prior to attempting these steps.
Both Rundeck versions (Community and Enterprise) use a built-in plugin for Ansible integrations. This plugin imports hosts from Ansible's inventory. It includes a bunch of facts and can run modules and playbooks. There is also a node executor and file copier for the project.
This integration enables Rundeck users to:
- Call Ansible playbooks and modules from Rundeck. Rundeck returns output from Ansible's command line, however in an easier to consume format within Rundeck’s GUI and users can utilize the Rundeck API and access control features.
- Use Ansible as the underlying execution framework. Run any command or script and output will be collated by node and step like typical Rundeck output.
Pre-Requisites
- Rundeck installed with version 6.0.1
- Ansible binaries installed on Rundeck Server based on Ansible documentation.
- Confirmation that Rundeck can SSH as
rundeckuser to the Ansible endpoints defined in the inventory file.
Note: It is possible to use the Welcome Project environment with the Project File in the Additional Information section at the bottom of this page.
Ansible Configuration
Ansible needs two basic files to work, ansible.cfg (where Ansible configurations are located) and hosts (inventory).
In this guide we use three nodes defined as the Ansible inventory file: (Note-Your file will be different)
[ssh_farm]
192.168.33.20
192.168.33.21
192.168.33.22
Rundeck/Ansible Integration
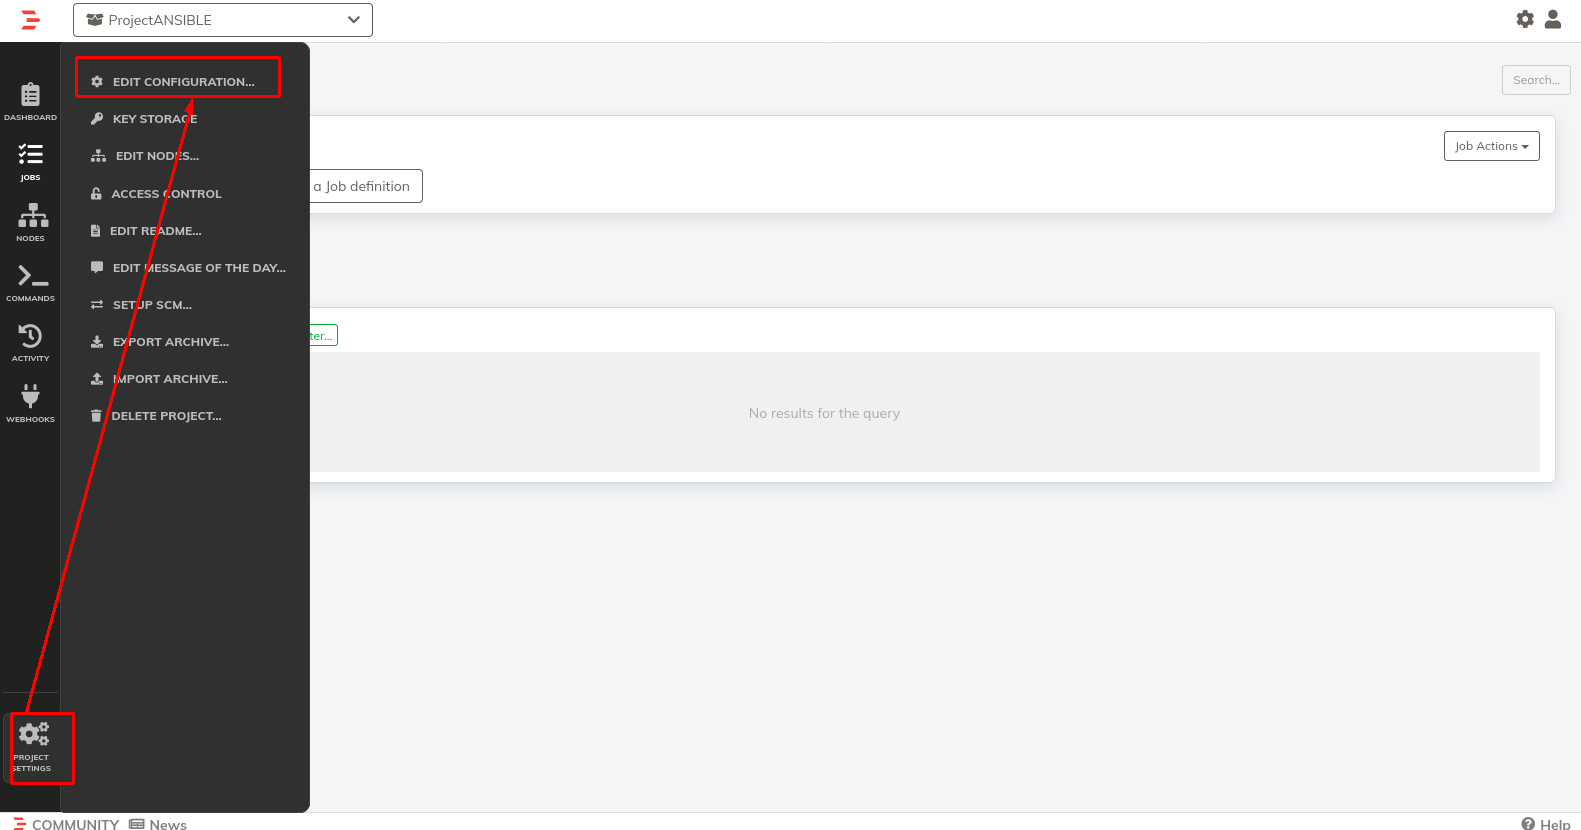
- To run commands via the "Commands" menu or the default "Command" node step in a Rundeck job, we can configure a project with the Ansible node executor as a default. Create a new project, go to the Default Node Executor tab and select Ansible Ad-hoc Node Executor.
- In the Ansible Node Executor configuration, set the Executable (usually
/bin/bash) and define the Ansible config path (usually at/etc/ansible/ansible.cfg). Click on the Generate Inventory checkbox. Now scroll down and click on the Save button.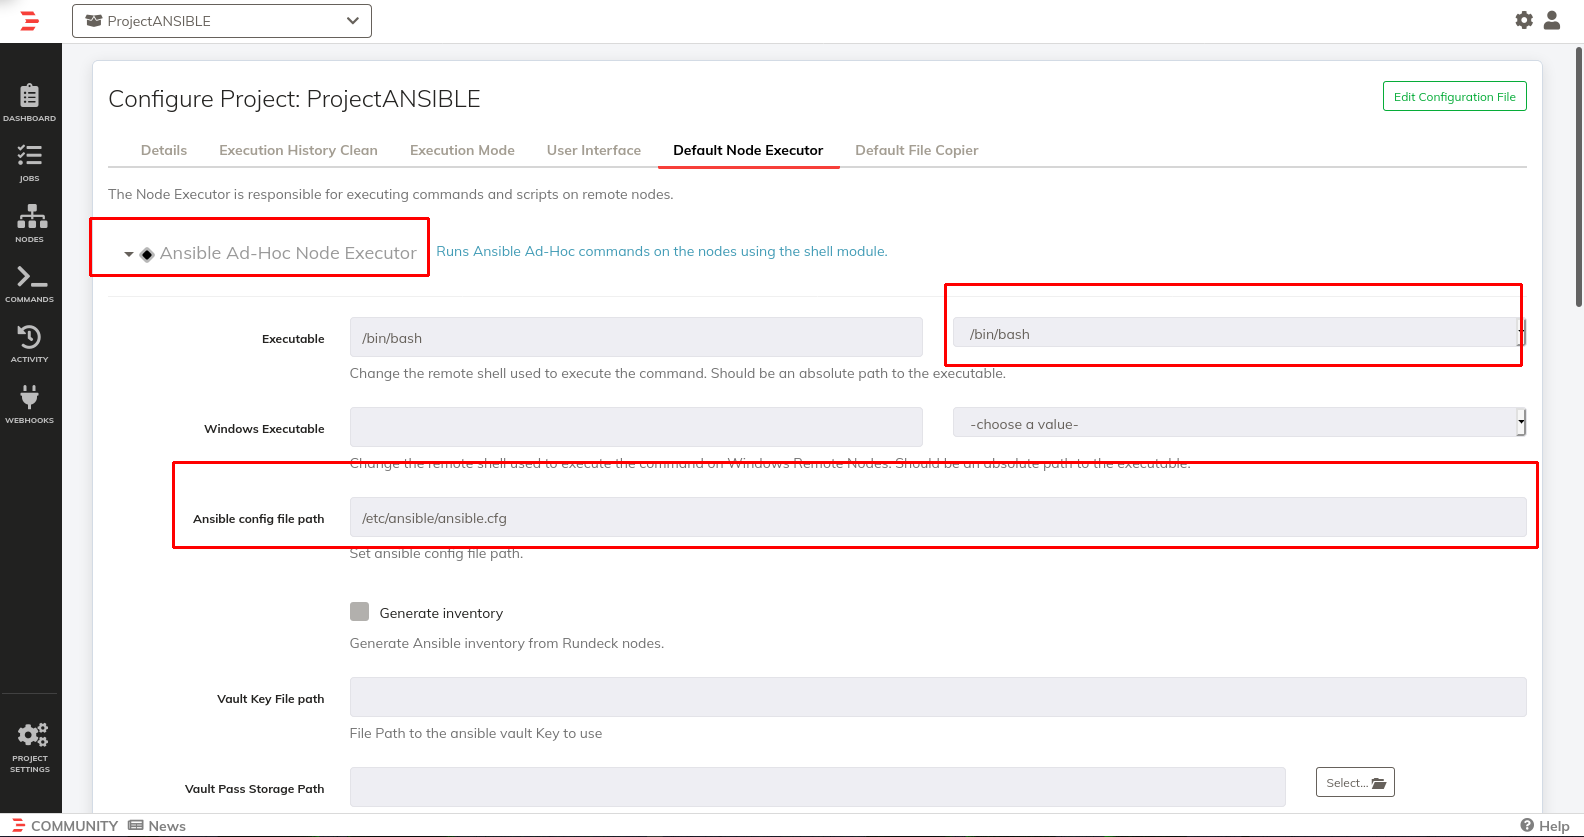
The Rundeck-Ansible plugin uses therundeckuser as the default user to connect to the Ansible remote inventory nodes. At this point, it’s possible to define the SSH authentication method (privatekeyandpassword) and the specific Ansible SSH user to connect to the remote inventory nodes. You need to define the username in the SSH User textbox. Depending on the auth method you can select the password from the storage path or the ssh key (also from the filesystem path).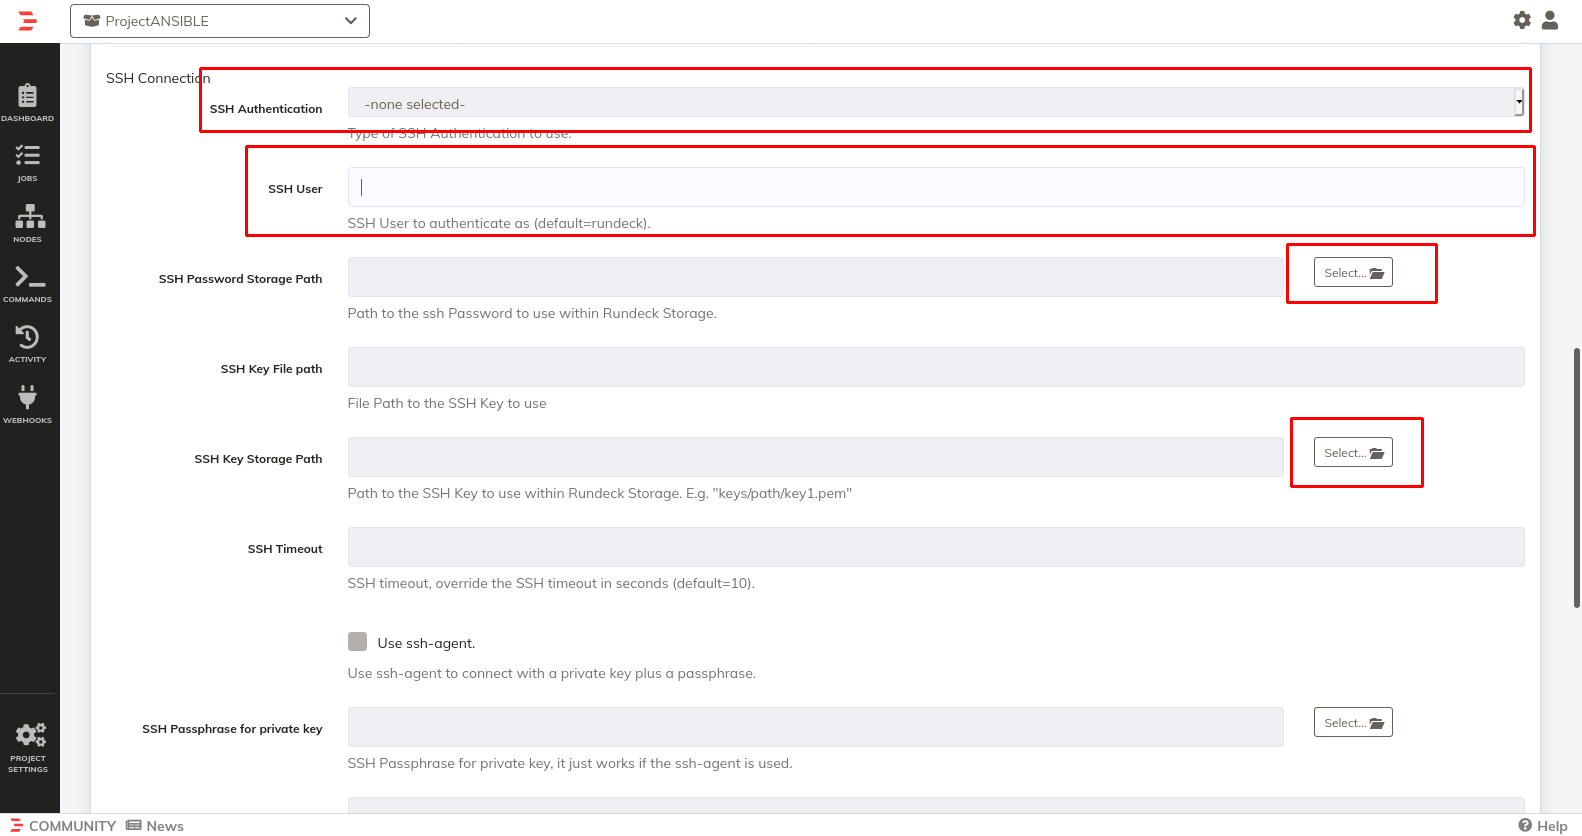
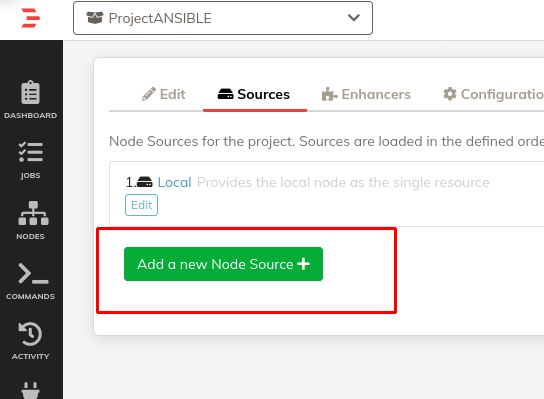
- Add the Ansible inventory nodes by clicking on Project Settings > Edit Nodes... and then on Add new Node Source +.
- Choose Ansible Resource Model Source and define the Ansible inventory file path on your Rundeck Server (usually at
/etc/ansible/hosts) and Ansible config path (usually at/etc/ansible/ansible.cfg).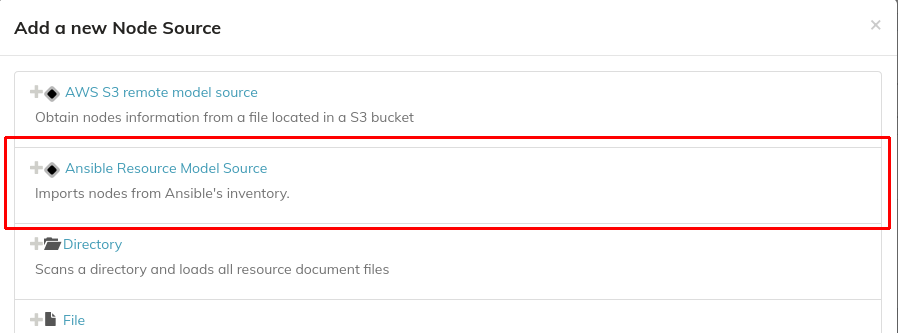
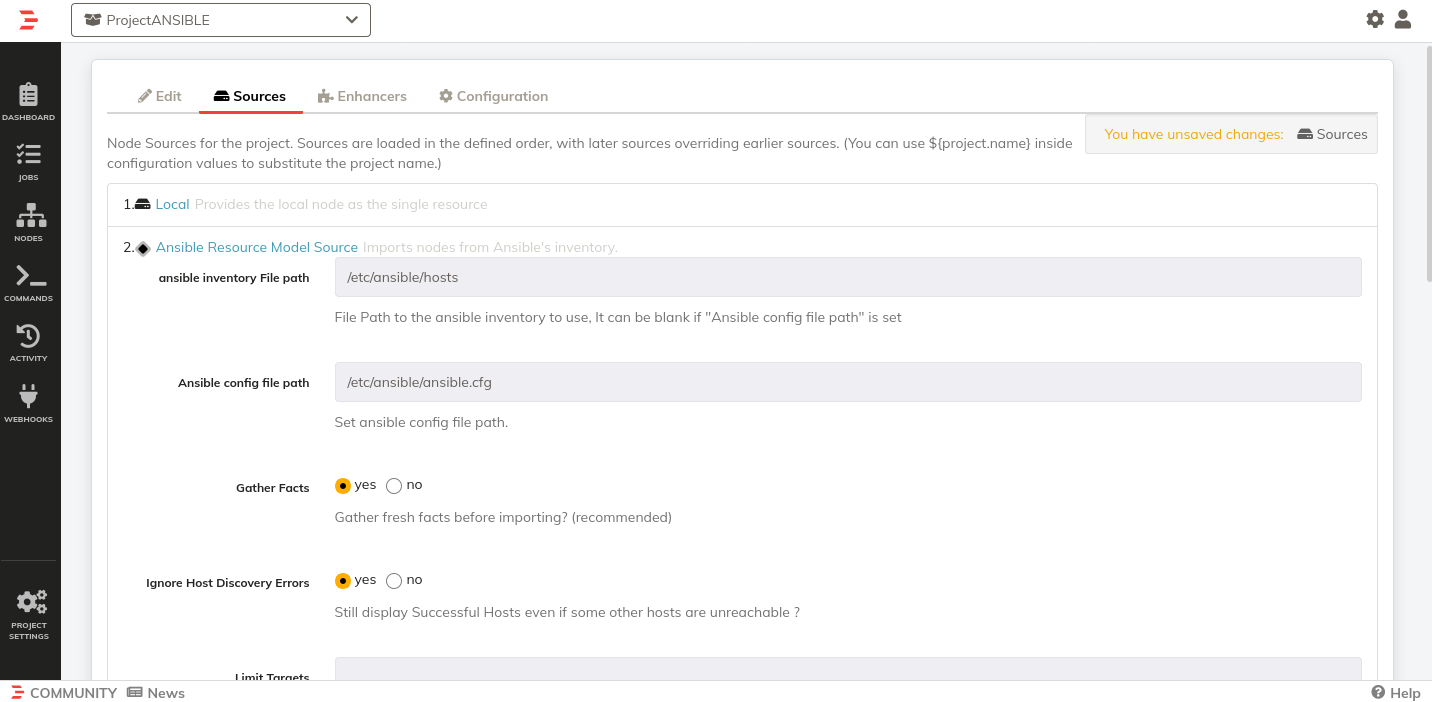
Similar to the node executor configuration, in the “SSH Connection” section it’s possible to define the Authentication method (privatekeyorpassword-based). Depending on the Authentication method, enter the user, ssh password, or the key file path.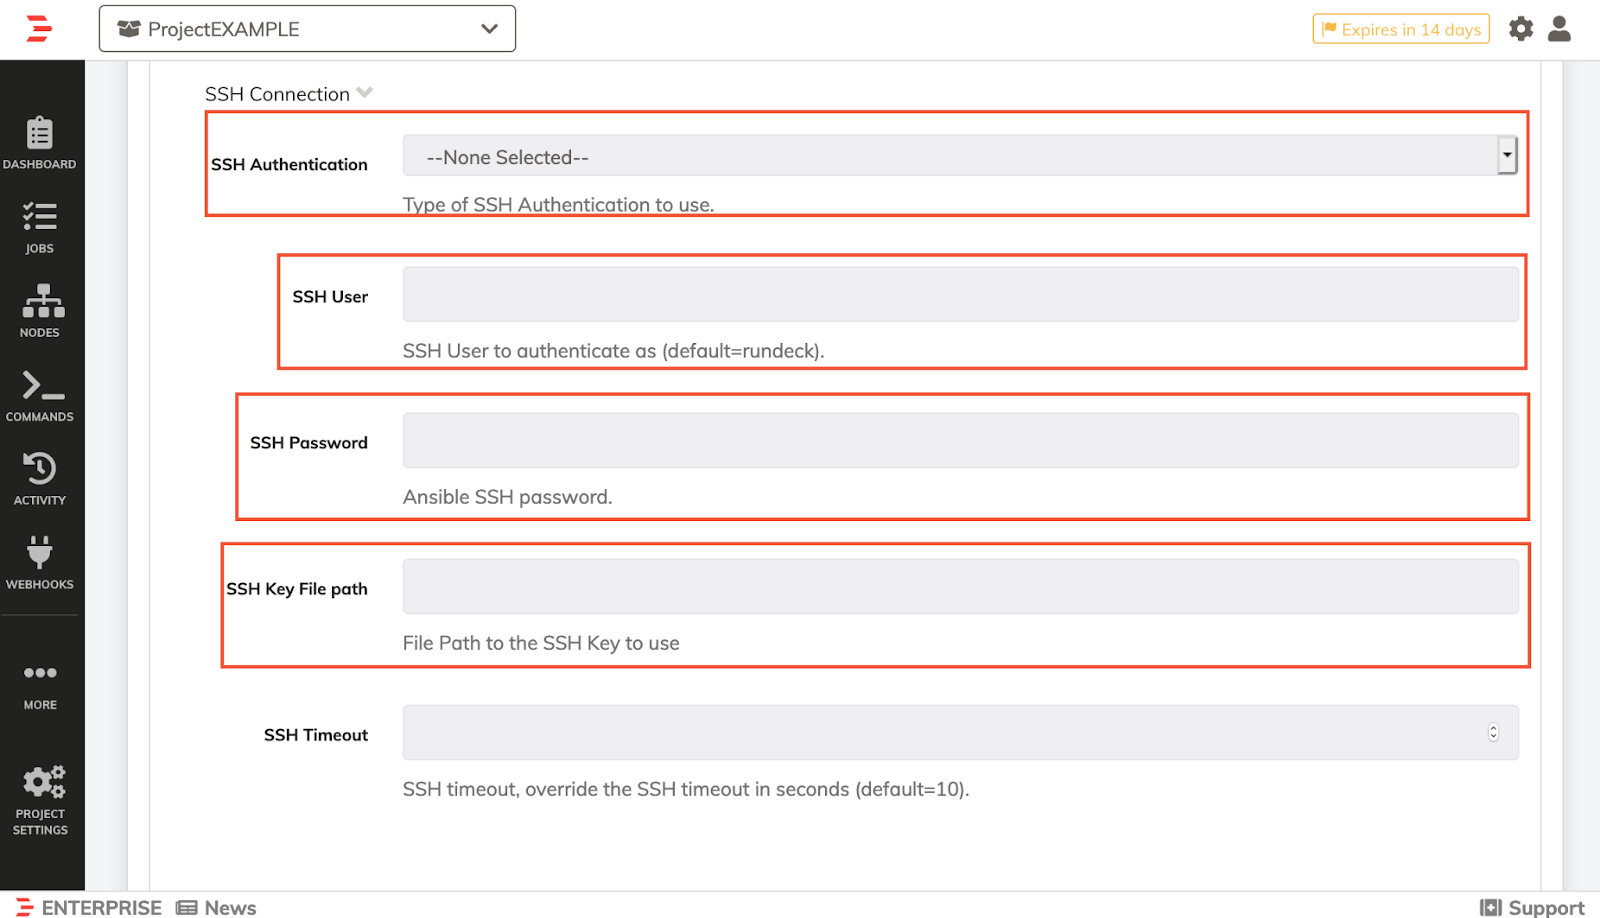
- Now, scroll down and click on the Save button.
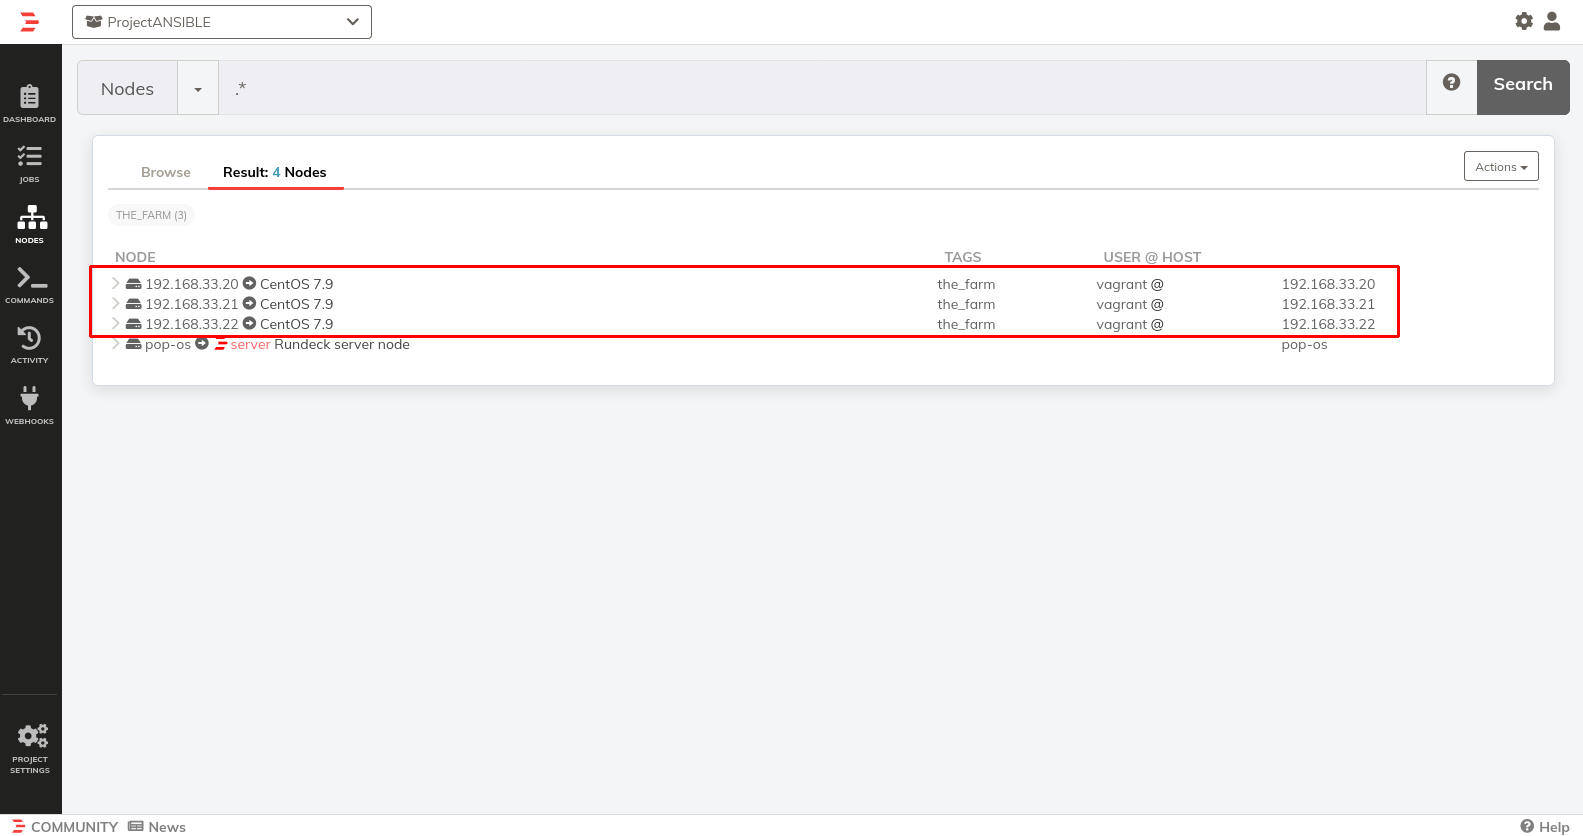
- Click on the Nodes option in the left panel to see the nodes defined in the Ansible inventory.
Time for a quick test.
- Go to the Commands option in the left panel in the Nodes section, select an Ansible node defined in your Ansible inventory, and run some command (in this example we used “
ls -la”).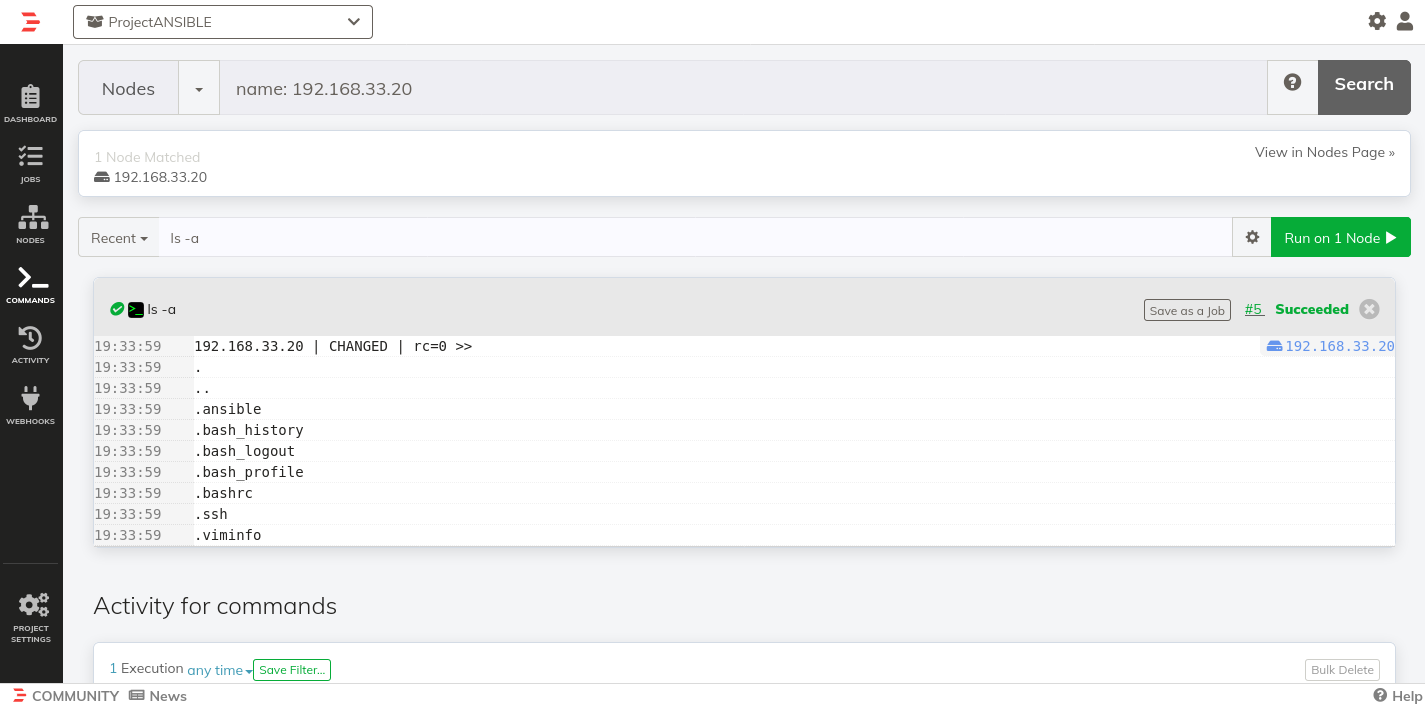
- Now you can run any command/playbooks/inline-playbooks over your Ansible inventory.
First Inline-Playbook Inside a Rundeck Job
- Create a new Job
- Give it any name
- In the Workflow tab select Ansible Playbook Inline Workflow Node Step
- Put the following playbook:
- name: test playbook hosts: all tasks: - shell: uname -a ignore_errors: yes register: uname_result - debug: msg="{{ uname_result.stdout }}" - Go to the Nodes tab in the Job Definition and type the name of an Ansible node as a Node Filter.
- Save the Job
- Run the job
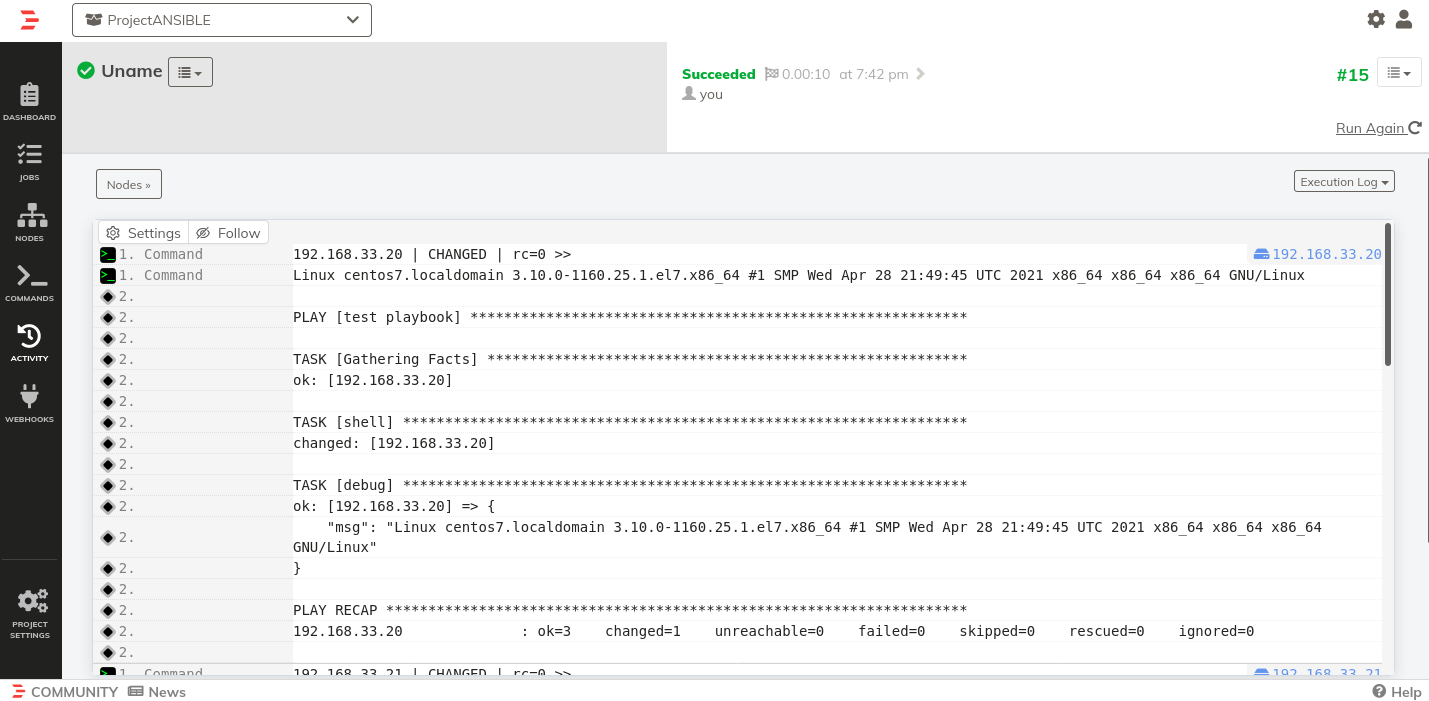
To see the output you may need to switch to the Log Output view.
Inventory Yaml
When Gather Facts is false, the inventory file is read as Yaml data. This avoids connection validation, significantly saving time and reducing CPU and RAM usage.
- Data Size It supports up to 10MB of data by default, which supports around 19,000 nodes. However, it depends on the operating system.
This parameter can be increased if necessary in this field: 
When the limit is exceeded it throws this error in rundeck.log file:
ResourceModelSourceException: Cannot load yaml data coming from Ansible: The incoming YAML document exceeds the limit: 10485760 code points.
- Max Aliases It supports up to 1000 of aliases by default. This is to avoid the application vulnerable to certain types of attacks.
This parameter can be increased if necessary in this field: 
When the limit is exceeded it throws this error in rundeck.log file:
ResourceModelSourceException: Cannot load yaml data coming from Ansible: Number of aliases for non-scalar nodes exceeds the specified max=1000.
Additional Information
It is possible to use the Welcome Project environment with this Project File.
- Create a new project called
ansible(or another name if that one is taken) - Open the Ansible Project and use Project Settings > Import Archive to import the file.
- Run the Install Ansible on Rundeck Server Job to install Ansible.
The other jobs have descriptions for what they do and are aligned with this tutorial.
Notes
It's advisable to segment extensive inventories into smaller groups or files containing approximately 1000 nodes each. Consequently, for every 1000 nodes, establish a dedicated source node for the respective group. The information described above is based on the recommendations described in the Ansible documentation. Ansible - Intro Inventory