
System & Project Runner Management
System & Project Runner Management
Runners can be managed at the System level as well as at the Project level of Runbook Automation (cloud and self-hosted). Both the System and Project level management interfaces allow users to create, edit, and delete Runners.
However, there are specific actions that can only take place in the System Level - such as assigning a Runner to multiple projects - or at the Project level - such as defining the Node Filter for dispatching to nodes.
System Level Runner Management
ACL Permissions for Managing Runners at System level
To manage a Runner at the System level, users will need the following ACL permissions:
---
by:
  group: my-user-group-name
description: Update Runners at System Level
for:
  runner:
  - allow:
    - update
    - delete
    - read
context:
  application: rundeck

---
by:
  group: my-user-group-name
description: Write Access to Runner Feature at System Level
for:
  resource:
  - allow:
    - read
    - admin
    equals:
      kind: runner
context:
  application: rundeck
- Change
my-user-group-namein the above ACL policy to the name of the user group that needs to have these permissions.
At the System level, in addition to creating, editing, and deleting Runners, users can also assign Runners to Projects.
To access the System level Runner management interface, navigate to the System menu and select Runner Management:
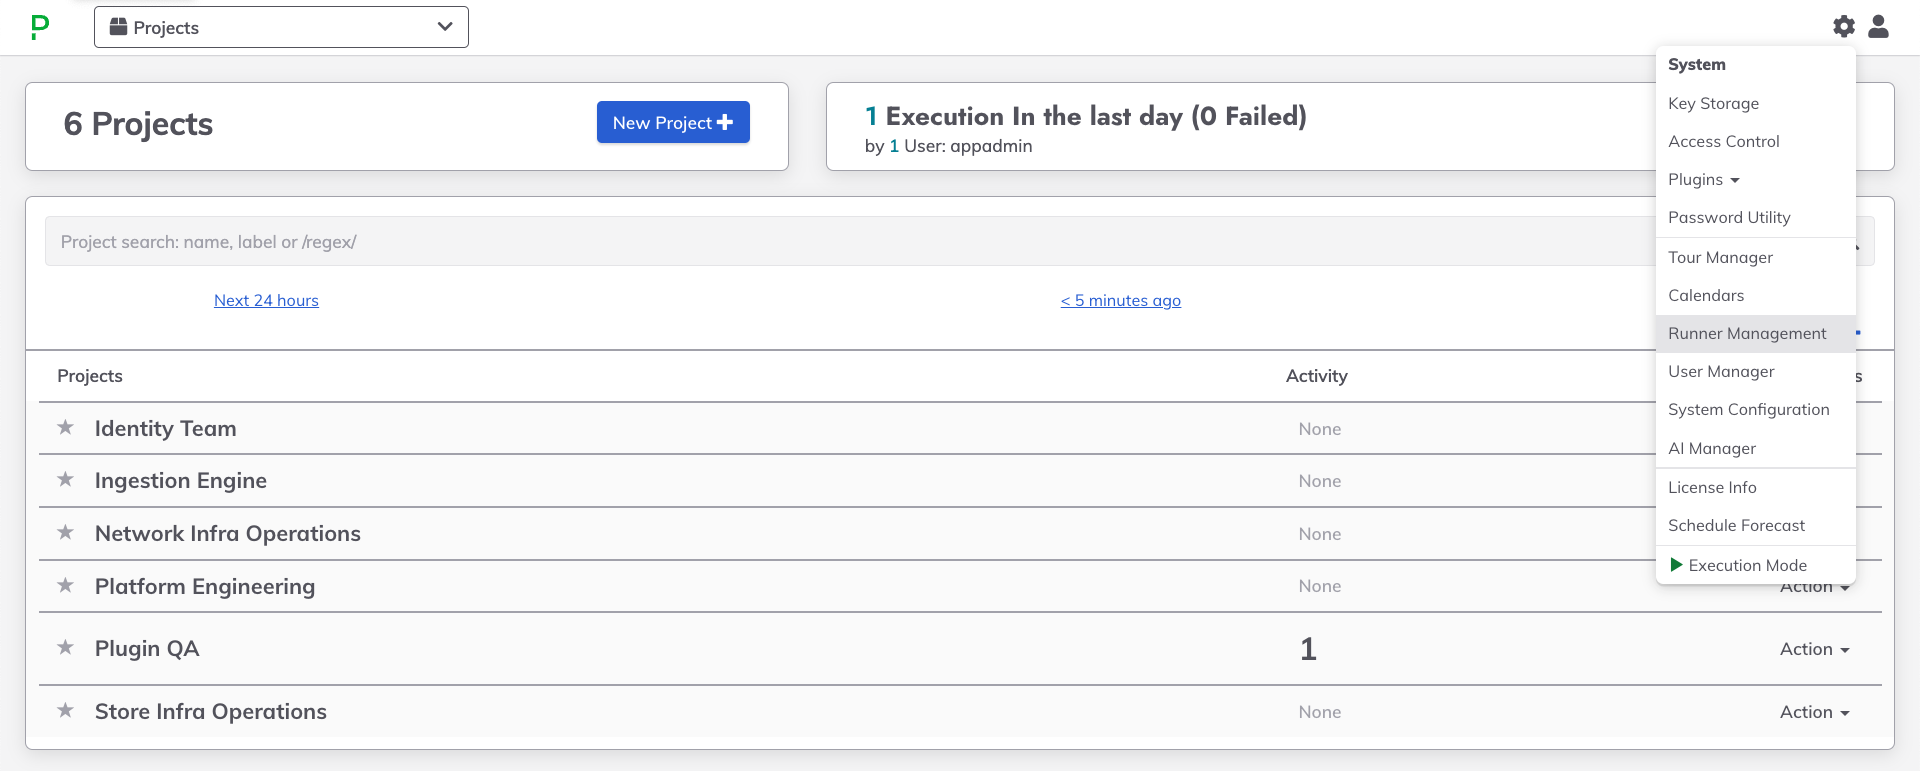
The Runner Management interface will display a list of all Runners in the system:
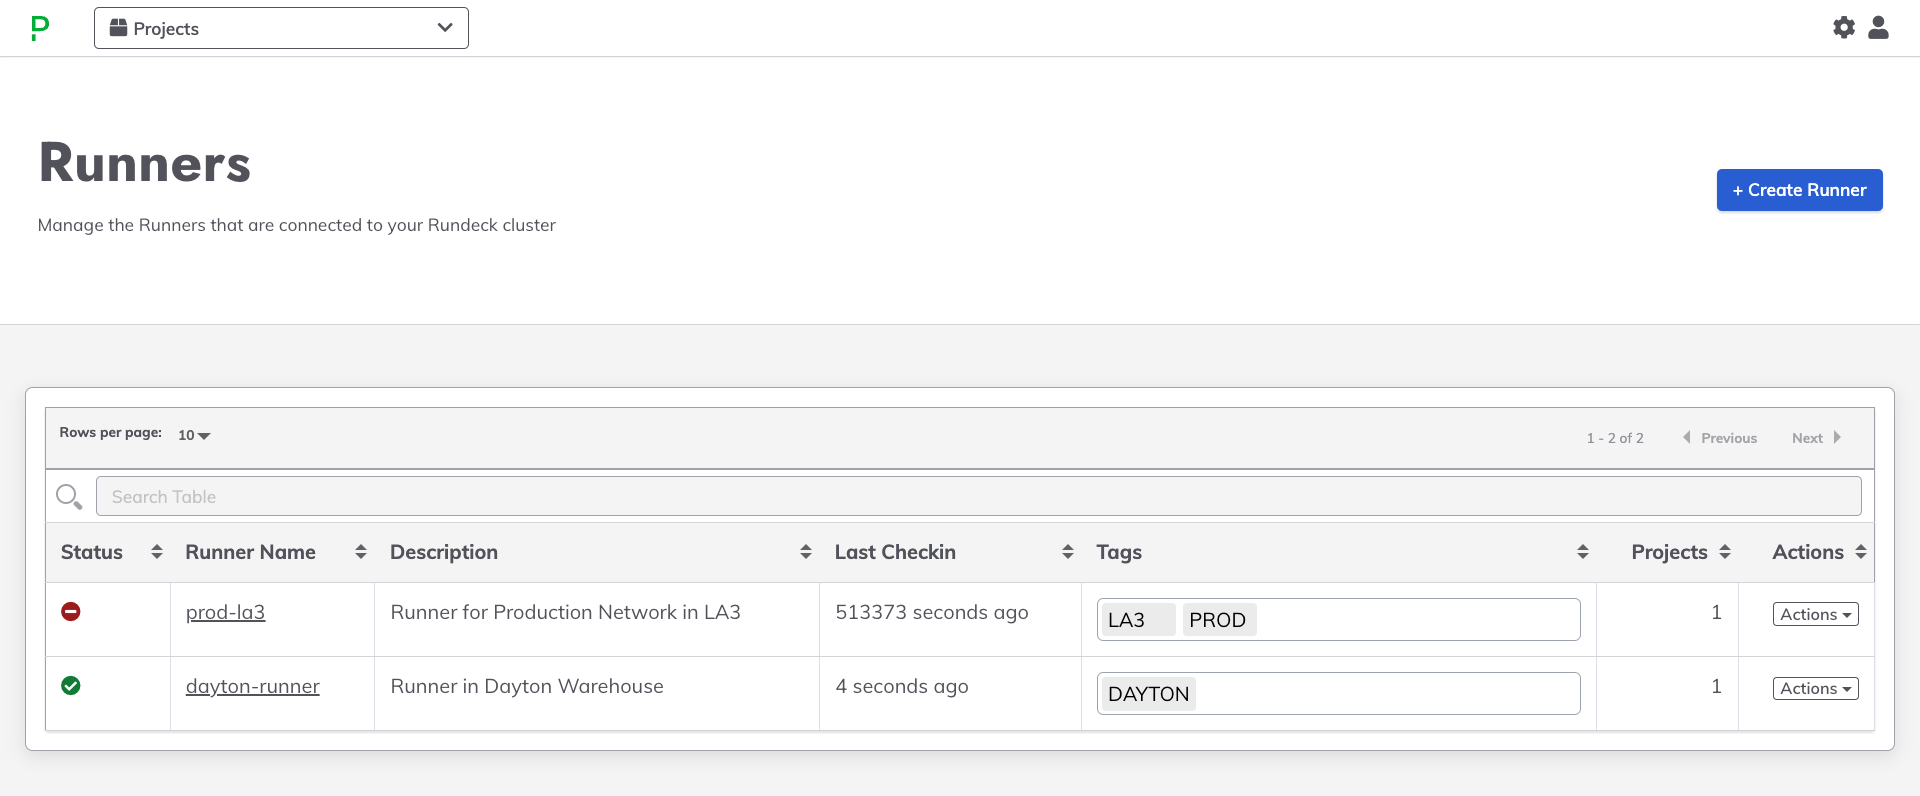
From this interface, users can:
- Create a new Runner. For detailed steps, see Creating a Runner.
- Edit a Runner's Tags.
- Assigning Runners to Projects.
- Manage a Runner's Replicas.
Assigning Runners to Projects
To assign a Runner to a project, follow these steps:
- From the System level Runner management interface, click on the name of the Runner.
- In the Project Assignments section, click on the Add Projects button.

- From the popup, select the Projects that should be able to use this Runner
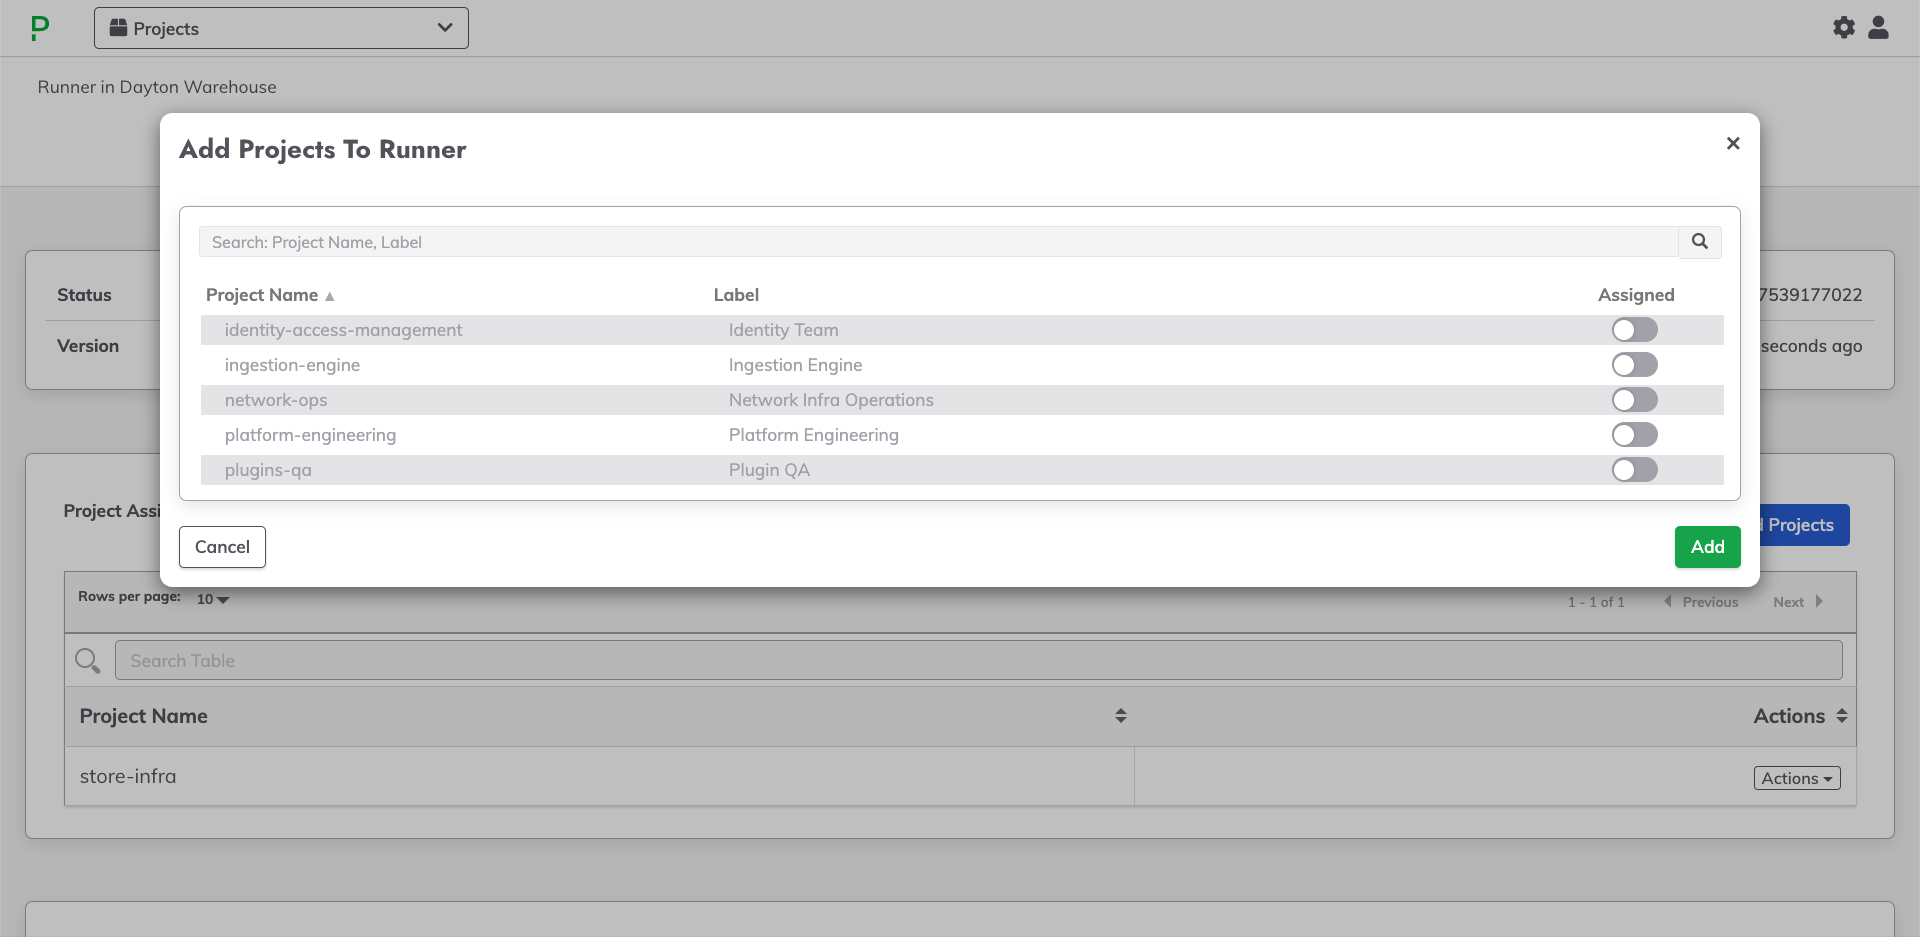
- Click Add
The Runner can now be used within the designated projects for various tasks such as job execution, node discovery, and secrets-management integration.
Managing Runners within a Project
ACL Permissions for Creating Runners at Project level
To create a Runner within a Project, users will need the following ACL permissions:
---
by:
  group: my-user-group-name
description: Manage Existing Runners within Project
for:
  runner:
  - allow:
    - read
    - update
    - delete
context:
  project: my-project-name

---
by:
  group: my-user-group-name
description: Write access to Runners at the Project Level
for:
  resource:
  - allow:
    - read
    - admin
    equals:
      kind: runner
context:
  project: my-project-name
- Change
my-user-group-namein the above ACL policy to the name of the user group that needs to have these permissions.
At the Project level, users can create, edit, and delete Runners for that specific Project. However, Runners created at the Project level are only available for use within that Project and cannot be used in other Projects.
To access the Project level Runner management interface, navigate to a specific Project and then select Runner Management from the left navbar.
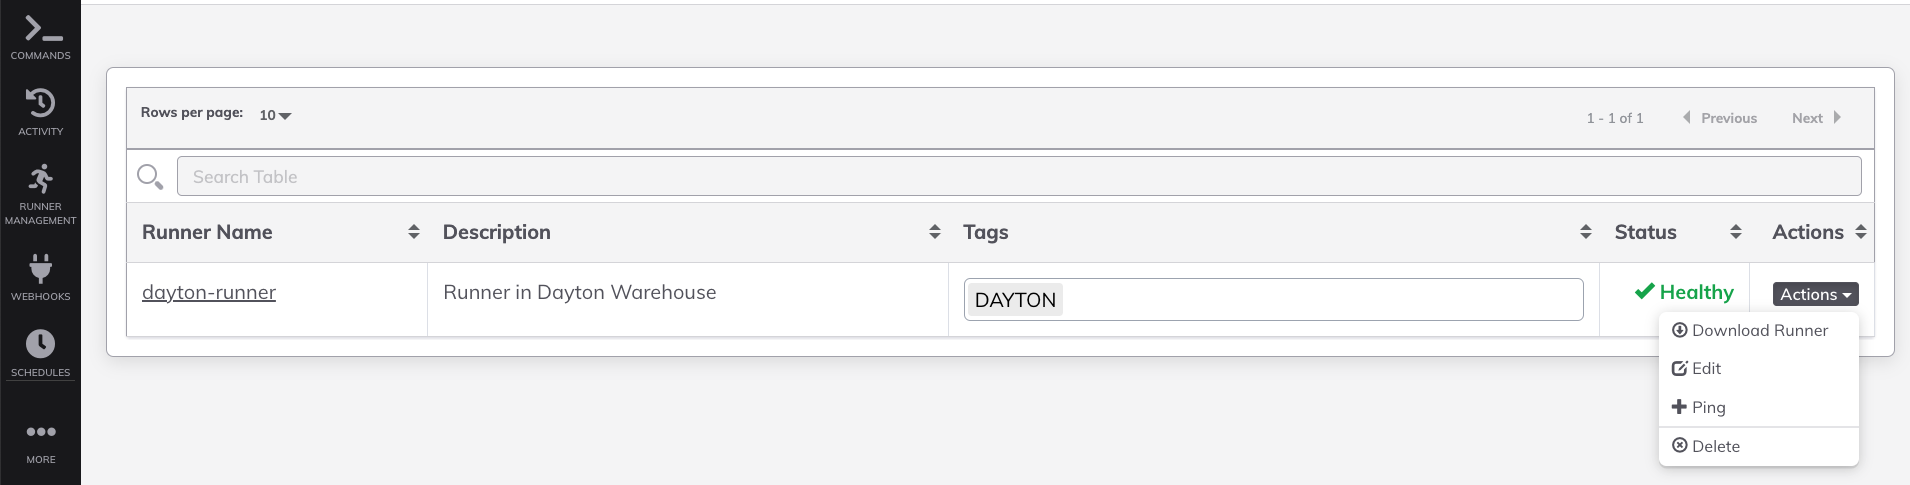
The Runner Management interface will display a list of all Runners in the Project:
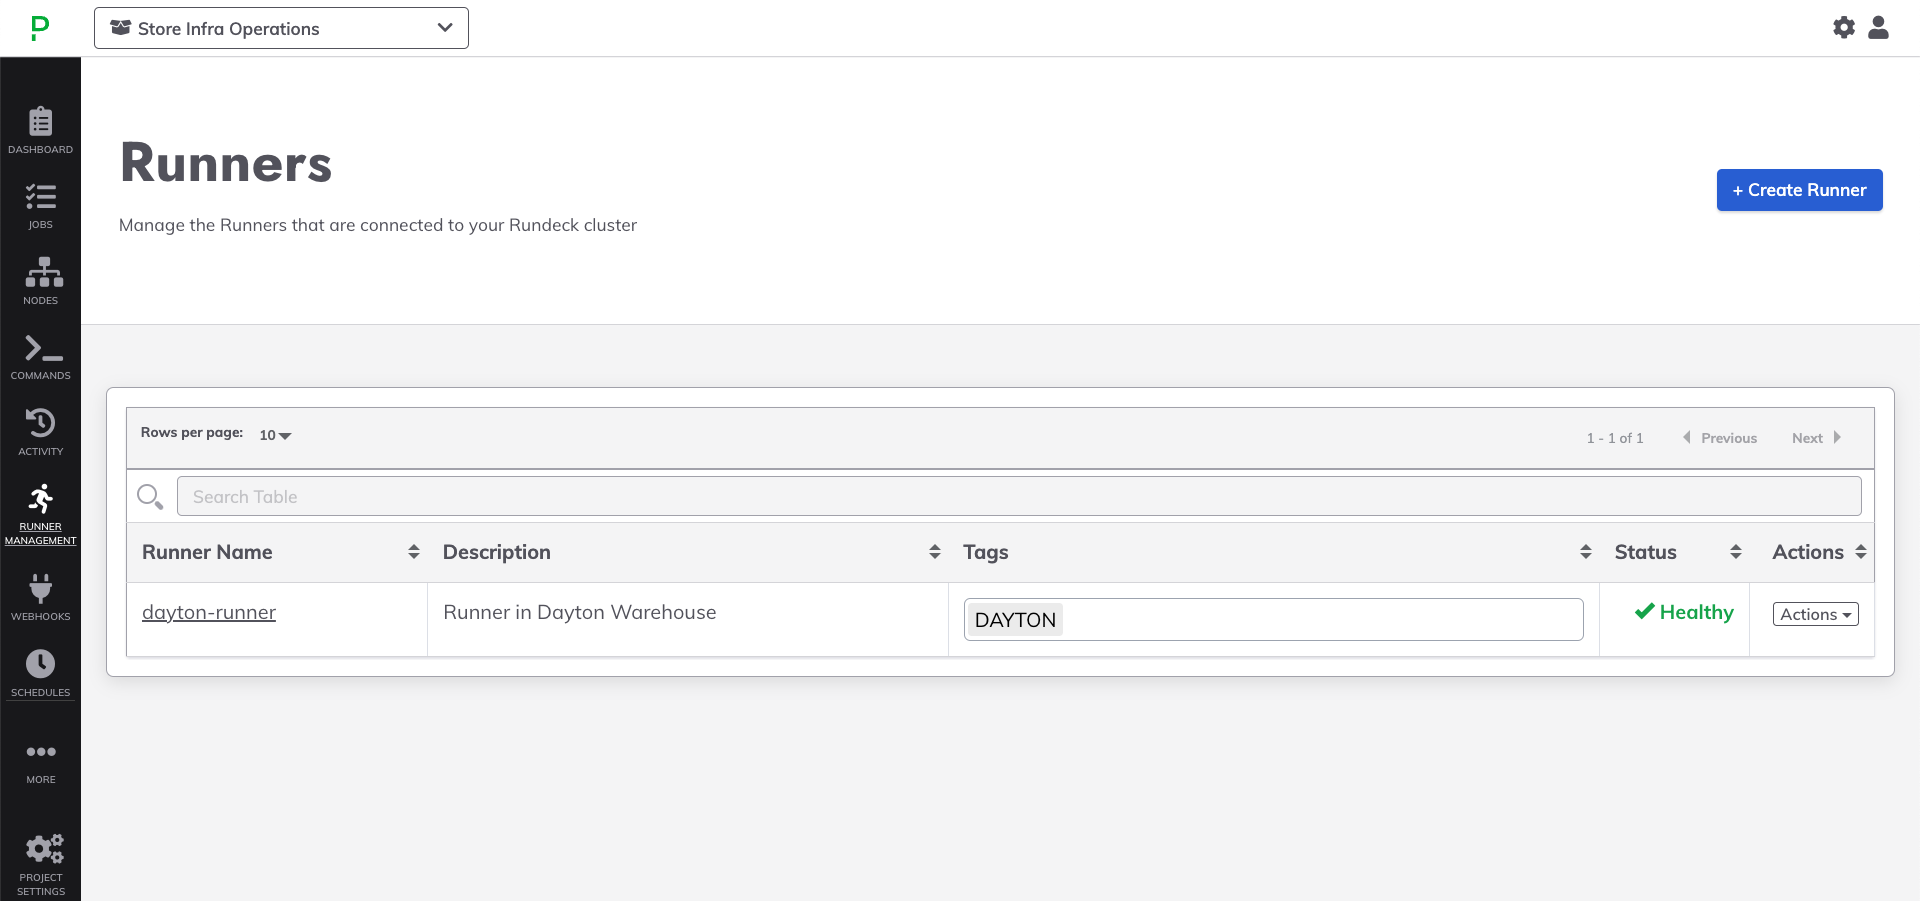
From this interface, users can:
- Create a new Runner. For detailed steps, see Creating a Runner.
- Modify a Runner's Node Dispatch Settings.
- Edit a Runner's Tags.
- Remove a Runner from a Project.
Removing a Runner from a Project
To remove a Runner from a Project, follow these steps:
- From the Project level Runner management interface, click on the Actions dropdown and select Remove from project.
- From the confirmation popup, select Ok.
In order to remove a Runner from a Project, the user must have the following ACL permission:
by:
  group: my-user-group-name
description: Allow [delete] for runner
for:
  runner:
  - allow:
    - delete
context:
  project: my-project-name
Upgrading from Earlier Self Hosted product versions
If using the self-hosted product and upgrading a version earlier than 5.3.0, the AppAdmin ACL policy stored on the local filesystem may need to be updated.
The following permissions must be added to it in order to manage Runners at the Project level:
runner:
  - allow: '*' # allow read/write/delete for all Runners
Therefore, the AppAdmin ACL Policy should look like this:
description: Admin, all access.
context:
  project: '.*' # all projects
for:
  resource:
    - allow: '*' # allow read/create all kinds
  adhoc:
    - allow: '*' # allow read/running/killing adhoc jobs
  job:
    - allow: '*' # allow read/write/delete/run/kill of all jobs
  node:
    - allow: '*' # allow read/run for all nodes
  runner:
    - allow: '*' # allow read/write/delete for all Runners
by:
  group: admin
---
description: Admin, all access.
context:
  application: 'rundeck'
for:
  resource:
    - allow: '*' # allow create of projects
  project:
    - allow: '*' # allow view/admin of all projects
  project_acl:
    - allow: '*' # allow admin of all project-level ACL policies
  storage:
    - allow: '*' # allow read/create/update/delete for all /keys/* storage content
by:
  group: admin
Changing Runners from Single to Multiple Projects
When a Runner is assigned to a single Project, then users within a Project and with the appropriate permissions can make any changes to the Runner from the Project level interface. This includes the ability to:
- Edit the Runner's Name
- Edit the Runner's Tags
- Delete the Runner
- Regenerate Credentials
However, when a Runner is assigned to multiple Projects, then users within Projects can only remove the Runner from their Project. They cannot make other changes to the Runner.

This is because when a Runner spans multiple Projects it is considered a shared resource.
Runner Tags
Runner Tags are used to select one or more Runners for specific operations - such as for Job execution when using Manual Runner Dispatch Configuration or when using Runners for Node Source plugins.
Tag selection within the Runner Selector uses and logic to define the inclusive set of Runners. For example, if a Job is configured to run on Runners with the tags LINUX and DEV, then only Runners that have both tags will be listed as usable for the Job.
Editing Runner Details
Rundeck provides an improved single-screen inline editing experience for managing Runner information. Instead of navigating to a separate edit page, you can now edit Runner details directly on the Runner's detail page within the Basic Information tab.
Accessing Edit Mode
To edit a Runner:
- Navigate to the Runner Management page (system or project level)
- Click the Actions dropdown next to the Runner you want to edit
- Select Edit Runner
The Runner's detail page opens with the Basic Information tab in edit mode, allowing you to modify Runner properties without leaving the page.
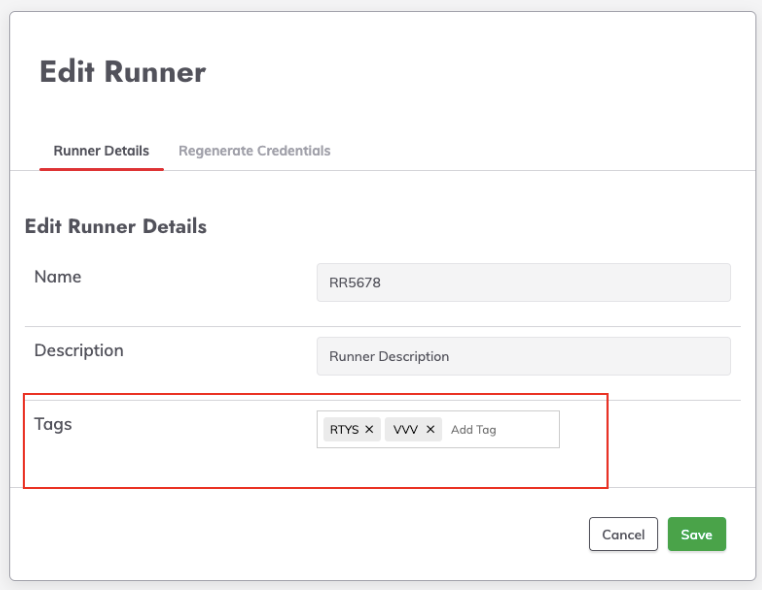
Editable Fields
In edit mode, you can modify the following Runner properties:
- Name: The Runner's display name (required)
- Description: Additional information about the Runner's purpose
- Tags: Labels for organizing Runners and controlling job execution targeting
Validation
The edit form includes built-in validation:
- Runner Name is Required: You cannot save a Runner without a name
- Empty or whitespace-only names will display a clear error message
- Invalid inputs are caught before submission to prevent errors
Saving Changes
To save your edits:
- Make your desired changes to the Runner details
- Click Save to commit the changes
Upon successful save:
- You'll see a success notification: "Runner updated successfully"
- The detail page returns to view mode with your updated Runner data
- Changes are immediately reflected across the system
Canceling Edits
To discard your changes:
- Click Cancel in the edit form
- All changes are discarded
- The detail page returns to view mode with the original Runner data
Focused Editing Experience
When in edit mode:
- Non-essential tabs (Node Dispatch, Replicas) are hidden to maintain focus on editing
- Only the Basic Information tab is visible with the edit form
- The Regenerate Credentials button is hidden during editing (only available in view mode)
- All tabs reappear when you cancel or save
Note: The Node Dispatch tab settings are managed and saved independently from the basic Runner information.
To edit these settings:
- View the Runner detail page in View Mode (not Edit Mode)
- Open the Node Dispatch tab
- Adjust the settings as needed
- Use the Node Dispatch tab's save action to persist those changes without affecting the other Runner fields
Regenerating Runner Credentials
Credentials may need to be regenerated if they are compromised or lost. The Regenerate Credentials functionality is only available when viewing a Runner's detail page in view mode (not during edit mode).
When Regenerate is Available
The Regenerate Credentials button visibility depends on Runner type and replica configuration:
View Mode Requirement
- The Regenerate Credentials button is only visible in view mode (not shown during edit mode to maintain focus on basic information editing)
When Replicas Feature is Enabled
- Ephemeral Runners: Can regenerate credentials (designed for dynamic environments)
- Manual Runners: Cannot regenerate credentials (use "Add Replica" workflow instead)
When Replicas Feature is Disabled (Legacy Mode)
- All Runner types can regenerate credentials for backward compatibility
Security Note
Important
Regenerating credentials will immediately invalidate the current credentials. Any active Runner using the old credentials will no longer be able to connect to Rundeck until you update the Runner with the new credentials and restart it.
How to Regenerate Credentials
- Navigate to the Runner's detail page (click on a Runner name from the table)
- Ensure you are in View Mode (not Edit Mode) - the Regenerate Credentials button is only visible in view mode
- Scroll to the Regenerate Credentials section
- Review the warning message about credential invalidation
- Click Regenerate Credentials
- Installation instructions will appear with:
- New Runner Token
- New Download Token
- Updated installation commands for your platform
Note: The "Download Runner" option has been removed from the actions dropdown. Installation instructions are now displayed directly after clicking Regenerate Credentials.
Installing Regenerated Credentials
After regenerating credentials:
- Stop the running Runner service on your Runner machine
- Update the Runner configuration file with the new token:
RUNDECK_RUNNER_TOKEN=your-new-token-value
- Restart the Runner service
- Verify the Runner reconnects and shows "Healthy" status
For manual Runners with replicas enabled, use the Add Replica workflow to create new Runner instances rather than regenerating credentials.