
Creating a Rundeck Job
Creating a Rundeck Job
This article brings all of the Job pieces together to construct a single Job.
Create a basic Rundeck Job
To create a Job in Rundeck (or the commercial Runbook Automation products), follow these steps:
- Create a new Project by clicking on the "Create New Project" button if you have not already done so. Otherwise, select a Project from the Project list and skip to step 4.
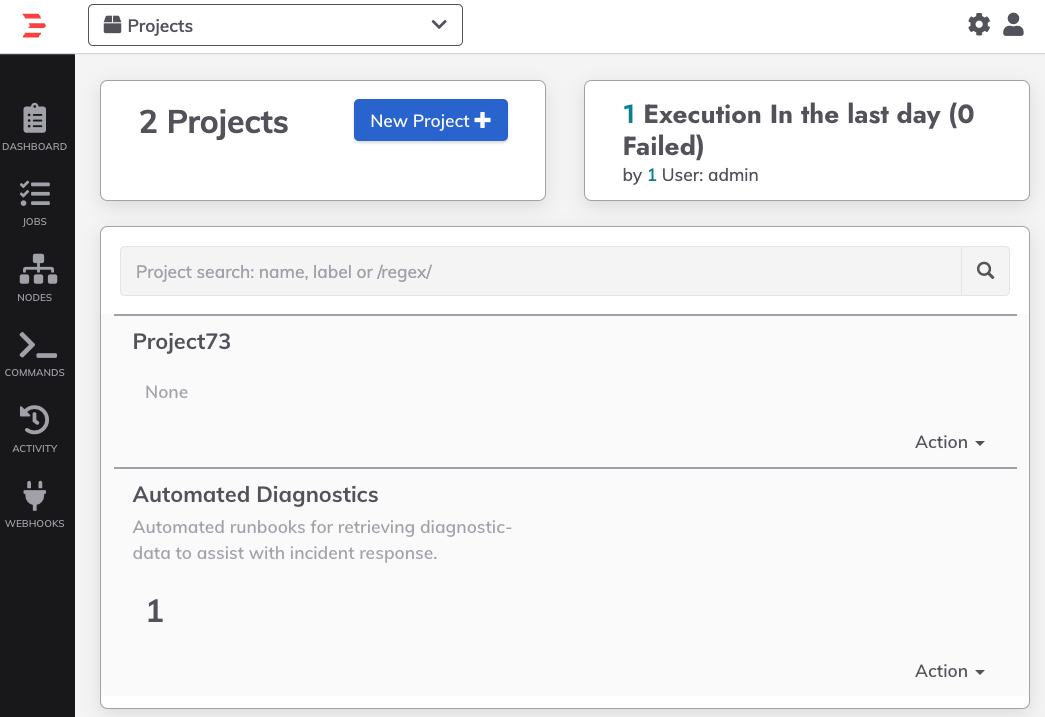
- Give the Project a name and a short description ("Project Name" and "Description” fields).

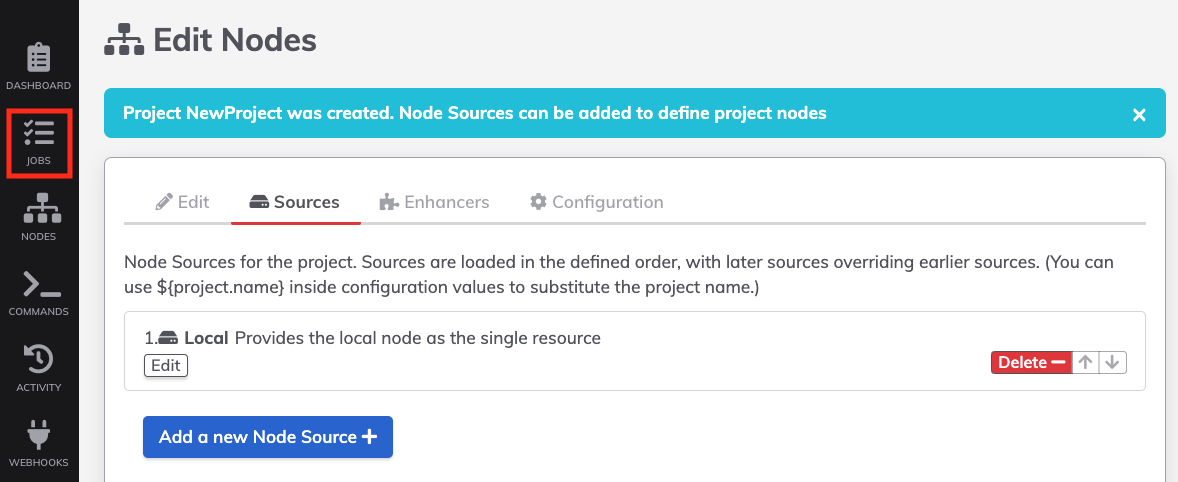
- For a new Project, the Edit Nodes page is displayed first.
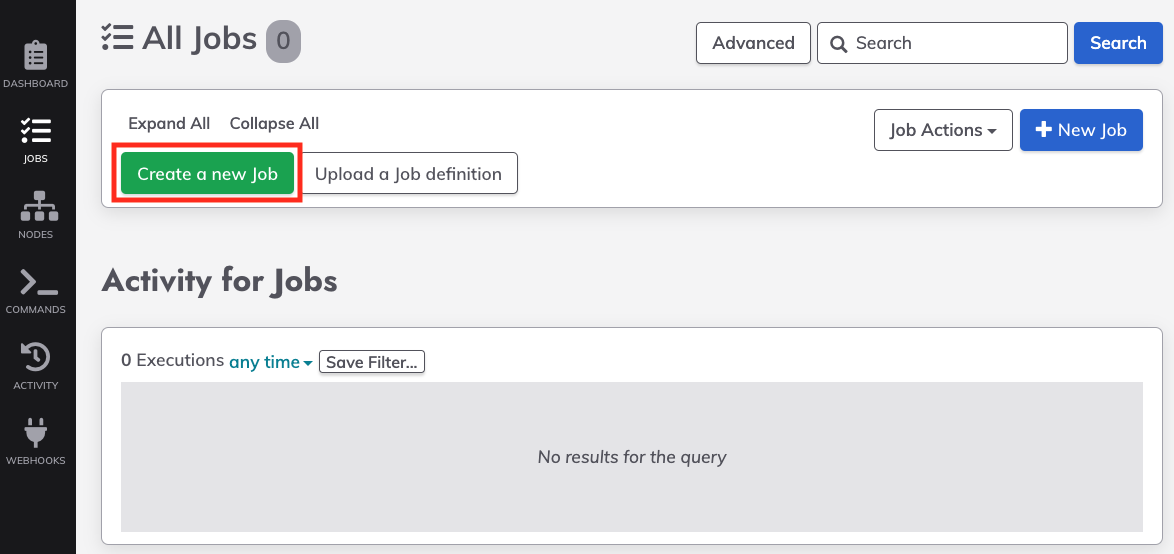
- Click on the Jobs page (left panel) and then click on the green "Create a new Job" button.
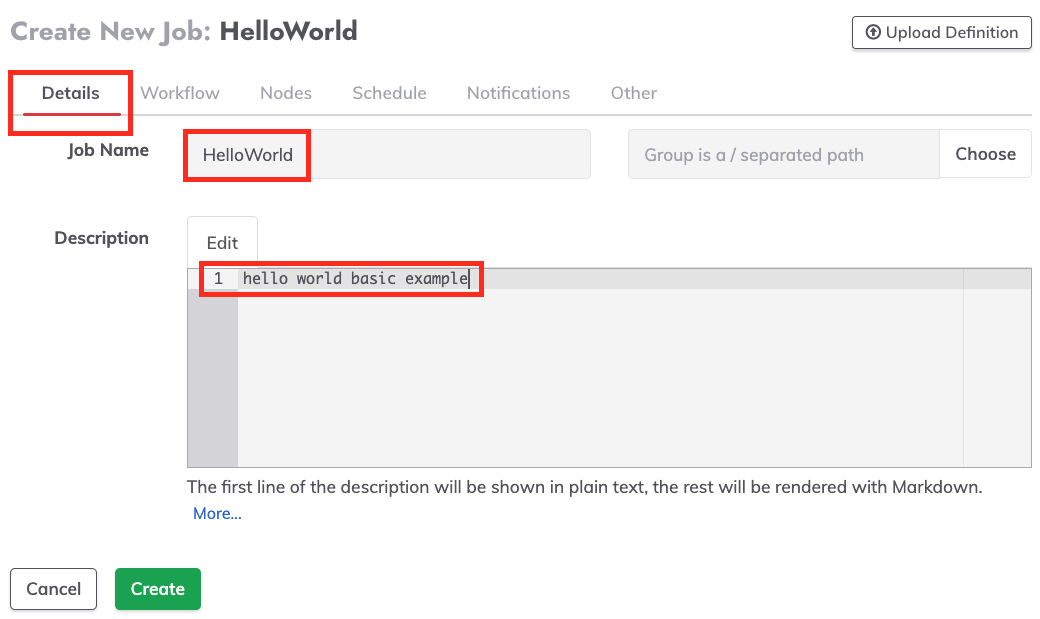
- Provide the Job with a “Name” and an optional “Description.”
- Click on the Workflow tab, then on the "Add an option" button ("Options" section).
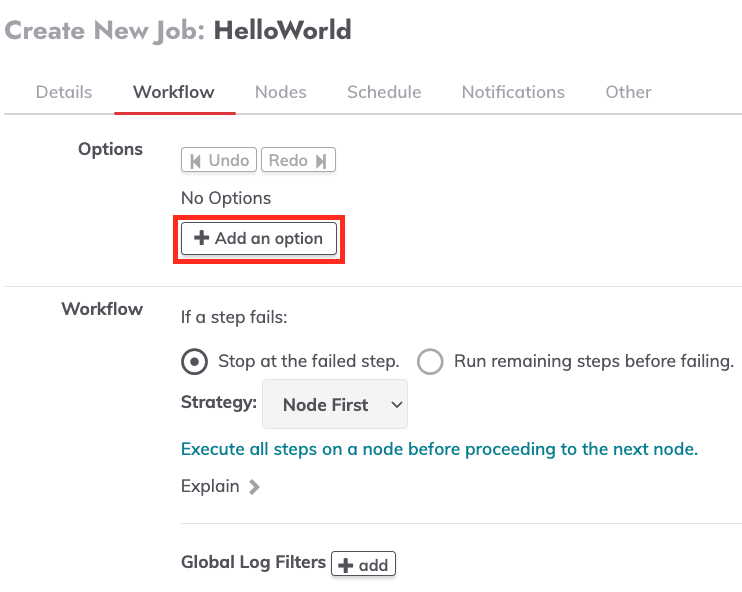
- Select "Text" as the "Option Type" and give it a name ("opt1" in the example). Then enter a string as a "Default Value".

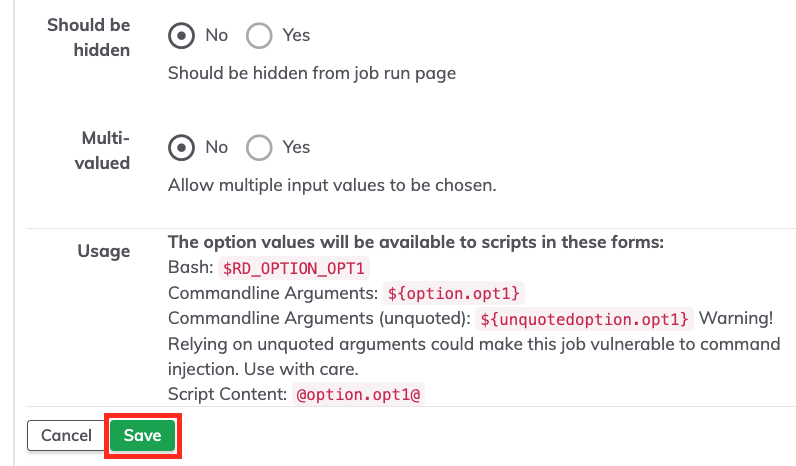
- Scroll down and click Save for the option.
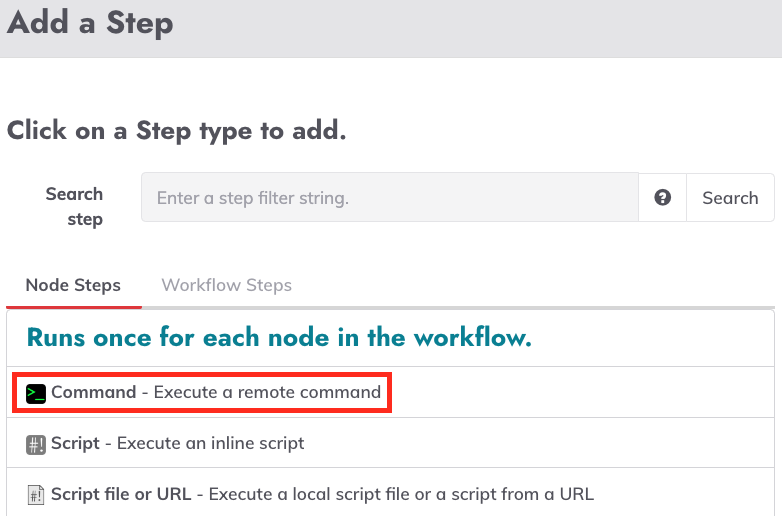
- Scroll down and add a new step, a "Command” step in the "Node Steps" tab.
Workflow Step vs Node Step
Node steps are designed to be dispatched to one or more nodes based on a filter defined in the Nodes section. An example of a node step is a single command or an inline script to be executed on each targeted node.
Workflow steps don't operate in a node context. Instead, these steps run on the local Rundeck server and run only once in a workflow. For example, the "Refresh Project Nodes" workflow step refreshes the Rundeck node cache in case of any change.
10. Add the following command:
echo "option value is: ${option.opt1}"
This will print the option default value as part of the Job.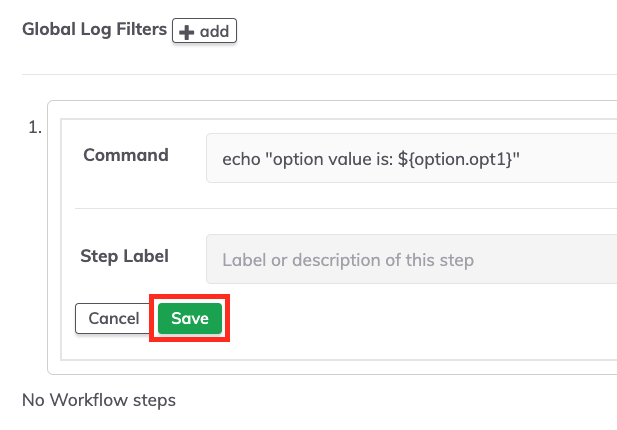
11. Click on the Nodes Section then the "Dispatch to Nodes" radio button, and put in .* in the Node Filter box. If there is a valid Model Source configured, all available nodes will be listed in the "Matched Nodes" section. Otherwise, only the local host (Rundeck Server) will be displayed there.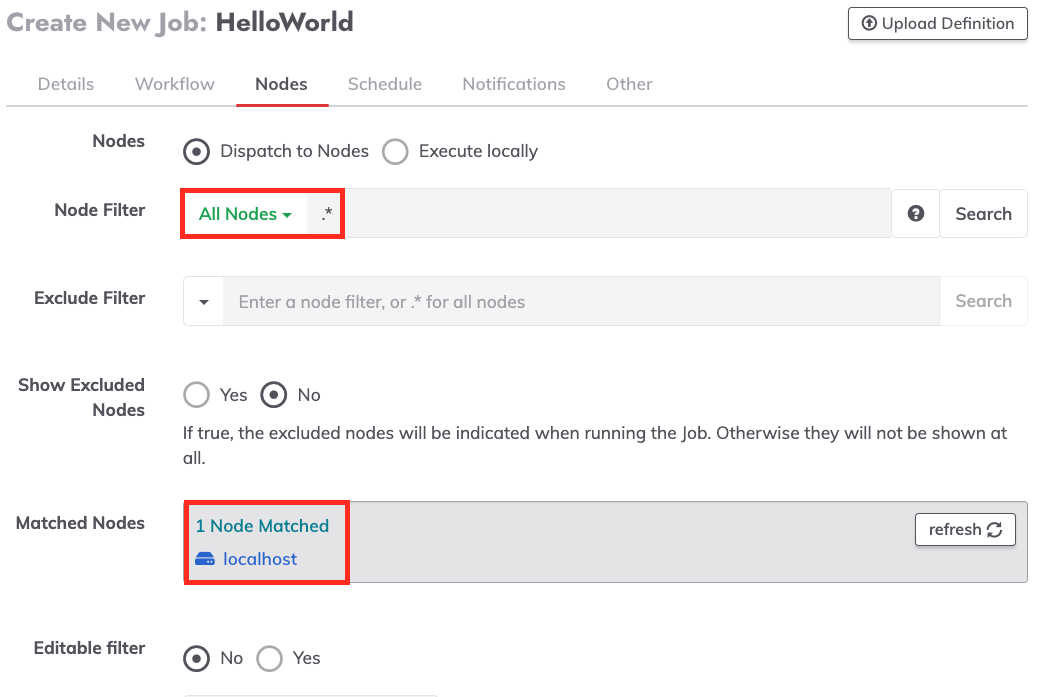
About Node Filters
Attributes and values entered here will be used to compose the filtered set of nodes that will targeted by the Job. Any node attributes can be used for this purpose, including a combination of attributes and regular expressions if needed.
With the remote nodes well configured it's possible to define the filter to dispatch the Job across Remote nodes.
12. To Schedule the Job every 30 seconds, click on the Schedule tab and select "Yes" on the "Schedule to run repeatedly?" section. Now click on the Crontab tab and put the following:
0/30 * * ? * *
This will run the job every 30 seconds (0/30), on every minute (*), on every hour (*), on every day of the week (?), every month (*), every year (*).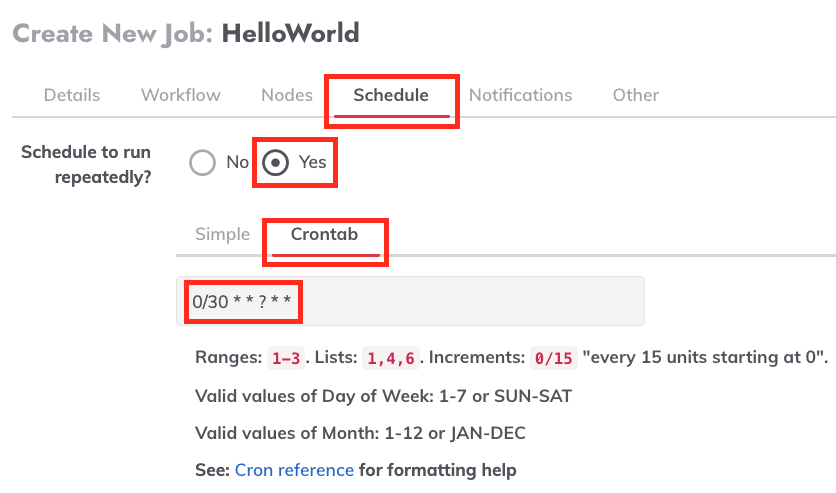
13. Click the green Create button to save the Job.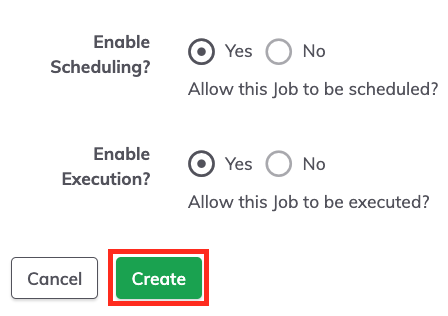
14. Click on the "Run Job Now" button to run this test job.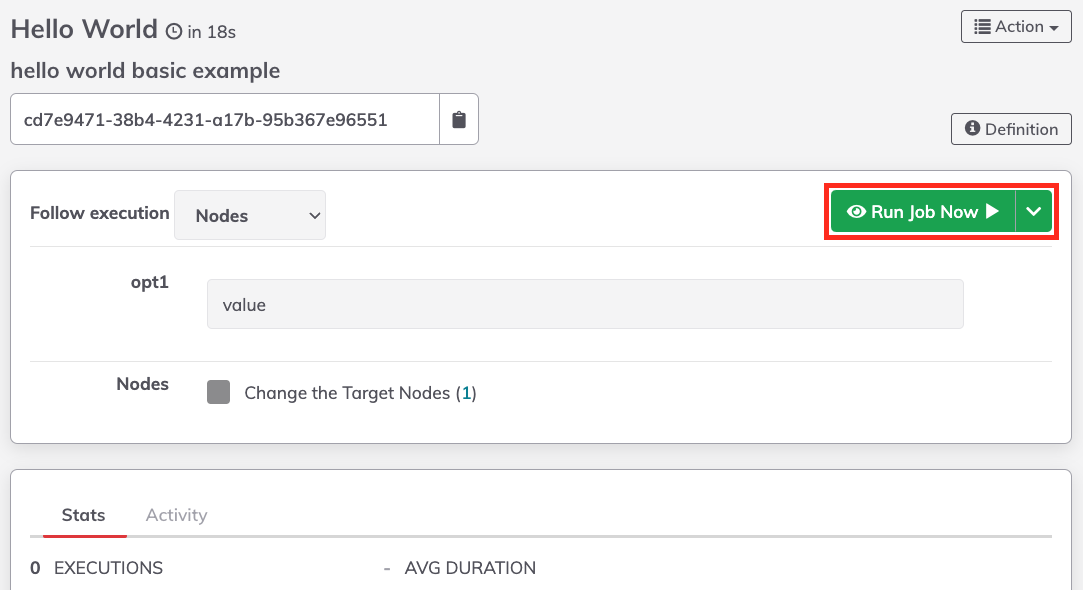
15. To see this activity (and all recent activities), go to the "Activity" page (left panel).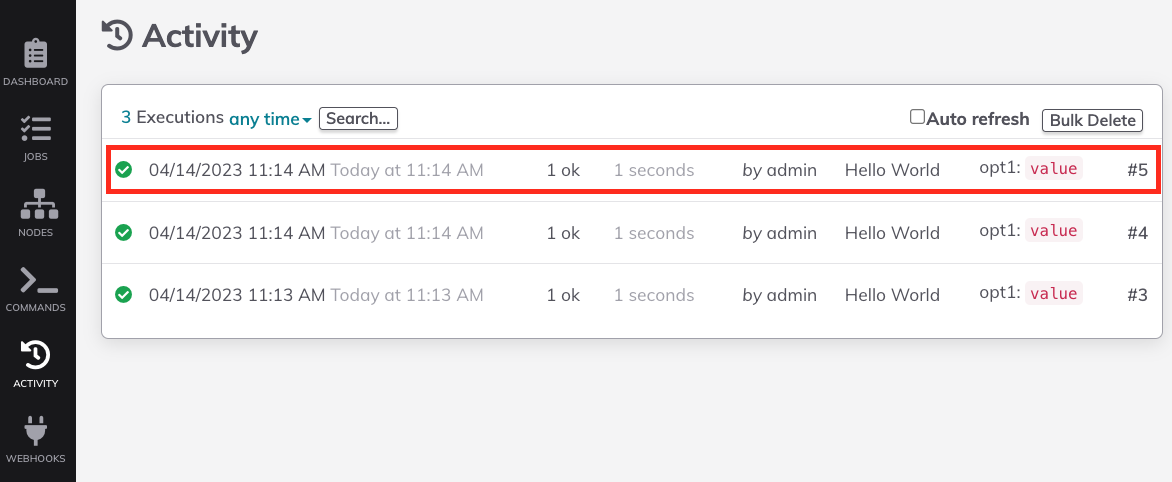
16. The result of any Job run is available by clicking on the specific execution.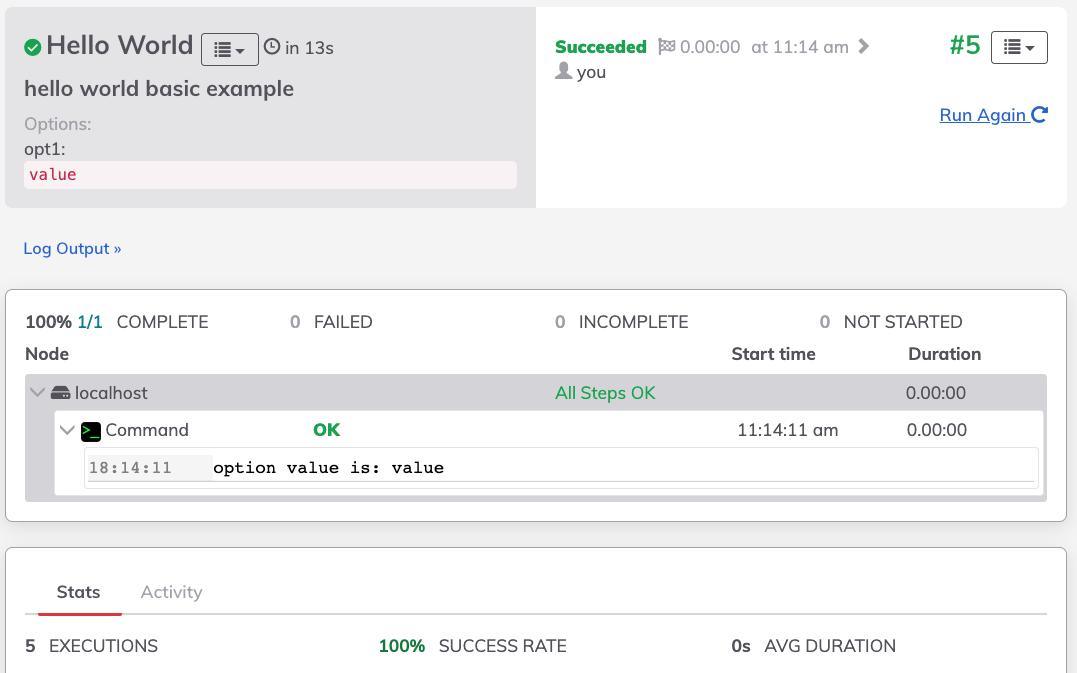
Add an example webhook Notification to the example Job
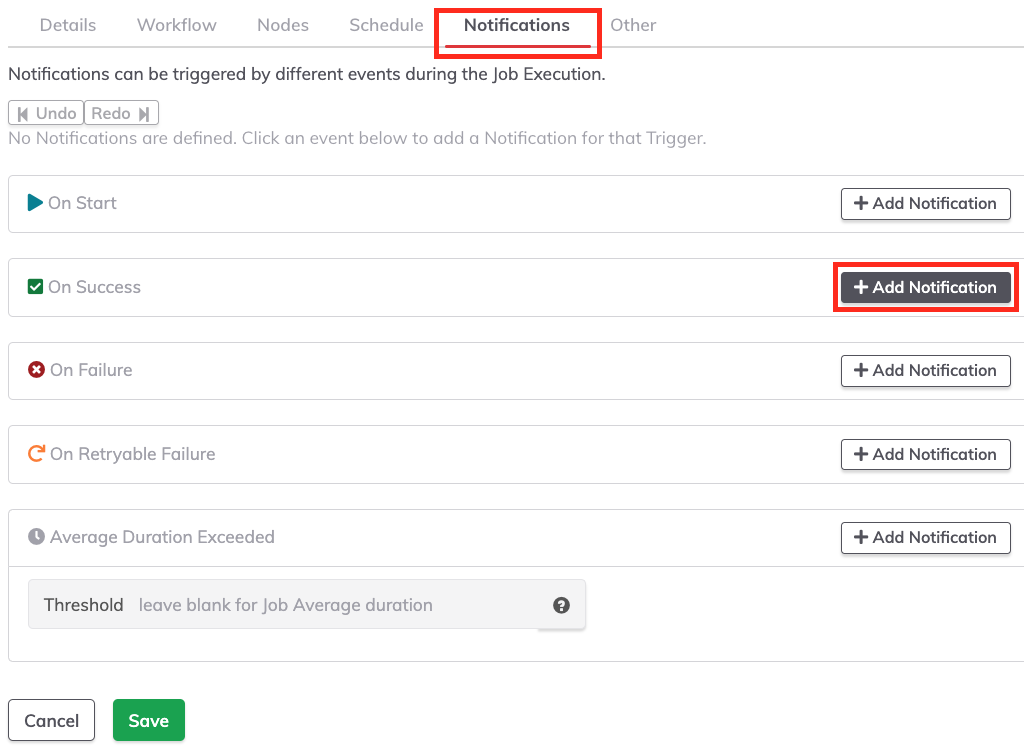
- Edit the Rundeck Job and go to the "Notifications" tab. Then in the "On Success" section, click the "Add Notification" button.
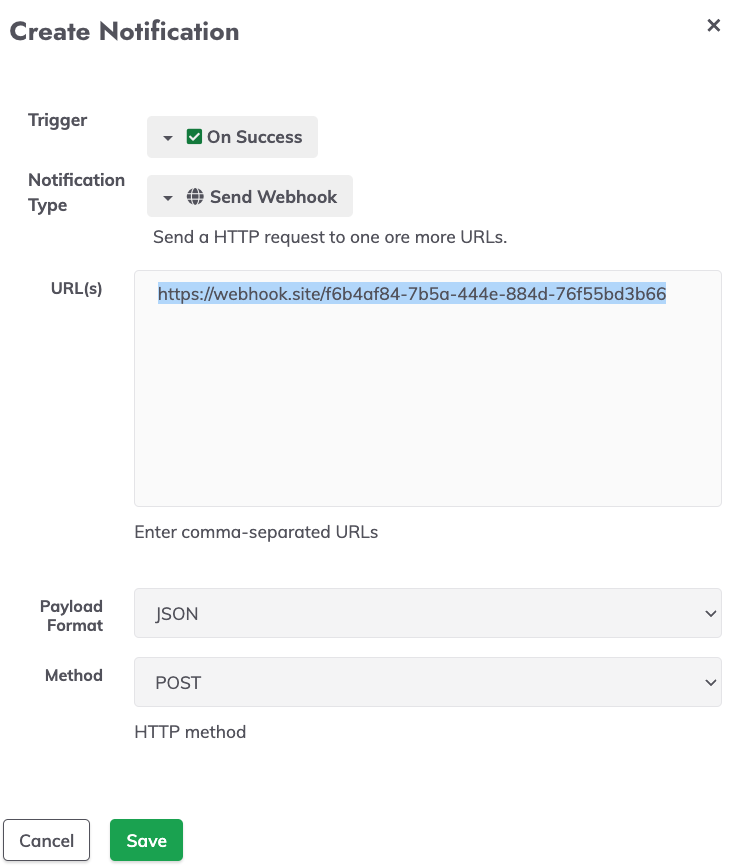
- Select "Send Webhook" in the "Notification Type" section. Then put the HTTP service URL to receive the data in the "URLs'' box. This example uses the webhook.site test URL. Access this website, to obtain an auto generated URL to receive any call. Set "POST" in the "Method" section and "JSON'' in the "Payload format" section.
Job Notifications
Notifications are messages, such as an email or HTTP service push. This is a common area for integration with other tools since a notification could go to another tool when a Job begins or when it fails. One or more notifications can be set for the notification events available.
Available Notifications scenarios
- Start: When the Job starts, all "start" notifications will be triggered.
- On Success: When the Job finishes executing, all "success" notifications will be triggered if the Job is successful.
- On Failure: All "failure" notifications will be triggered if the Job fails or is canceled.
- On Retryable Failure: all "failure" notifications that are retryable will be triggered if the Job fails.
- Average Duration Exceeded: Sends a notification when the specified duration threshold has been exceeded. If not specified, the Job Average duration will be used. (See below information for configuration options)
- Save the Notification and then save the Job.
- Run the Job. The web service that receives the notification will print the JSON Job result:
{
  "trigger": "success",
  "status": "succeeded",
  "executionId": 343,
  "execution": {
    "id": 343,
    "href": "http://localhost:4440/project/ProjectEXAMPLE/execution/show/343",
    "permalink": null,
    "status": "succeeded",
    "project": "ProjectEXAMPLE",
    "executionType": "user",
    "user": "admin",
    "date-started": {
      "unixtime": 1679053792192,
      "date": "2023-03-17T11:49:52Z"
    },
    "job": {
      "id": "ff9077ad-09ed-440e-a5eb-406bd552628",
      "averageDuration": 3019,
      "name": "HelloWorld",
      "group": "",
      "project": "ProjectEXAMPLE",
      "description": "HelloWorld Example Job.",
      "options": {
        "opt1": "myoption"
      },
      "href": "http://localhost:4440/api/43/job/ff9077ad-09ed-440e-a5eb-406bd552628",
      "permalink": "http://localhost:4440/project/ProjectEXAMPLE/job/show/ff9077ad-09ed-440e-a5eb-406bd552628"
    },
    "description": "echo \"option value is: ${option.opt1}\"",
    "argstring": "-opt1 myoption",
    "serverUUID": "1605e4c5-3bc7-4263-a145-ae9df2615a6"
  }
}
The Welcome Project
A good place to learn and practice Rundeck concepts is the Welcome Project, you can check it out many related concepts here.