
Installing on Windows
Installing on Windows
Prerequisites
Before proceeding to install Rundeck, check all system requirements to make sure that the server can run Rundeck, also, make sure that the Windows user has sufficient rights to install software.
Be sure to install the appropriate Java Software Development Kit per the requirements.
Installing Rundeck on Windows based systems and first run
Download the Rundeck WAR file and save it to a main working directory, e.g. C:\rundeck, you can download Community version or Enterprise. Set the Rundeck path environment variable, by typing the following command at a Powershell command prompt :
set RDECK_BASE=C:\rundeck
When Rundeck is started for the first time, it generates the configuration files and folders structure. Open a Powershell command prompt, go to c:\rundeck, and execute for Enterprise:
java -jar rundeckpro-enterprise-6.0.1-20260715.war
or this for the community edition:
java -jar rundeck-6.0.1-20260715.war
This step may take up to 1-2 minutes depending on system performance. When Rundeck is ready, it will be indicated in the Powershell window:
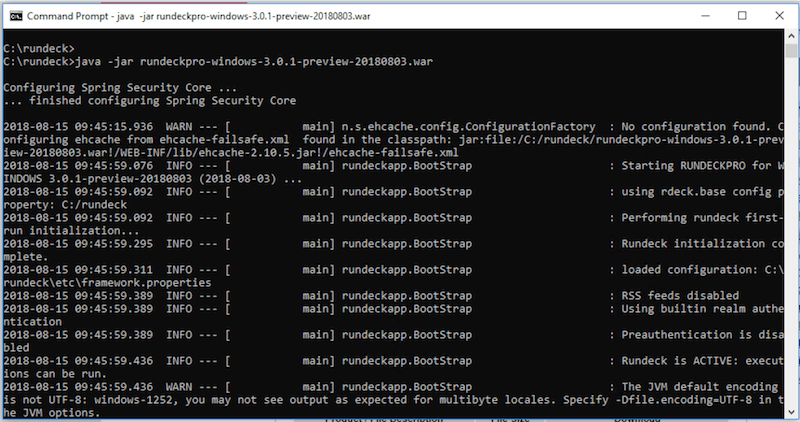
After generation is complete, stop the process with <Crtl+C> keys and continue with configuration.
Folder Structure
+---etc
|       admin.aclpolicy => Administrator access control policy defined with a [aclpolicy] document.
|       apitoken.aclpolicy => Default API ACL policies.
|       cli-log4j.properties => This file defines the logging configuration for the Commandline tools.
|       framework.properties => Configuration file used by shell tools and core Rundeck services.
|       preferences.properties
|       profile
|       profile.bat => Shell environment variables used by the shell tools.
|       project.properties =>Rundeck project configuration file when using Filsystem based project defintions.
+---libext => Plugin folder.
+---projects => Projects data (eg: resource files, project properties, etc)
+---server
|   +---config
|   |       jaas-loginmodule.conf
|   |       log4j.properties => This file defines the logging configuration for rundeck.
|   |       realm.properties => Property file user directory when PropertyFileLoginModule is used.
|   |       rundeck-config.properties => This is the primary Rundeck webapp configuration file. Defines default loglevel, datasource configuration, and GUI customization.
|   |       ssl.properties => To enable SSL access to rundeck.
|   +---data => H2 default database
|   |       grailsdb.mv.db
|   +---lib
|   |       rundeck-core-3.0.X.jar => rundeck core
|   +---logs => Rundeck logging
|   |       rundeck.access.log => access to rundeck.
|   |       rundeck.api.log => API calls
|   |       rundeck.audit.log => Authorization messages pertaining to aclpolicy.
|   |       rundeck.executions.log => Logs of all executions.
|   |       rundeck.jobs.log => Log of all job definition changes.
|   |       rundeck.log=> General Rundeck application messages.
|   |       rundeck.options.log=> Logs remote HTTP requests for Options JSON data.
|   |       rundeck.project.log
|   |       rundeck.storage.log=> Standard input and output generated during runtime.
|   +---sbin
|   \---work
+---tools=> rd-acl client (to manage ACL validation).
\---var   => Executions Logs folder.
Configuring Rundeck
After installing Rundeck, the first run and know the files/folders structure, you need to configure it. Basically publish Rundeck to be available on the network and generate a .bat script to launch Rundeck and use some parameters depending on our needs.
To publish Rundeck to be available in your network, open C:\rundeck\server\config\rundeck-config.properties with your favorite text editor and change this line:
server.address=yourhostname
to:
server.address=0.0.0.0
Create a file called start_rundeck.bat with your favorite text editor with the contents shown below. Make sure the .war filename matches the war file you downloaded:
Runbook Automation version:
set CURDIR=%~dp0
call %CURDIR%etc\profile.bat
java %RDECK_CLI_OPTS% %RDECK_SSL_OPTS% -jar rundeckpro-enterprise-6.0.1-20260715.war --skipinstall -d  >> %CURDIR%\var\logs\service.log  2>&1
for community:
set CURDIR=%~dp0
call %CURDIR%etc\profile.bat
java %RDECK_CLI_OPTS% %RDECK_SSL_OPTS% -jar rundeck-6.0.1-20260715.war --skipinstall -d  >> %CURDIR%\var\logs\service.log  2>&1
To launch, type start_rundeck.bat at the command prompt. To stop Rundeck, you can press <Crtl+C> keys.
Login to the GUI
By default, Rundeck will be available on TCP port 4440. To access, go to the following URL on your web browser: http://servername:4440 (when "servername" is the name of your Windows server).

The default username and password is "admin".
Run Rundeck as a Service
This section will install Rundeck as a Windows Service so it runs in the background even when a user is not logged in.
Prerequisites
The JAVA_HOME system environment variable must be set (See How to set up JAVA_HOME section)
Service Setup
- Download Apache Commons Daemon zip. These binaries wraps Java applications as a Windows service. More info here.
- Download Rundeck.
- Unzip the apache-commons-daemon file and place the files including the WAR package in a new created folder (the Rundeck base folder i.e C:\rundeck).
- Rename WAR package to rundeck.war, rename prunsrv.exe to the service name i.e rundeck.exe, and prunmgr.exe to rundeckw.exe (the "w" character is required).
- Open a CMD prompt and paste these commands (Administrator user is required to install a service)
java mode) rundeck.exe //IS/rundeck ^
--DisplayName=Rundeck/ProcessAutomation ^
--LogLevel=Debug ^
--LogPath=C:\rundeck ^
--ServiceUser=LocalSystem ^
--Startup=auto ^
--StartMode=java ^
--StartPath=C:\rundeck ^
--StartParams=-jar#rundeck.war ^
--StopMode=exe ^
--StopPath=C:\rundeck ^
--StopImage=TASKKILL.exe ^
--StopTimeout=30 ^
--PidFile=rundeck.pid ^
--JvmMs=1024 --JvmMx=4096 ^
--StdOutput=C:\rundeck\var\logs\service.log ^
--StdError=C:\rundeck\var\logs\service.log ^
--JvmOptions=-server#-Drdeck.base=C:\rundeck#-Drundeck.config.location=C:\rundeck\server\config\rundeck-config.properties#-Drundeck.server.logDir=C:\rundeck\server\logs
With --StartMode=java, procrun launches Rundeck as a separate java.exe process and does not pipe that process's output into --StdOutput/--StdError, so service.log can stay empty. Use this jvm-mode variant instead: procrun loads the JVM in-process and captures Rundeck's System.out/System.err directly into the log file.
  rundeck.exe //IS//rundeck ^
  --DisplayName=Rundeck/ProcessAutomation ^
  --LogLevel=Debug ^
  --LogPath=C:\rundeck ^
  --LogPrefix=commons-daemon ^
  --ServiceUser=LocalSystem ^
  --Startup=auto ^
  --Jvm="%JAVA_HOME%\bin\server\jvm.dll" ^
  --LibraryPath="%JAVA_HOME%\bin" ^
  --StartMode=jvm ^
  --Classpath=C:\rundeck\rundeck.war ^
  --StartClass=org.springframework.boot.loader.WarLauncher ^
  --StartMethod=main ^
  --StartPath=C:\rundeck ^
  --StopMode=jvm ^
  --StopClass=java.lang.System ^
  --StopMethod=exit ^
  --StopParams=0 ^
  --StopTimeout=30 ^
  --PidFile=rundeck.pid ^
  --JvmMs=1024 ^
  --JvmMx=2048 ^
  --StdOutput=C:\rundeck\service.log ^
  --StdError=C:\rundeck\service.log ^
  --JvmOptions=-Drdeck.base=C:\rundeck#-Drundeck.config.location=C:\rundeck\server\config\rundeck-config.properties#-Drundeck.server.logDir=C:\rundeck\server\logs#--add-opens=java.base/java.lang=ALL-UNNAMED#--add-opens=java.base/java.util=ALL-UNNAMED#--add-opens=java.base/java.lang.reflect=ALL-UNNAMED#--add-opens=java.base/java.io=ALL-UNNAMED#--add-opens=java.base/java.net=ALL-UNNAMED
Set --Jvm to your real jvm.dll path
In jvm mode, --Jvm=auto often fails with no JVM configured or found in registry (many JDK/JRE builds don't register in the Windows registry, and the LocalSystem account doesn't see a user-level JAVA_HOME). Replace the --Jvm and --LibraryPath values above with your actual Java installation directory (the same path as JAVA_HOME).
The rundeck.exe (procrun) binary and the jvm.dll must be the same architecture — use the 64-bit prunsrv.exe from the amd64\ subfolder of the Apache Commons Daemon archive with a 64-bit JDK/JRE. The --add-opens options are required so the embedded JVM can run on Java 17.
Now, Rundeck is configured as a Service and can be managed with rundeckw.exe
- Double click the rundeckw.exe binary and a management window will appear to start the service. Stop, Restart or settings like JVM Max memory size can be tweaked from this window.
- NOTE: This service can also be managed from services.msc console.
Set JAVA_HOME in windows OS
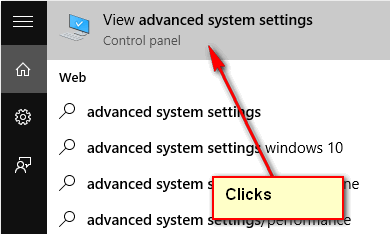
- Go to Advanced System Settings, type "Advanced System Settings" in the windowssearch box and click on the tool.
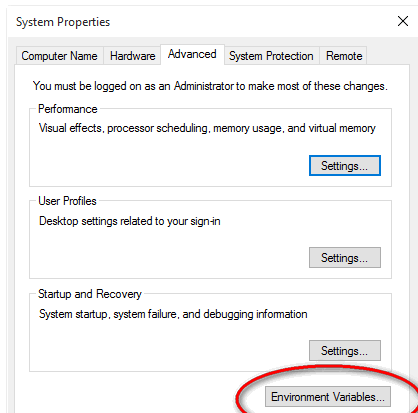
- Select the Advanced tab, and click on Environment Variables
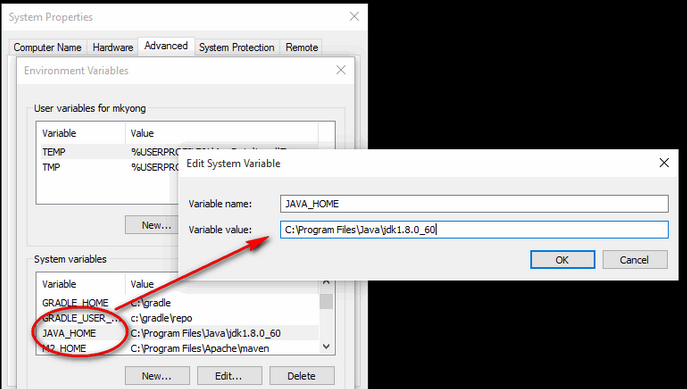
- In System variables, click New and add a variable with Variable Name: JAVA_HOME Variable Value: jdk installation directory
Warning
Don’t include the \bin directory, only the JDK path. Example: (path specifics may vary)
Correct – C:\Program Files\Java\jdk-17
Wrong – C:\Program Files\Java\jdk-17\bin