Installing on AWS
Installing on AWS
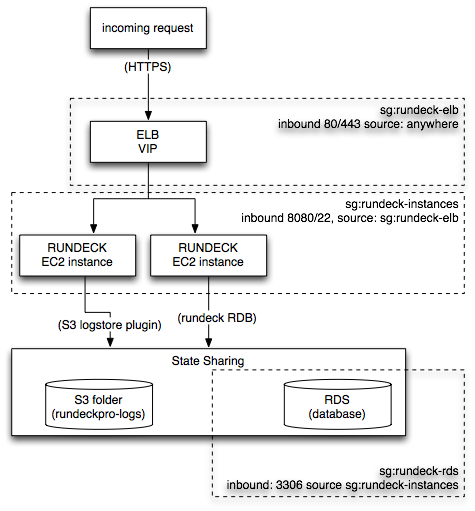
This document provides instructions to install Runbook Automation Self-Hosted in a highly available (HA) clustered configuration on AWS, taking advantage of ELB, RDS, and S3 for scale and availability.
AWS Setup
This section describes the AWS environment setup needed before the Rundeck software can be installed.
Key Pair
Create a key pair to access the EC2 instances, rundeckpro-ec2user. This key pair will be specified when it is time to launch the EC2 instances later on. This is also the key pair used to ssh to the EC2 instances.
- Open the Amazon EC2 console at: https://console.aws.amazon.com/ec2/
- Go to navigation panel of the AWS console, under NETWORK & SECURITY, choose Key Pairs.
- Add the new key pair.
For further information, see http://docs.aws.amazon.com/AWSEC2/latest/UserGuide/ec2-key-pairs.html#having-ec2-create-your-key-pair
IAM
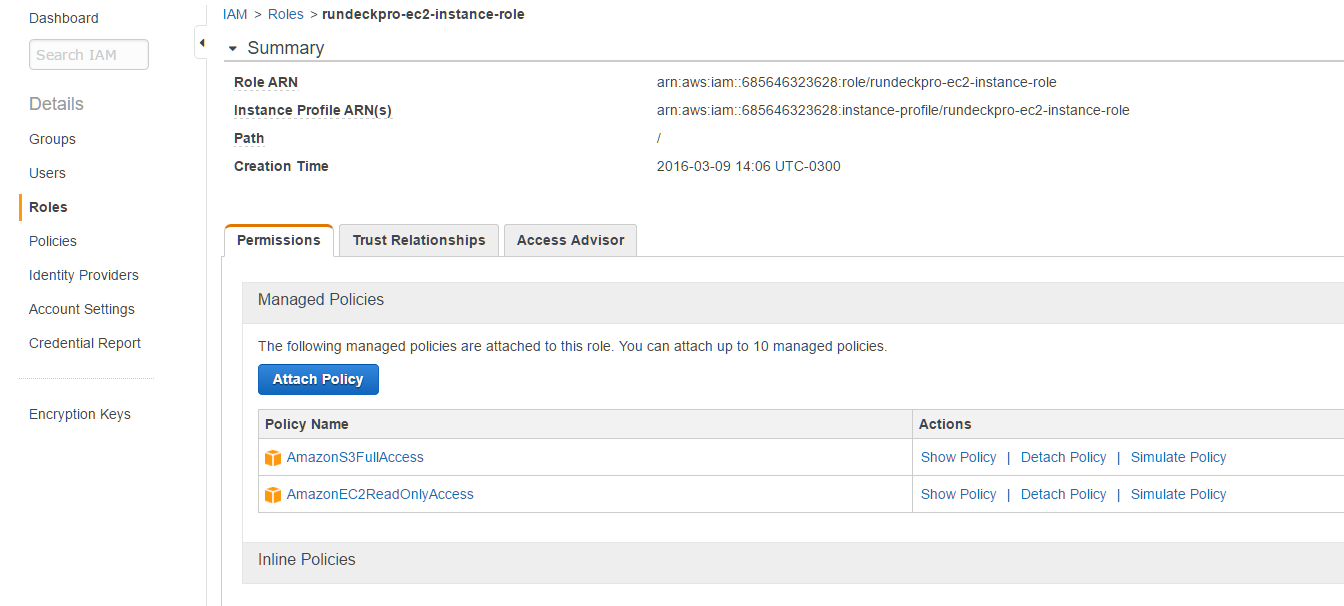
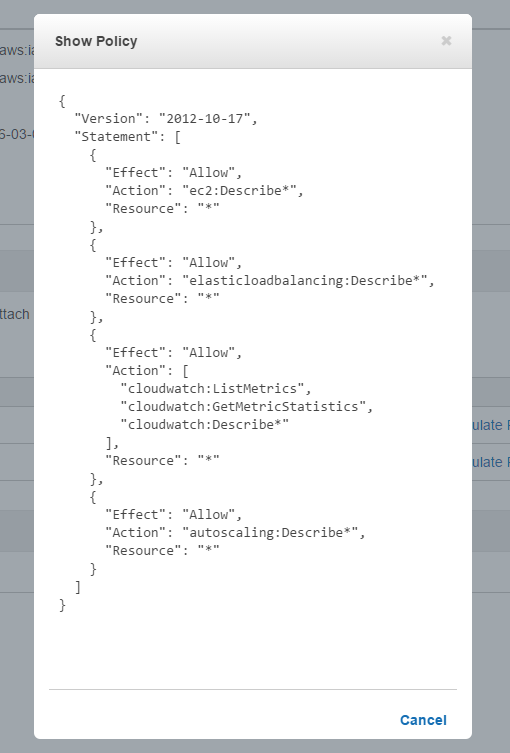
Create a Role to allow the Rundeck EC2 and S3 plugins to access AWS API so we don’t have to specify access and secret key strings.
- Go to the AWS Management Console and open the IAM console at https://console.aws.amazon.com/iam/
- In the navigation pane of the console, click Roles and then click Create New Role.
- Add the role name: rundeckpro-ec2-instance-role
- Attach the following policies: AmazonS3FullAccess, AmazonEc2ReadOnlyAccess
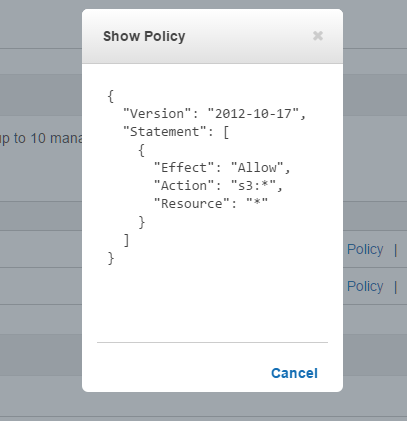
For further information, see http://docs.aws.amazon.com/AWSEC2/latest/UserGuide/ec2-key-pairs.html#having-ec2-create-your-key-pair
Security Groups
Several security groups are defined to manage network access between the layers of the Enterprise environment (ELB->RUNDECK-RDS).
- Open the Amazon EC2 console at https://console.aws.amazon.com/ec2/.
- In the navigation pane, choose Security Groups.
- Choose Create Security Group.
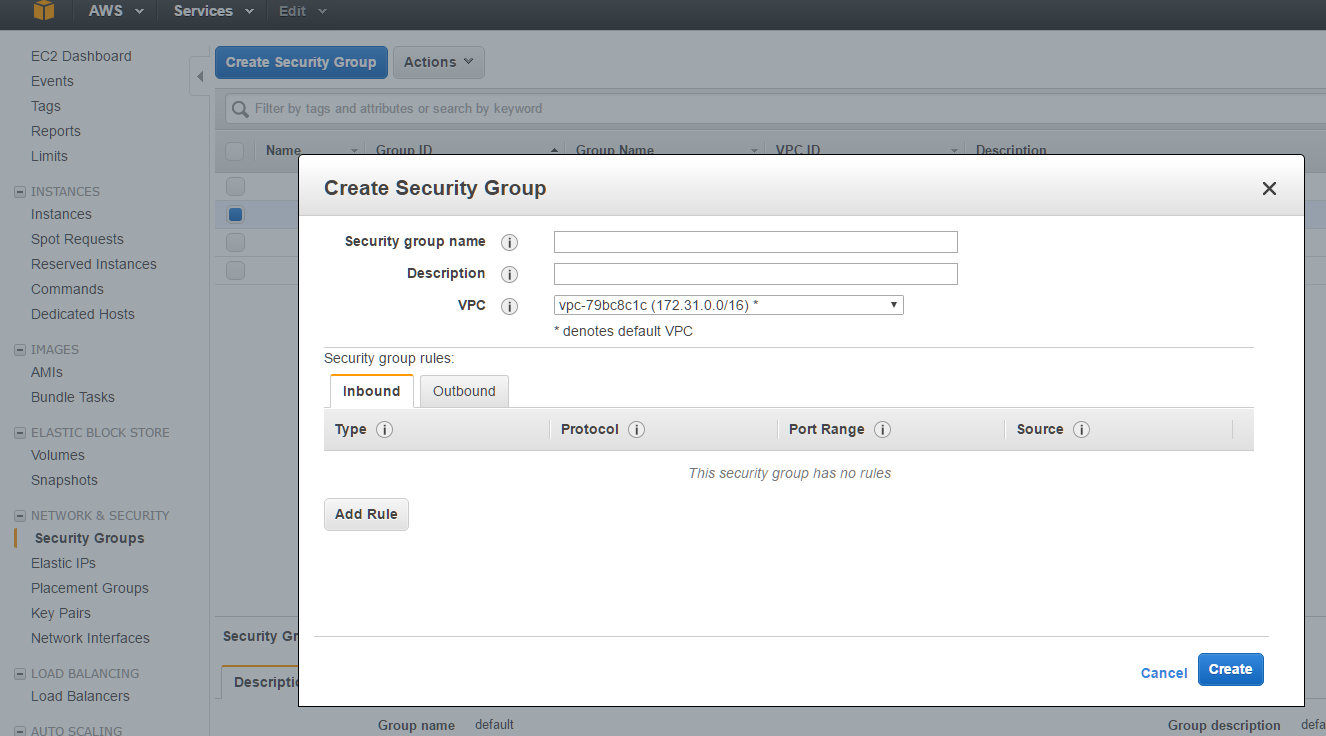
Create the follow groups:
sg:rundeck-elb
inbound:
- type: http, protocol TCP, port: 80, source 0.0.0.0/0
- type: https, protocol TCP, port 443, source 0.0.0.0/0
outbound:
- type: all, protocol: all, port: all, destination 0.0.0.0/0

sg:rundeck-instances
inbound:
- type: custom, protocol TCP, port: 4440, source sg:rundeck-elb
- type: custom, protocol SSH, port: 20, source sg:rundeck-elb
outbound:
- type: all, protocol: all, port: all, destination 0.0.0.0/0

sg:rundeck-rds
inbound:
- type: mysql, protocol TCP, port: 3306, source: sg-rundeck-instances

For further information, see http://docs.aws.amazon.com/AWSEC2/latest/UserGuide/using-network-security.html#creating-security-group
S3
Create a folder in the S3 bucket to store logs called rundeckpro. You will specify this folder name when the pro software is installed.
Go into the AWS Management Console and open the Amazon S3 console at https://console.aws.amazon.com/s3
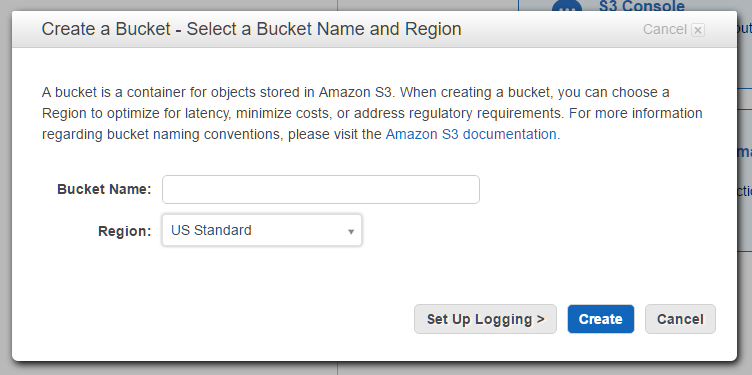
Set Policy:
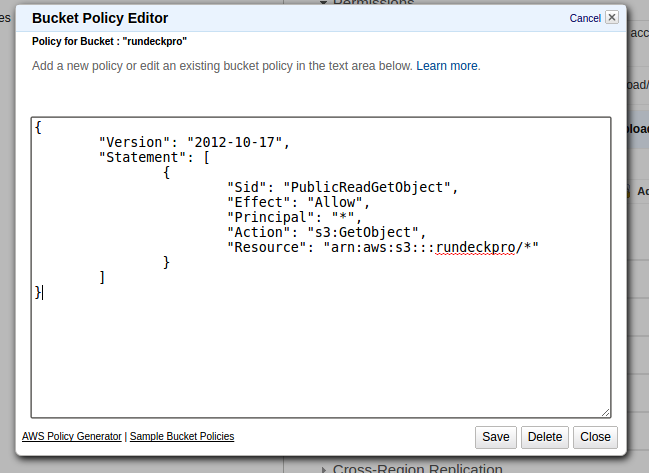
{
    "Version": "2012-10-17",
    "Statement": [
        {
            "Sid": "PublicReadGetObject",
            "Effect": "Allow",
            "Principal": "*",
            "Action": "s3:GetObject",
            "Resource": "arn:aws:s3:::rundeckpro/*"
        }
    ]
}
For further information, see http://docs.aws.amazon.com/AmazonS3/latest/gsg/CreatingABucket.html
RDS
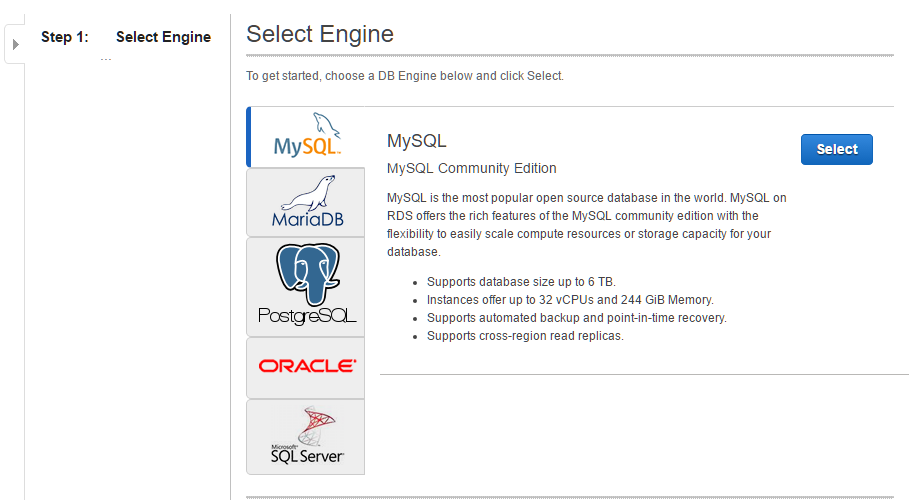
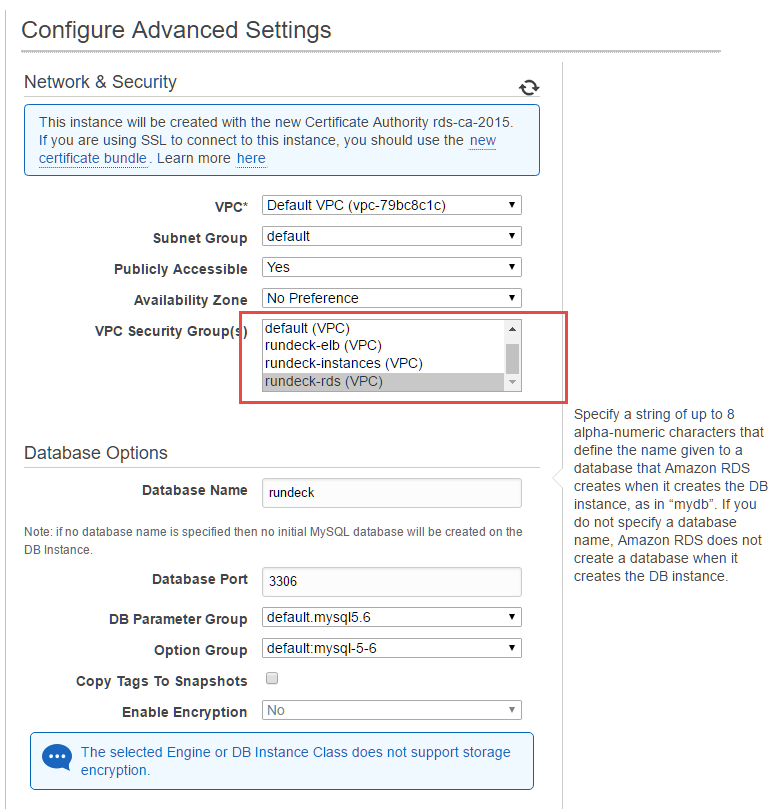
Create an RDS mysql instance, rundeck-rds and place it in the rundeck-rds security group. Specify a database named "rundeck". Note the name of the RDS hostname because it is needed for the Enterprise installation.
- Go into the AWS Management Console and open the Amazon RDS console at https://console.aws.amazon.com/rds
- In the top right corner of the AWS Management Console, select the region in which you want to create the DB instance.
- In the navigation pane, click Instances.
- Click Launch DB Instance to start the Launch DB Instance Wizard.
- Complete the advanced settings:
For further information, see http://docs.aws.amazon.com/AmazonRDS/latest/UserGuide/USER_CreateInstance.html
EC2
Create two EC2 instances for the cluster. Specify the following when launching the instance:
- Open the Amazon EC2 console at https://console.aws.amazon.com/ec2/.
- From the console dashboard, choose Launch Instance.
- Select the AMI image: Amazon Linux AMI 2015.03.0 x86_64 HVM GP2

- In the configure instance details, choose the IAM Role: rundeckpro-ec2-instance-role
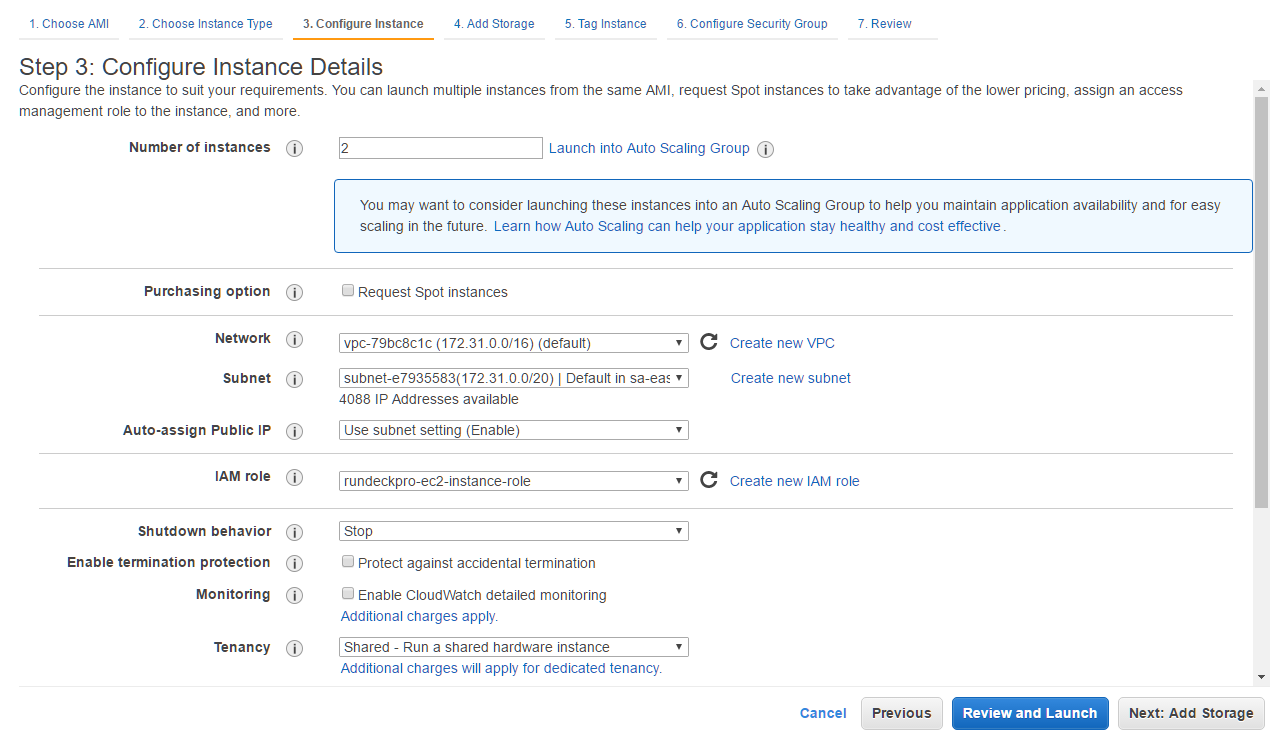
- In the configure Security-group, choose the rundeck-instances
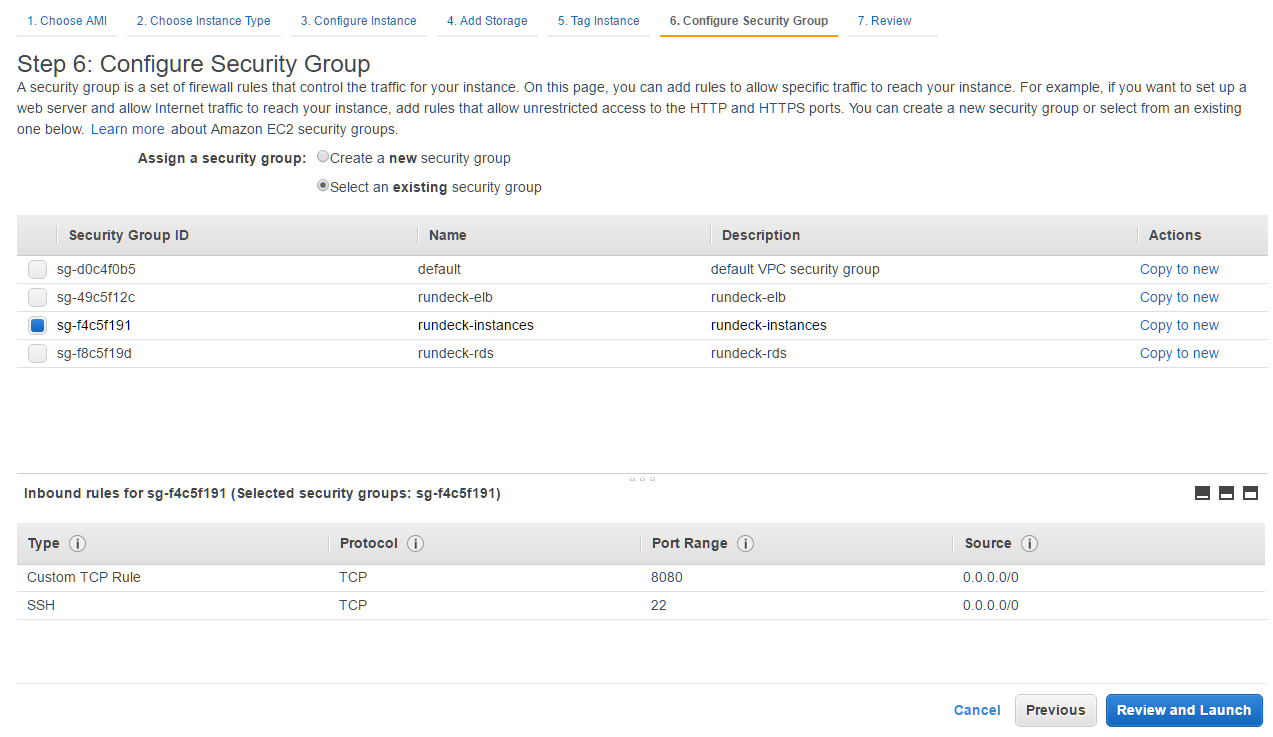
- Finally, add the key pair name: rundeckpro-ec2user
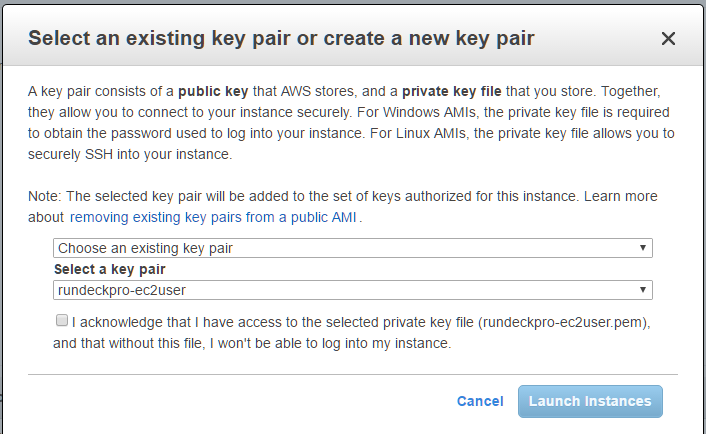
For further information, see http://docs.aws.amazon.com/AWSEC2/latest/UserGuide/EC2_GetStarted.html#ec2-launch-instance_linux
ELB
Create the ELB called rundeckpro-ha-elb. If you defined the HTTPS listener, you must create a new SSL certificate. You will upload the SSL cert and key when defining the HTTPS listener.
- Open the Amazon EC2 console at https://console.aws.amazon.com/ec2/.
- From the navigation bar, select a region for your load balancers. Be sure to select the same region that you selected for your EC2 instances.
- In the navigation pane, under LOAD BALANCING, click Load Balancers.
- Click Create Load Balancer.
- Define the listeners:
- 80 (HTTP) forwarding to 4440 (HTTP)
- 443 (HTTPS, required certificate: rundeckpro-cert) forwarding to 4440 (HTTP)
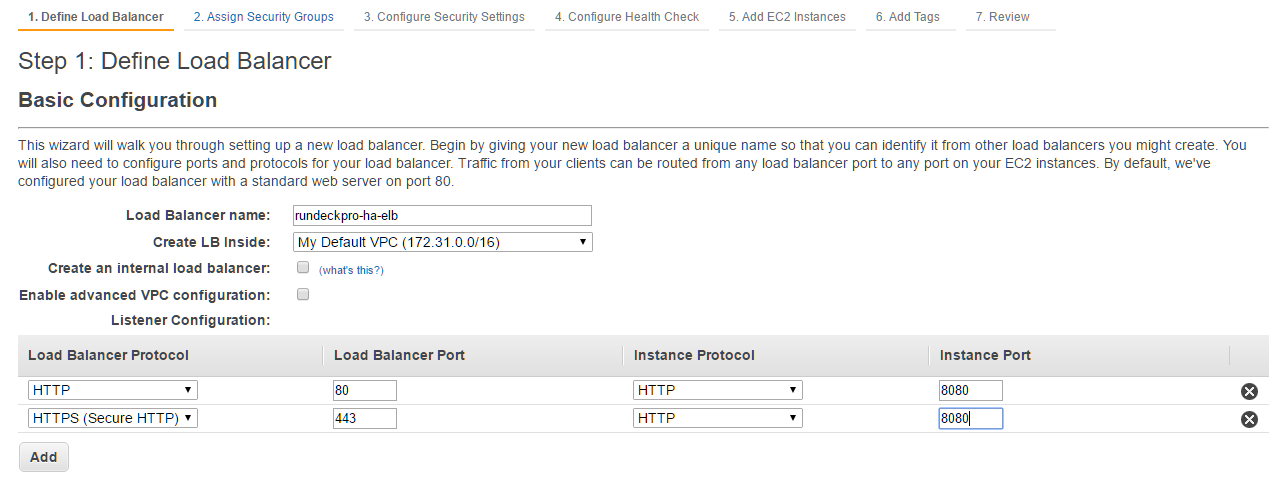
- Select the security group rundeck-elb

- Add the two EC2 instances to the ELB.

- Add Stickiness: cookieName='JSESSIONID'
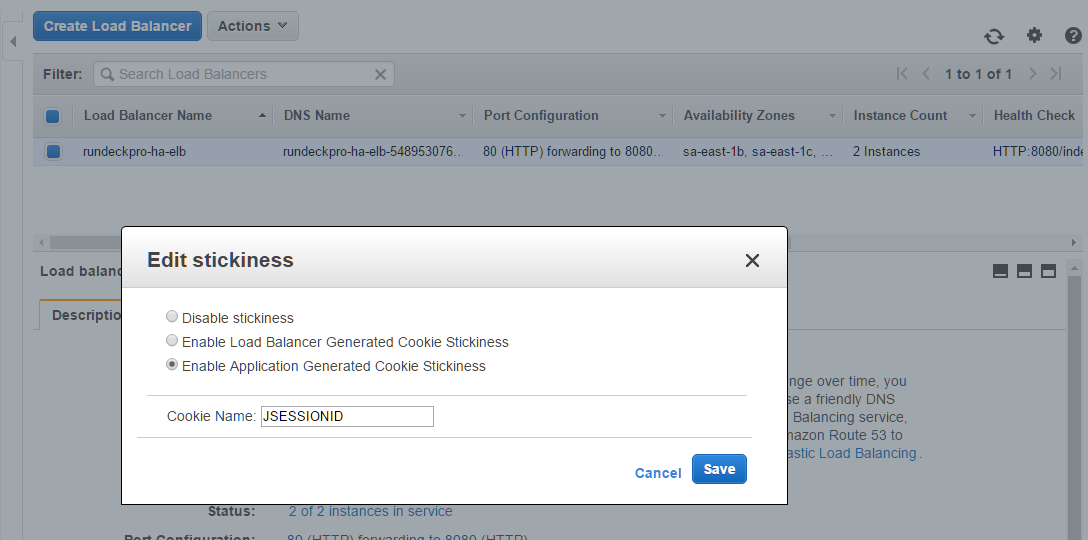
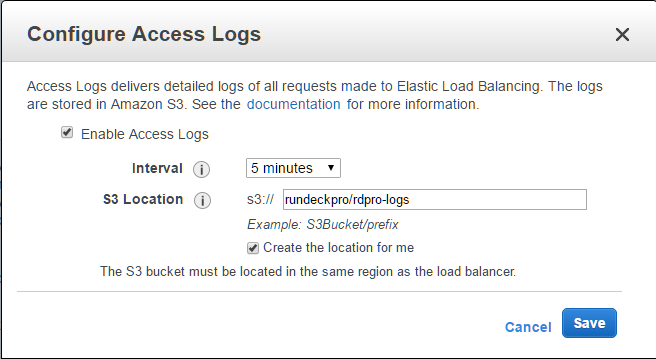
- Enable access logs: S3 Location: rdpro-logs
