# Builtin Workflow Steps
# Ansible Module
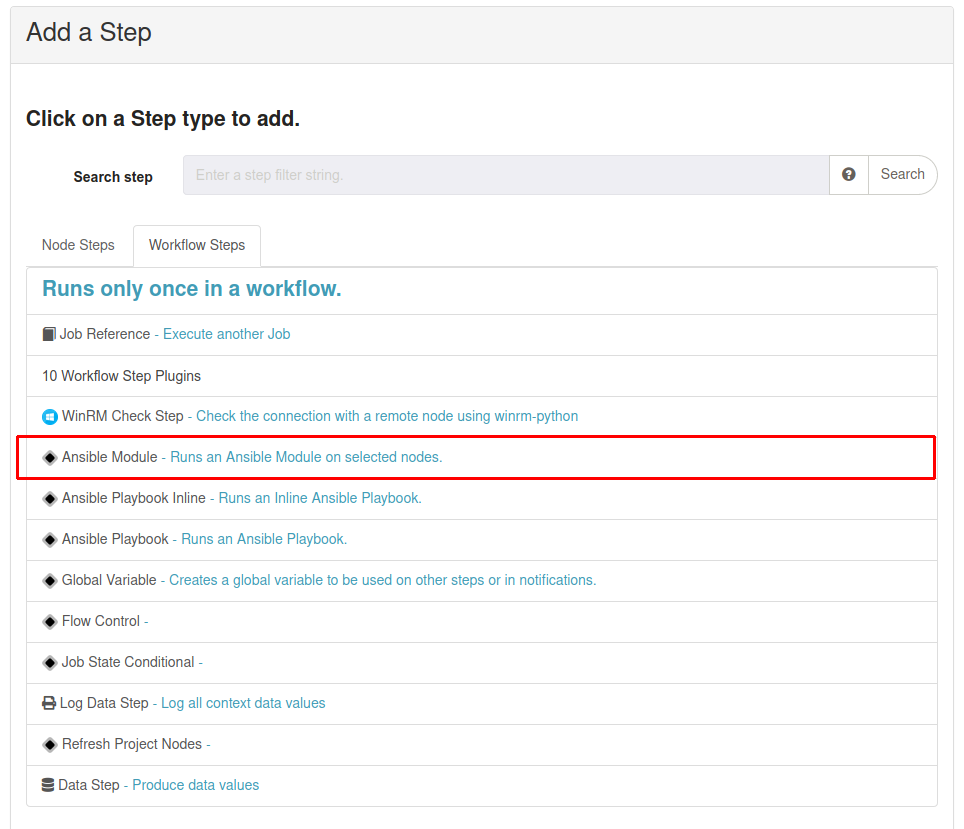
Ansible Module workflow step allows executing any Ansible module directly on any Rundeck workflow, it's also available for Node Steps. To use, add a new step, and selecting "Ansible Module".
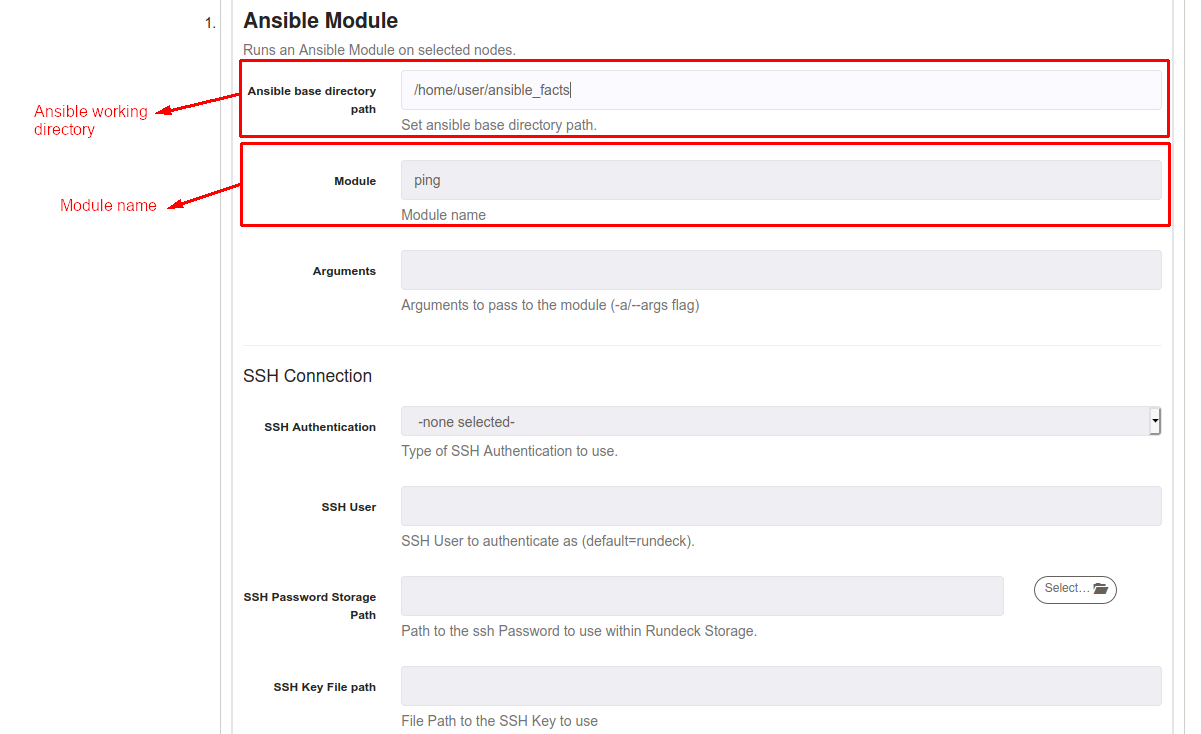
On Module textbox just put the module name, here (opens new window) you can check all Ansible modules.
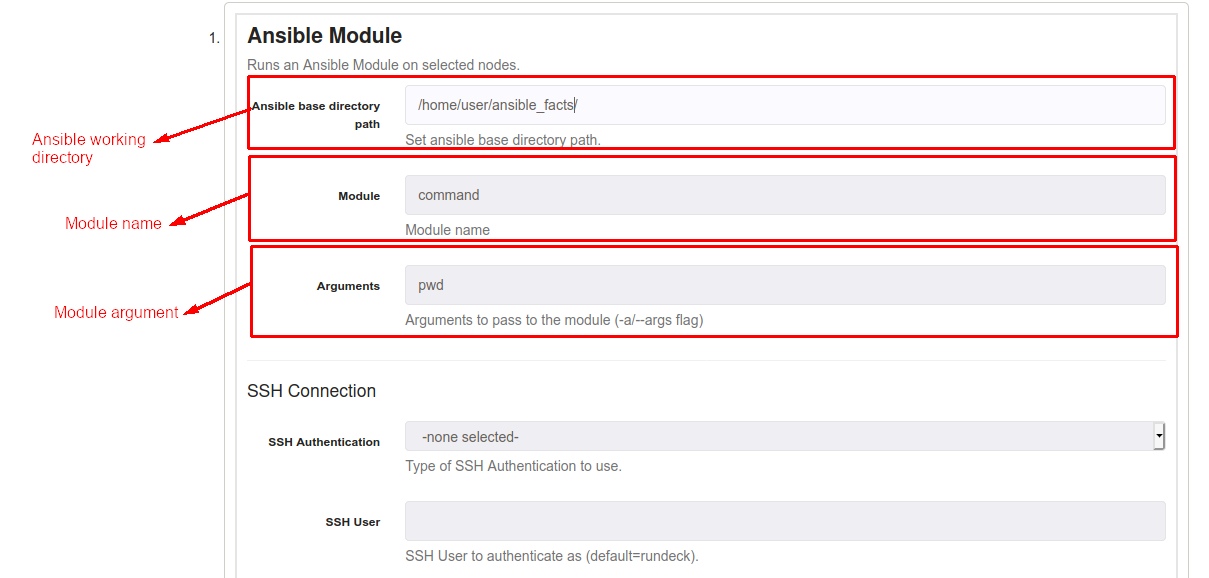
It's possible to pass arguments to modules (for example, any command to execute using the command module), just put the name of argument on "Argument" textbox. In the following example, we're passing a command (pwd) to command module to execute pwd (opens new window).
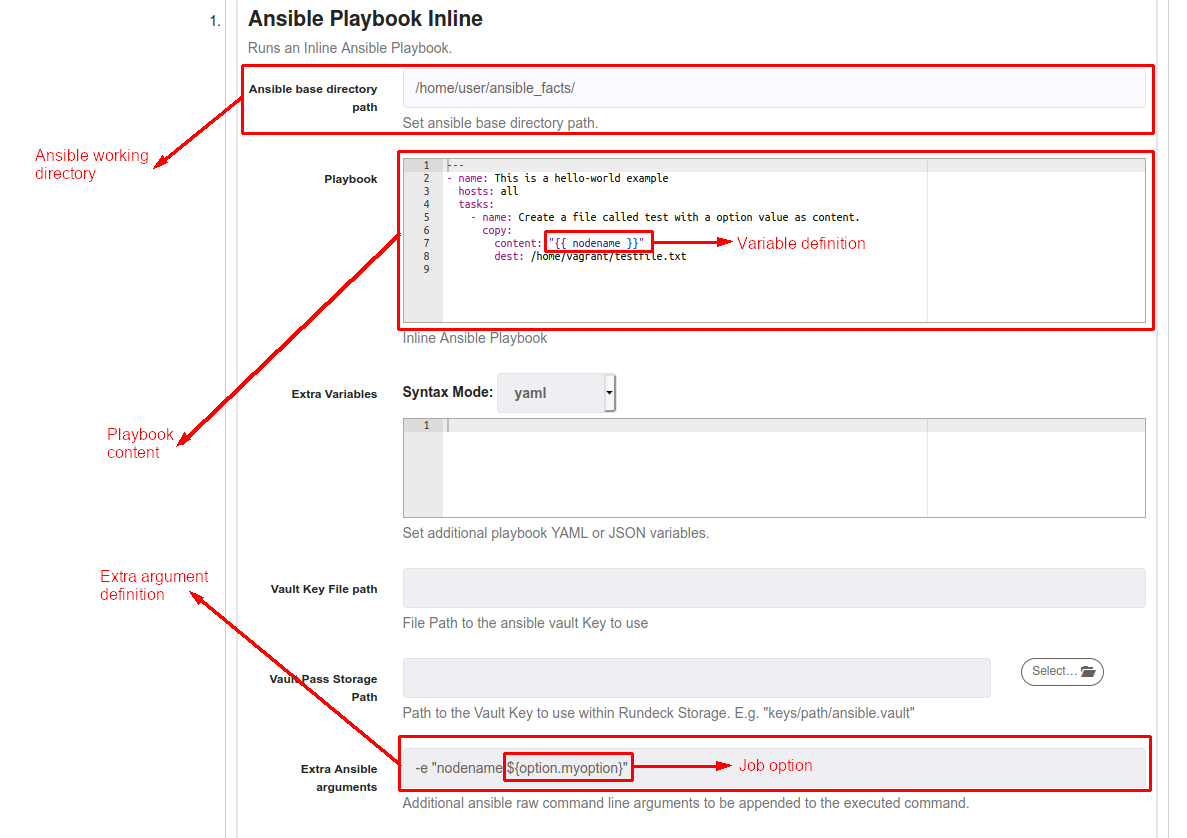
# Ansible Playbook Inline
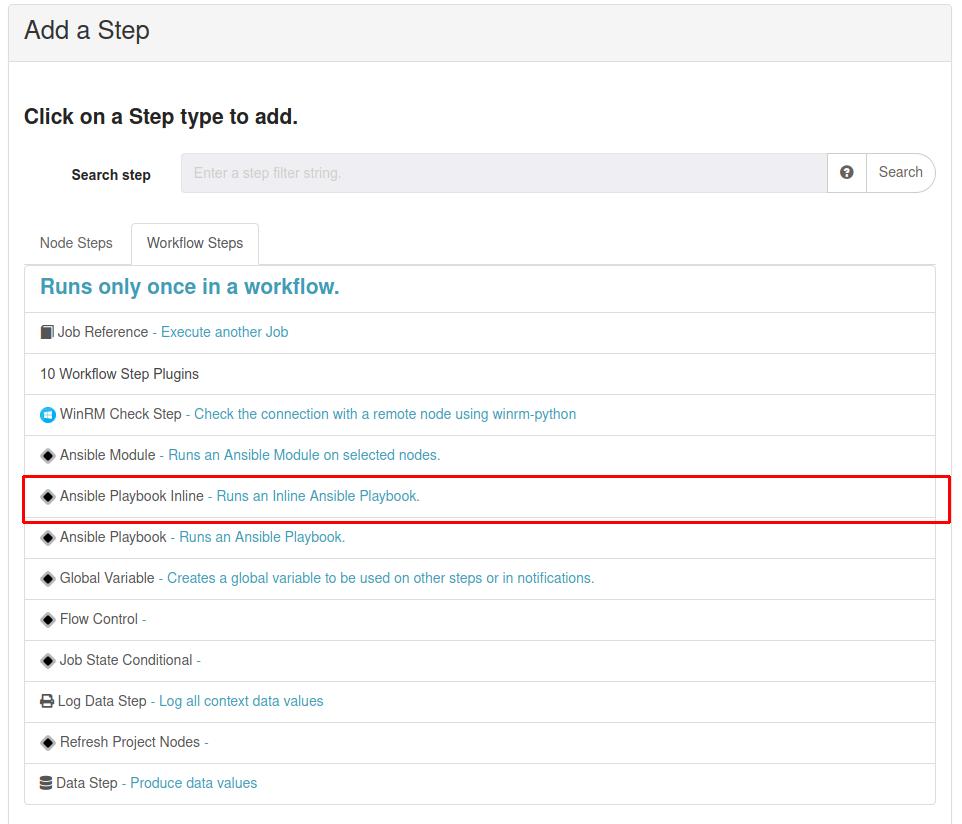
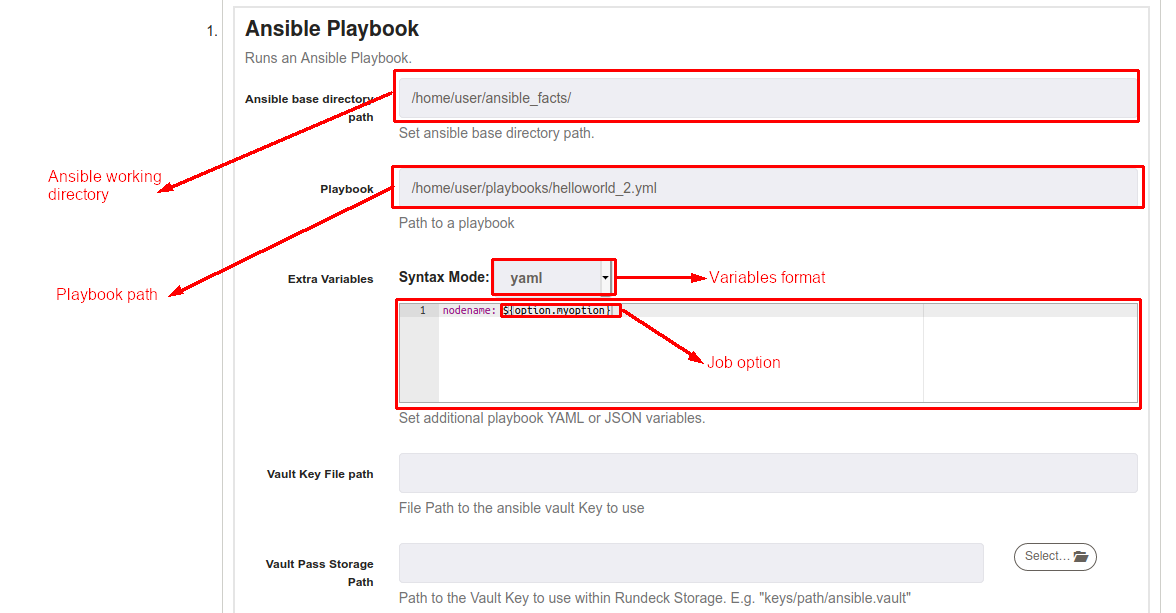
Ansible Playbook Inline workflow step allows executing an Ansible playbook definition directly on any Rundeck workflow, it's also available for Node Steps. To use, add a new step, and select "Ansible Playbook".
In Playbook textbox just put the Ansible Playbook content, it's important to respect the Ansible Playbook YAML syntax (opens new window).

It's possible to pass extra variables to Playbooks. The variable must be defined on Ansible Playbook in this format ""', later, define the format, in the following example we're using a YAML format. Finally, define the variable content on "Extra Variables" textbox (following the format defined on "Syntax Mode"), options (opens new window) and data (opens new window) values are accepted.

Another way to pass variables to Ansible inline playbooks is to define as an argument on "Extra Ansible arguments" textbox, using the same inline-playbook defined in the example above, you can define the argument using -e "variable_name:value", options (opens new window) and data (opens new window) values are accepted.
# Ansible Playbook
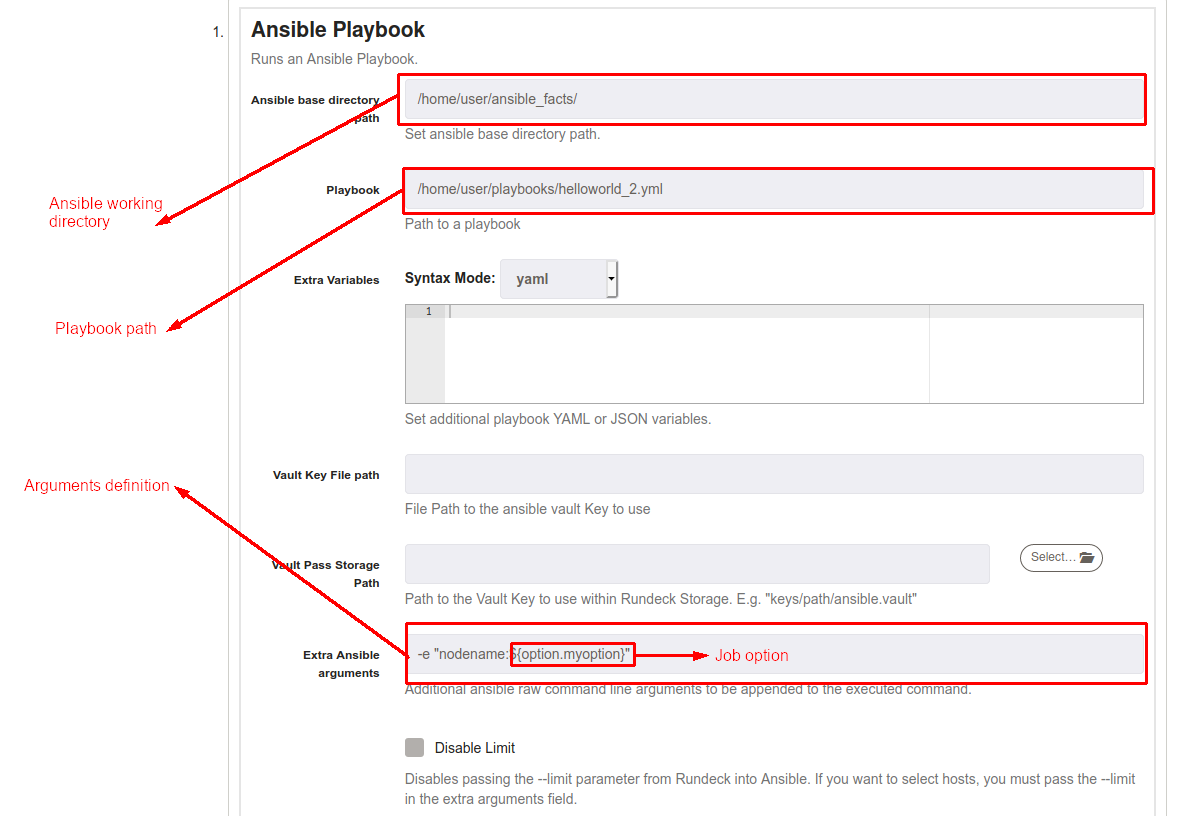
Ansible Playbook allows to execute Ansible Playbooks files from filesystem, it's also available for Node Step. It's available adding "Ansible Playbook" workflow step on any job.
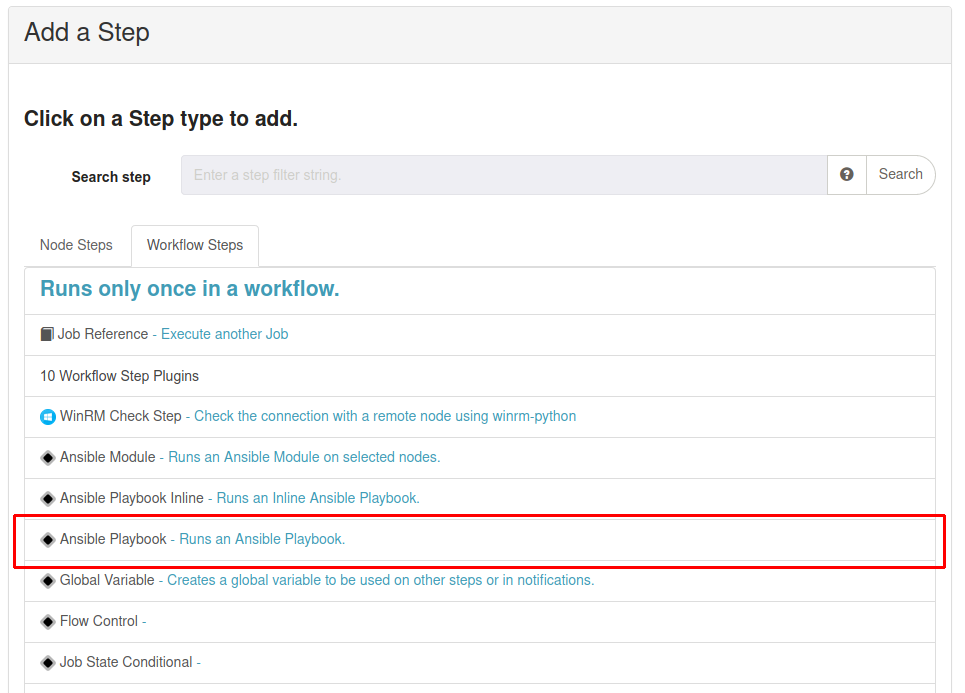
To reference the playbook file, just put the Ansible Playbook file path at "Playbook" textbox like the following example.
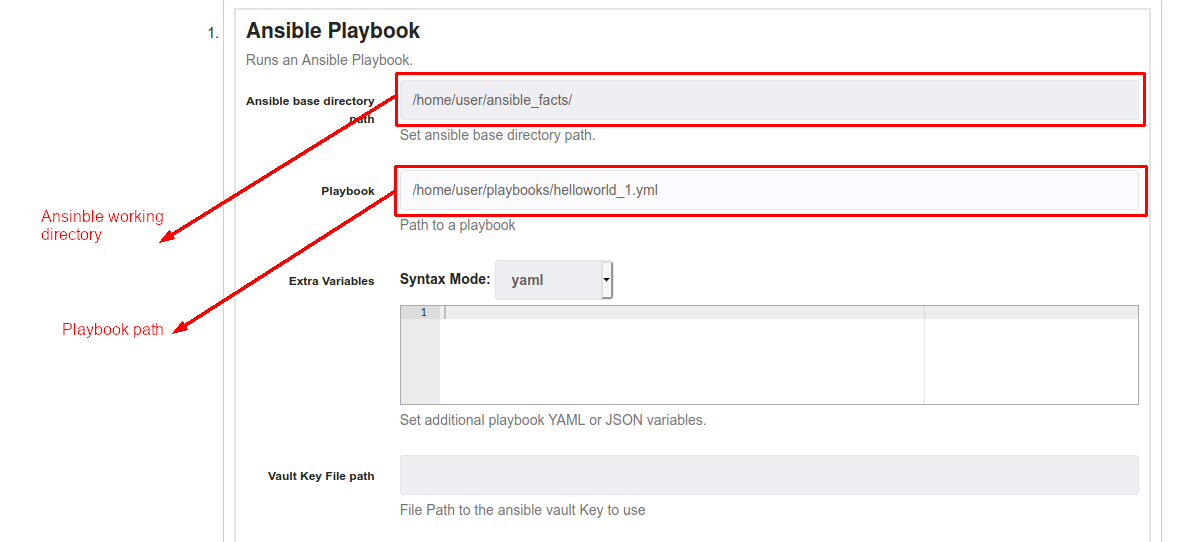
Like Ansible Playbook Inline step, it's possible to use "Extra Variables" textbox to pass any variable defined in your Playbook, it's importaant follow the syntax defined on "Syntax Mode" list. You can use Rundeck options (opens new window) or data (opens new window) values.
Also, it's possible use "Extra Ansible arguments" as the same way of Ansible Playbook Inline step, just define the argument in the following way: -e "variable_name:value", options (opens new window) and data (opens new window) values are accepted.
# Global Variable
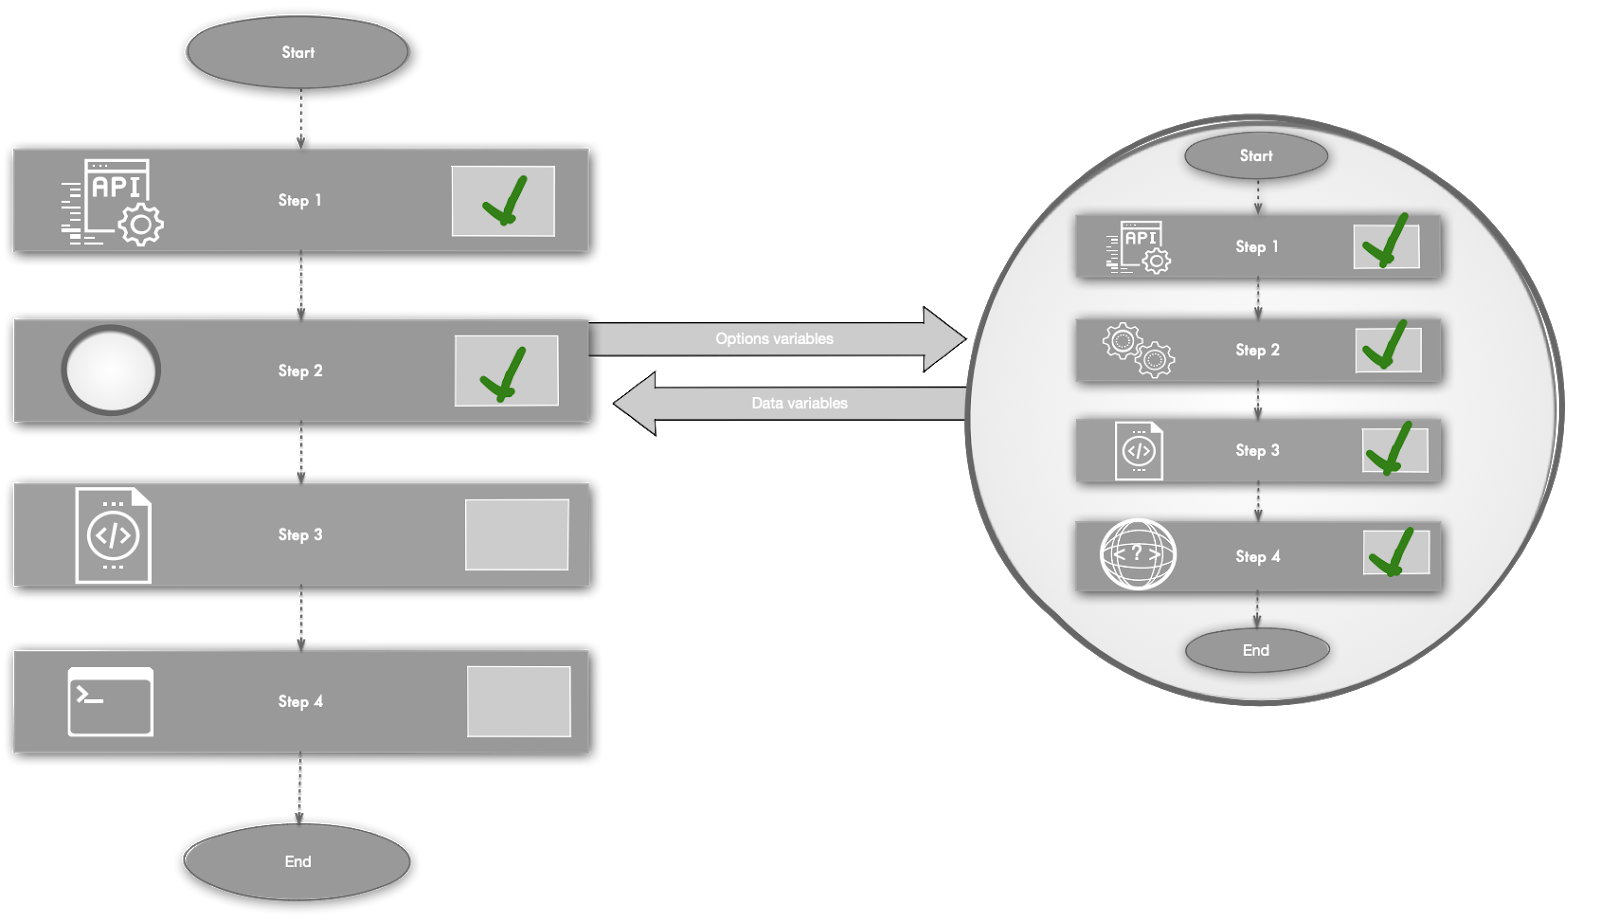
# Working with job references
When a global variable step is defined in a referenced job, it exports values into a data variable that can be used in subsequent steps of the parent job.
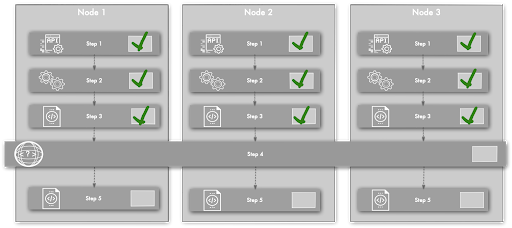
# Collecting values for all target nodes
Use the global variable workflow step to collect data across all target nodes into a delimited list. Rundeck executes the steps before the global variable step, collecting values into the variable and then executes any remaining steps. The data variable is available to all subsequent steps in the job.
Note that you can also collect a value from a single node that is available in steps on the other targeted nodes.
# Reference
The global variable step can capture the following groups of variables:
- context (opens new window) variable, such as project, job, node
- data variable captured by a key-value (opens new window), Multiline regex, or JQ log filter
| Field name | Syntax | Description |
|---|---|---|
| Value | ${group.keyname*} | Captures the value across all nodes into a comma separated list. To change the delimiter add the character after the asterisk. For example to capture values separated by a dash use ${data.status*-}. |
| ${group.keyname@nodename} | Captures the value only on a single node. For example. ${data.status@haproxy}. | |
| Group | Prefix that identifies the variable group. Note that you cannot add the variable to any context groups such as job or node, however you can use data to add it to the captured group. | |
| Name | Key name of variable. |
# Flow Control
# Job State Conditional
Job State Conditional Step allows to verify if a job is running and/or checks the lastest execution status.
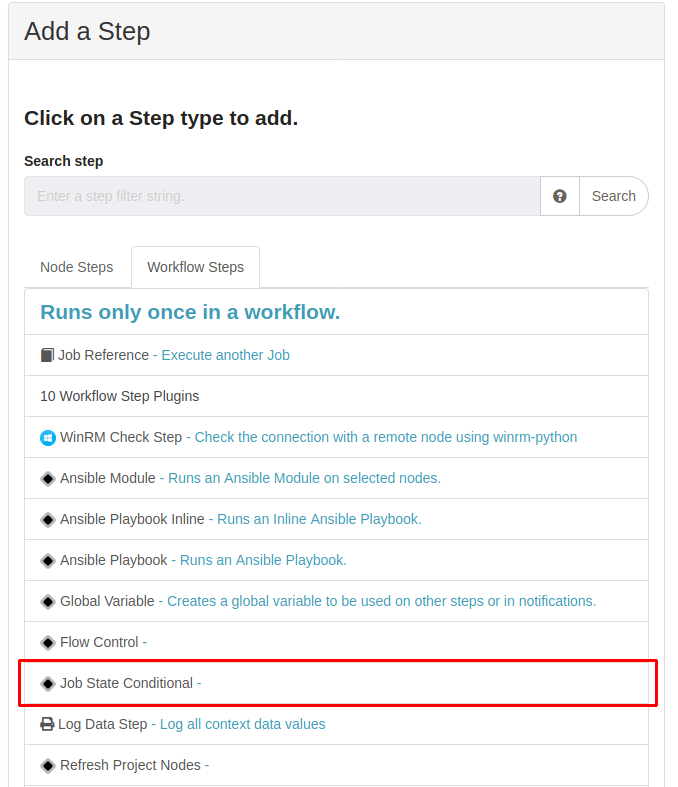
This step has many ways of being configured:
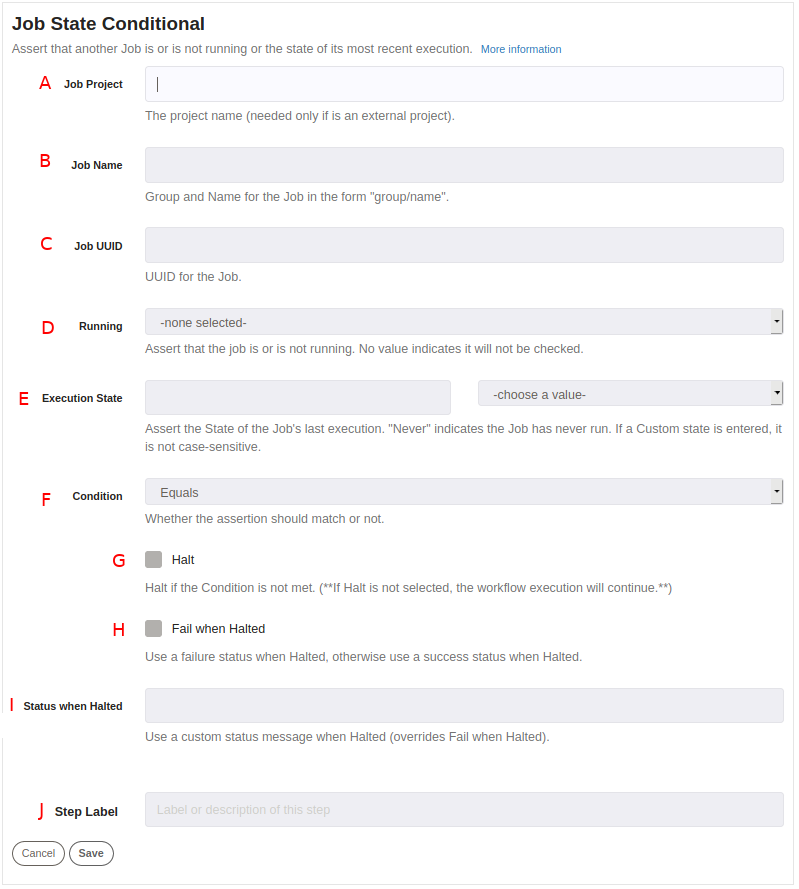
A. Project name (this is needed only if the job if is an external project).
B. Job Name, you can refer to a job using the group/name format, for example: maintenance/check_status.
C. You can reference to a job using its UUID, example: b152d59b-7d6d-440c-95ea-23dc9fc1db07.
D. Is the job running? (true or false or none).
E. Last execution status (Succeeded, Failed, Aborted, TimeOut, Failed-with-retry or Never).
F. Condition: Equals (Match with defined at "Running" and "Execution State" sections) or Not Equals (if it doesn't match with defined at "Running" and "Execution State" sections). Basically, this defines the behavior of the step with the rules defined before.
G. If the expected condition is not met, it stops the execution of the current job.
H. If execution is stopped, it will report the current job as failed.
I. Custom status when the current job is halted (overrides Fail when Halted).
J. Defines any label to the current step.
# Example:
We need to run the current job only if another was executed successfully (last execution: Succeeded).

At the beginning of the current job, we add a new Job State Conditional Step to verify another job status.
In the Job State Conditional Step, we need to point to the job using Group/Name or UUID (in the example we are using UUID), also, we need to know the latest execution, then, we set Running job as false and set Latest execution as Succeeded. At this point we have our rules, now we set Condition to Equals to match with running status and latest execution defined.
Clicking on "Halt" and "Fail when Halted" the next steps on the current job don't execute, the job stops and reports as Failed.
Finally at the moment of run our job, if the referenced job defines in Job State Conditional Step has run as Succeeded in the latest execution all the rules matched and the next steps can be executed.
# Log Data Step
The log data step allows you to log all the context data values and view them in a table.
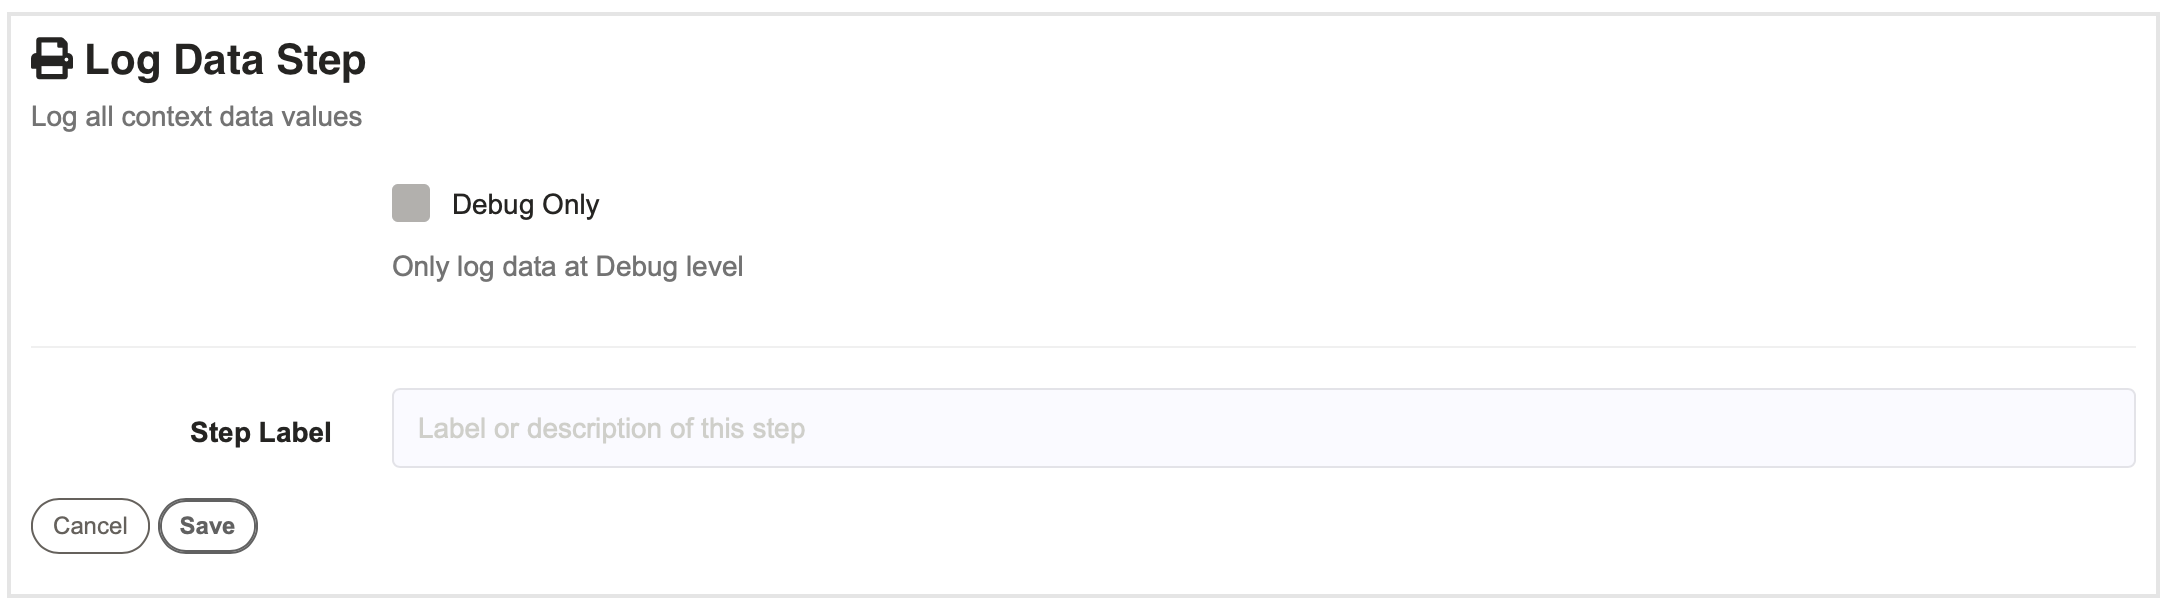
- Debug Only
- If checked, only runs if the job is run in Debug mode
After execution of the job, you will get a table like this:

# Executions Delete
This job step allows you to delete previously run executions by specifying when the executions are from, who executed them and what job thet were executed on.
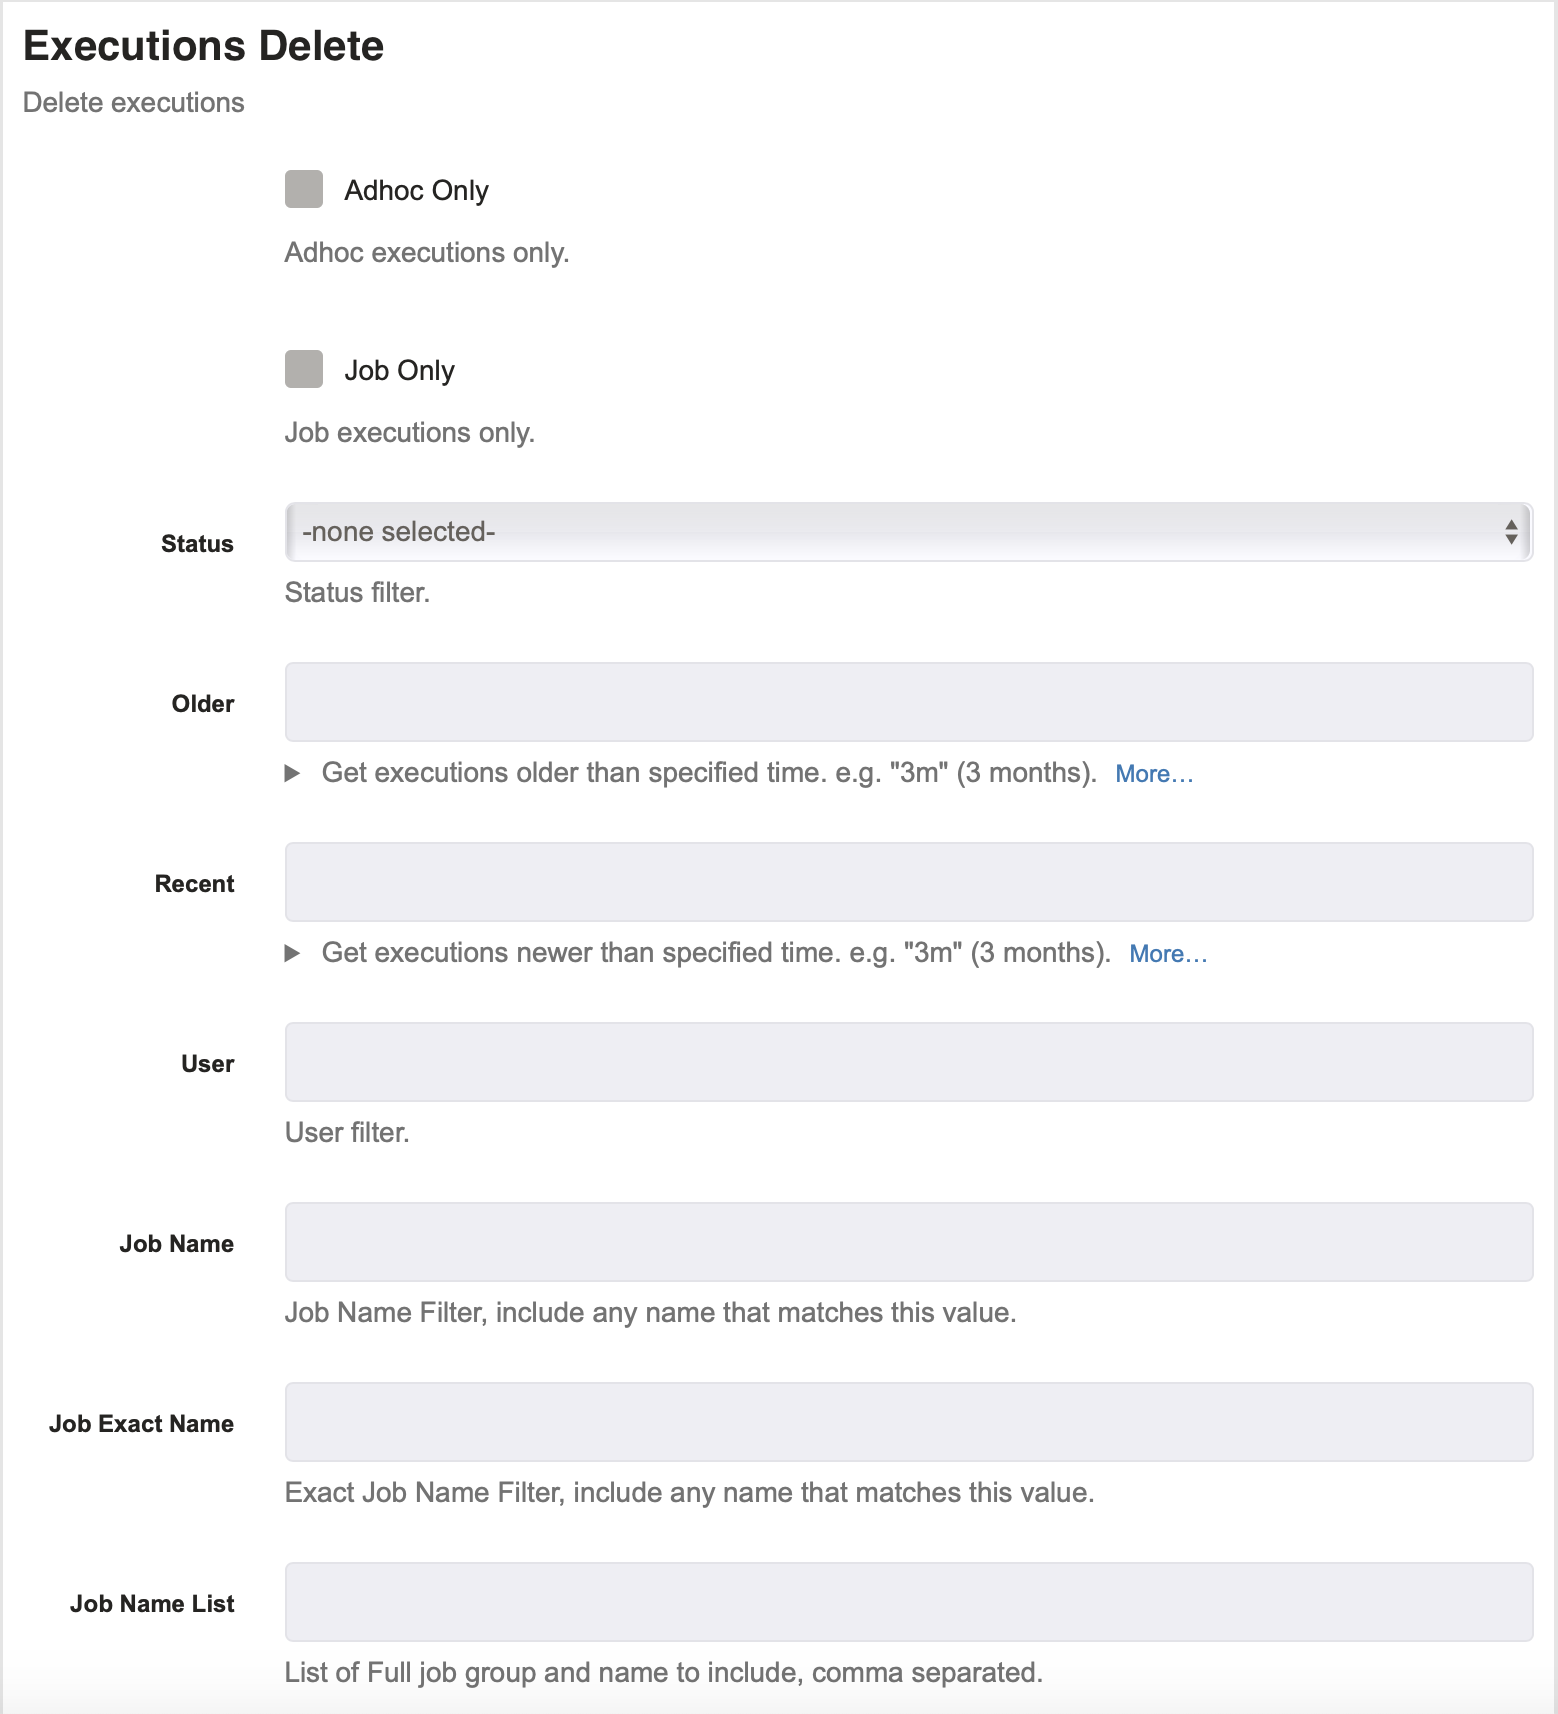
Status : This is where you specify the status of the executions that you wish to delete. The options are running, succeeded, failed, aborted.
Older : If filled out, this specifies that you want the executions you delete to be older than this amount of time. You can enter anything from years to seconds. An example would be "3m", which would only delete executions that are older than three months old. Other options are: h,n,s,d,w,m,y (hour,minute,second,day,week,month,year).
Recent : If filled out, this specifies that you want the executions you delete to be newer than this amount of time. You can enter anything from years to seconds. An example would be "3m", which would only delete executions that have happened less than three months ago. Other options are: h,n,s,d,w,m,y (hour,minute,second,day,week,month,year).
User : This specifies which user who performed the executions that you want to delete. So, if you specify "admin" then it will only delete executions by the admin.
Job Name : This specifies which job name filters should have their executions deleted. For example, if you specify "update" then all jobs with the filter "update" will have its executions deleted.
Job Exact Name : This specifies the exact job name that you want to delete. If you specify the exact name of a job such as "restart X" then the job with the same name will have its executions deleted.
Job Name List : This allows you to specify numerous jobs names. This is just like Job Name above but now you can add many names separated by commas.
Job ID List : This allows you to list all of the job IDs that you want included in the deletion. So, you can enter numerous job IDs separated by a comma and those jobs executions will be deleted.
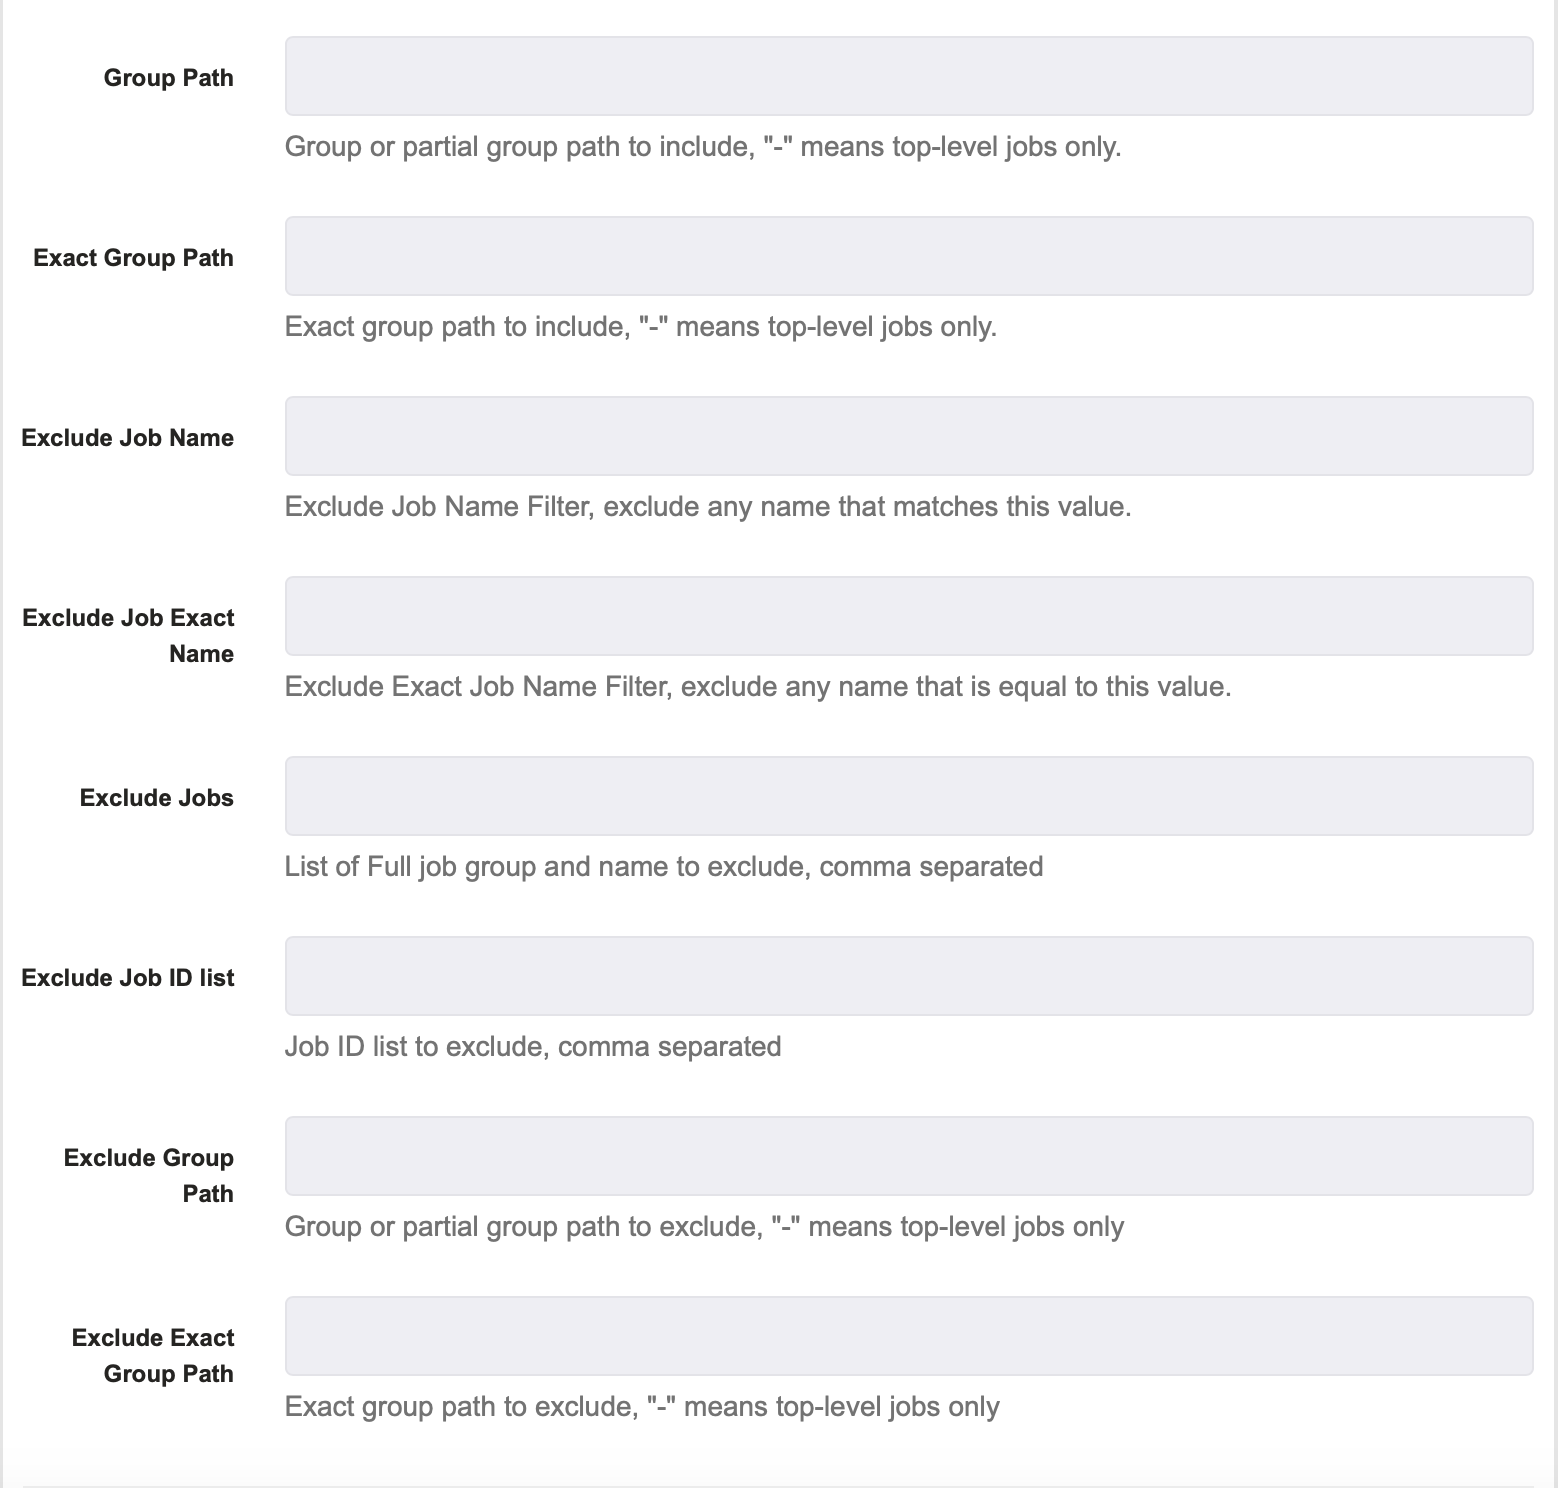
Group Path : This allows you to specify a group of jobs whose executions should be deleted. You can specify a path to a certain job group and all jobs in that group will have their executions deleted.
Exact Group Path : This allows you to specify an exact group path to a group of jobs whose executions you wish to delete. If specified, all job executions in that group that meet the criteria will be deleted.
Exclude Job Name : This specifies which job name filters should NOT have their executions deleted. For example, if you specify "update" then all jobs with the filter "update" will NOT have its executions deleted.
Exclude Job Exact Name : This specifies the exact job name that you DO NOT want to delete. If you specify the exact name of a job such as "restart X" then the job with the same name will NOT have its executions deleted.
Exclude Jobs : This allows you to specify numerous jobs names to exclude from deletion. For example, if you provide the paths group1/job1 and group2/job2 separated by commas then those jobs' executions will not be deleted.
Job ID List : This allows you to list all of the job IDs that you want excluded in the deletion. So, you can enter numerous job IDs separated by a comma, and those jobs executions will NOT be deleted.
Exclude Group Path : This allows you to specify a group of jobs whose executions should NOT be deleted. You can specify a path to a certain job group and all jobs in that group will NOT have their executions deleted.
Exclude Exact Group Path : This allows you to specify an exact group path to a group of jobs whose executions you wish to NOT delete. If specified, all job executions in that group that meet the criteria will NOT be deleted.
# Executions Wait Result
This job step allows you to wait on the results of other job executions before continuing on to the next job step. This is very helpful if you need a particular execution to run prior to running a job.
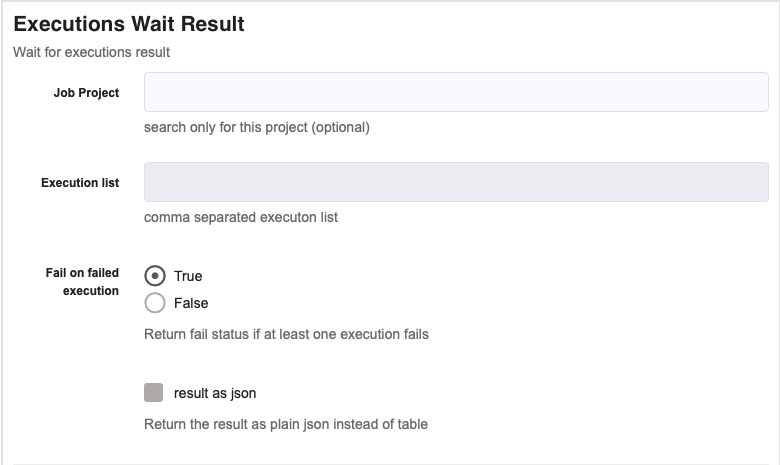
Job Project (optional) : If you enter a value into this box, then it will only search within that specific project, not across all project. If you don't specify, it will not only search that one project but all executions.
Execution List : This is where you can specify the executions that you wish to wait on. In order to do so you need to provide the list of execution IDs that you want to wait on, all separated by a comma.
Fail on Failed Execution : If true is selected and one execution fails, this whole step will fail, even if other executions succeeded. If false is chosed, this job step will only fail if all executions fail.
Result as JSON : If this box is checked, then the results will be in the form of a JSON instead of a table. This is ideal if the results need to be used elsewhere.
# Executions Retry
This job step allows you to reference execution IDs that you want to retry executing. This is very beneficial in a case where you need a successful execution prior to moving forward with another job.
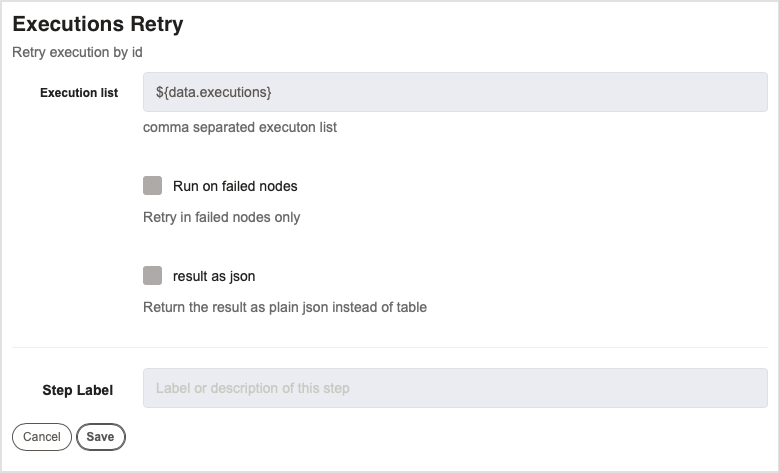
Execution List : This is where you specify the list of executions that you want to retry. Provide the execution IDs, separated by a comma. This is very helpful if you need for certain executions to run successfully prior to continuing with another job. This step allows you to retry those executions before continuing with the job.
Run on Failed Nodes : If checked, this box allows you to only run executions on nodes that have failed. Executions on healthy nodes will not be run.
Result as JSON : If this box is checked, then the results will be in the form of a JSON instead of a table. This is ideal if the results need to be used elsewhere.
# Executions Search
This job step allows you to search for an execution based on a variety of factors such as state of execution, job id, etc.
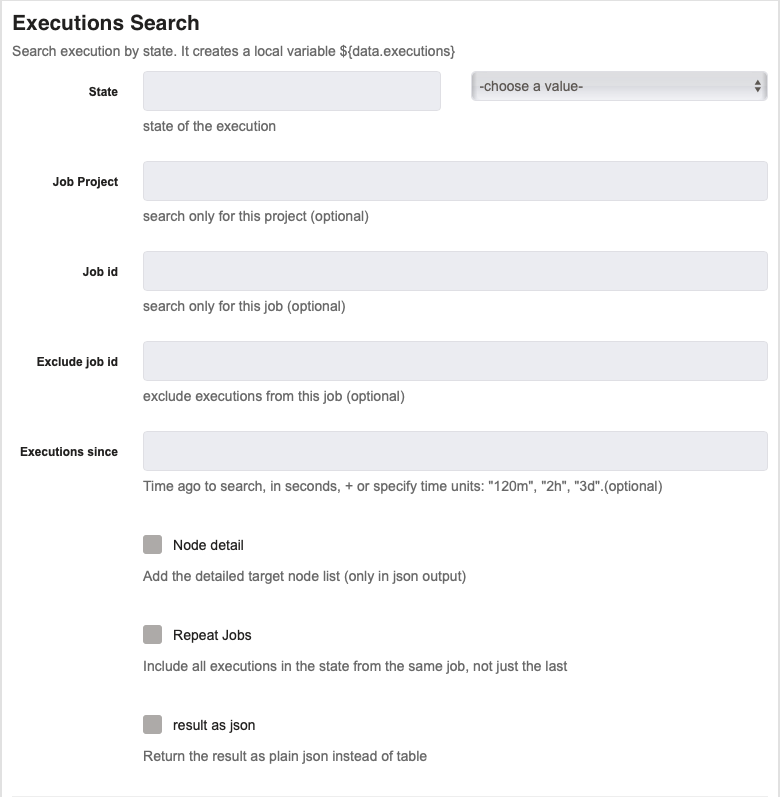
State : This allows you to specify the state of the execution that you are searching for. The possible options are incomplete, failed and succeeded.
Job Project (optional) : This allows you to search only one project for the executions. If nothing is provided, it will search all projects for executions meeting the criteria.
Job ID (optional) : This allows you to specify a certain job. If something is provided here, it will just search for executions of that specific job. Otherwise, it will search all jobs.
Exclude Job ID (optional) : This allows you to specify a certain job you aren't searching for. If something is provided here, it will not search for executions of that specific job.
Executions Since : This allows you to specify how far back you wish to search for executions. If you specify 3m then it will search all executions that are less than three minutes old. Other options are "m" for minutes, "d" for days and "h" for hours.
# Refresh Project Nodes
This job step allows you to refresh all the nodes in a project. This is beneficial if you want to make sure the nodes are up to date before executing a job. The refreshed nodes will be available in any subsequent Job Reference step, but not within the current workflow.
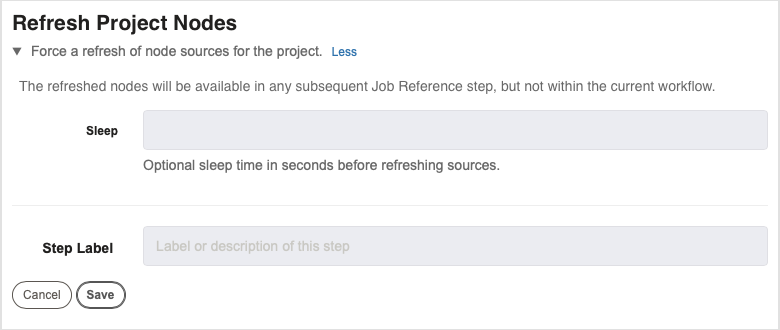
- Sleep (optional) : This is an optional field. If a number is provided (seconds), there will be a period of sleep for that amount of time before the sources are refreshed.
# Data Step
This job step produces data values for the current node.
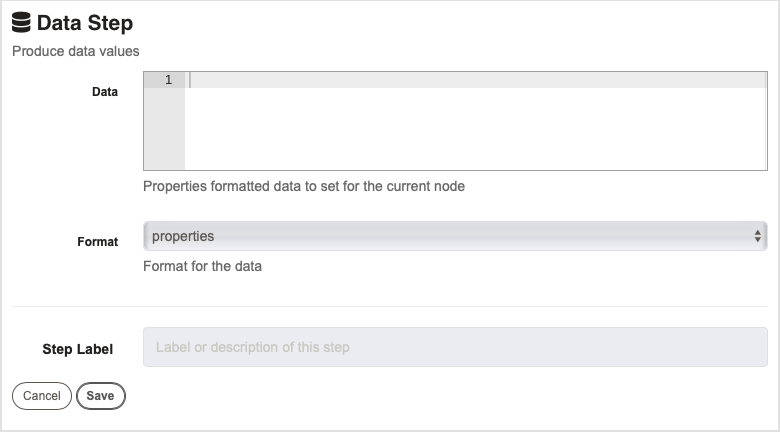
Data : This is where you provide the data variables and their values for the current node. For example, var1=value.
Format : This is where you specify the format for the data that you just entered. The options are properties, json or yaml.