# Datadog Workflow Steps
# Getting Started
TIP
An API and APP key created in Datadog are required to configure these steps. To create these values in Datadog, navigate to Integrations > APIs and copy and paste the API key. If it doesn't exist yet, create a Rundeck integration and create an API/APP key.
Before using the DataDog plugins, add the APP and API keys to Rundeck's key storage and then specifying that path in the framework.
Note: Follow these steps twice. Once for the API key and once for the APP key.
- In the top right-hand corner of Rundeck, click on the gear icon and select "Key Storage."
- Select "Add or Upload a Key."
- For key type, select "Password."
- Where it says enter text, copy and paste your API/APP key. To create these values in Datadog, navigate to Integrations > APIs and copy and paste the API key. If it doesn't exist yet, create a Rundeck integration and create an API/APP key.
- For storage path, this can be whatever you want (REMEMBER THIS FOR LATER). E.g. keys/datadog
- This can be whatever you want. For example, if you chose API as the name, the new path would be keys/datadog/API.
- Now that we have created the keys, we need to specify them in the framework. Open the
etc/framework.propertiesfile and add the following lines:
datadog.api-key-storage-path=path..
datadog.app-key-storage-path=path..
Where path is the path created above.
# Datadog / Send Event
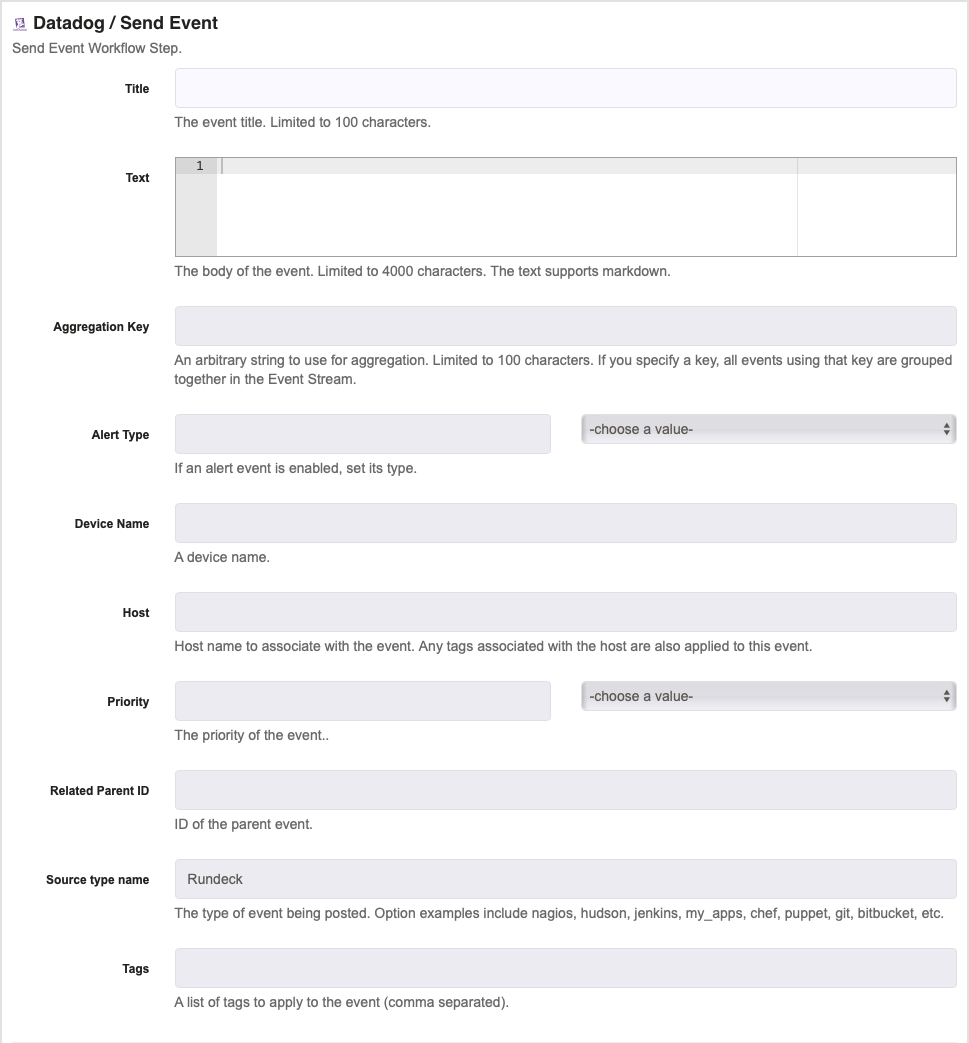
# Configuration
Title : This is the title of the event.
Text : This is the body of the event. This can contain any details that need to be included in the event in DataDog.
Aggregation Key : This is an arbitrary key used for aggregation. If a key is specified, all events with that key will be grouped together in the event steam. Maximum 100 characters.
Alert Type : This is the type that the event is defined as. The options are error, warning, info or success.
Device Name : This is the device name.
Host : To associate the event with a specific host include this optional value.
Priority : This is the priority that the event is defined as. The options are normal or low.
Related Parent ID : Specify the parent ID by including its ID. This field is not required.
Source Type Name : This is the type of event that is being posted. Option examples include nagios, hudson, jenkins, my_apps, chef, puppet, git, bitbucket, etc.
Tags : A list of tags that you want to be applied to the event. To specify more than one separate each by a comma.
WARNING
The following job steps require specifying the API and APP key paths in either project settings (e.g. project.datadog.api_key_path=keys/datadog/api & project.datadog.app_key_path=keys/datadog/app) or framework.properties (e.g. datadog.api_key_path=keys/datadog/api & datadog.app_key_path=keys/datadog/app) before running the step as it need to pull severity/state values specific to the account.
# Datadog / Incidents / Create Incident

Title: The title of the new event being created.
Incident Commander: The ID of the user who should be assigned as the commander on the incident. This can be found in Datadog by selecting "Teams" in the bottom left corner, selecting the user you want, and copying their ID from the URL of that page.
Incident Customer Scope: The scope of the customer impact for the incident that is being created.
Severity: The severity of the incident being creating. The dropdown will be populated with severity values unique to the account, as long as the API/APP keys are both set in the project configuration or framework as mentioned above.
State: The state of the incident being creating. The dropdown will be populated with state values unique to the account, as long as the API/APP keys are both set in the project configuration or framework as mentioned above.
Customer Impacted: Was the customer impacted? If checked, the value is true. If not, the value is false.
API Key: This is where you can choose the key from storage that we save earlier. Just click on browse, and choose the key you want to use. So select the API key here.
APP Key: This is where you can choose the key from storage that we save earlier. Just click on browse, and choose the key you want to use. So select the APP key here.
TIP
Any job steps in the same workflow, following Create Incident can use the incident ID by referencing ${data.dd_incident_id}.
# Datadog / Incidents / Update Status
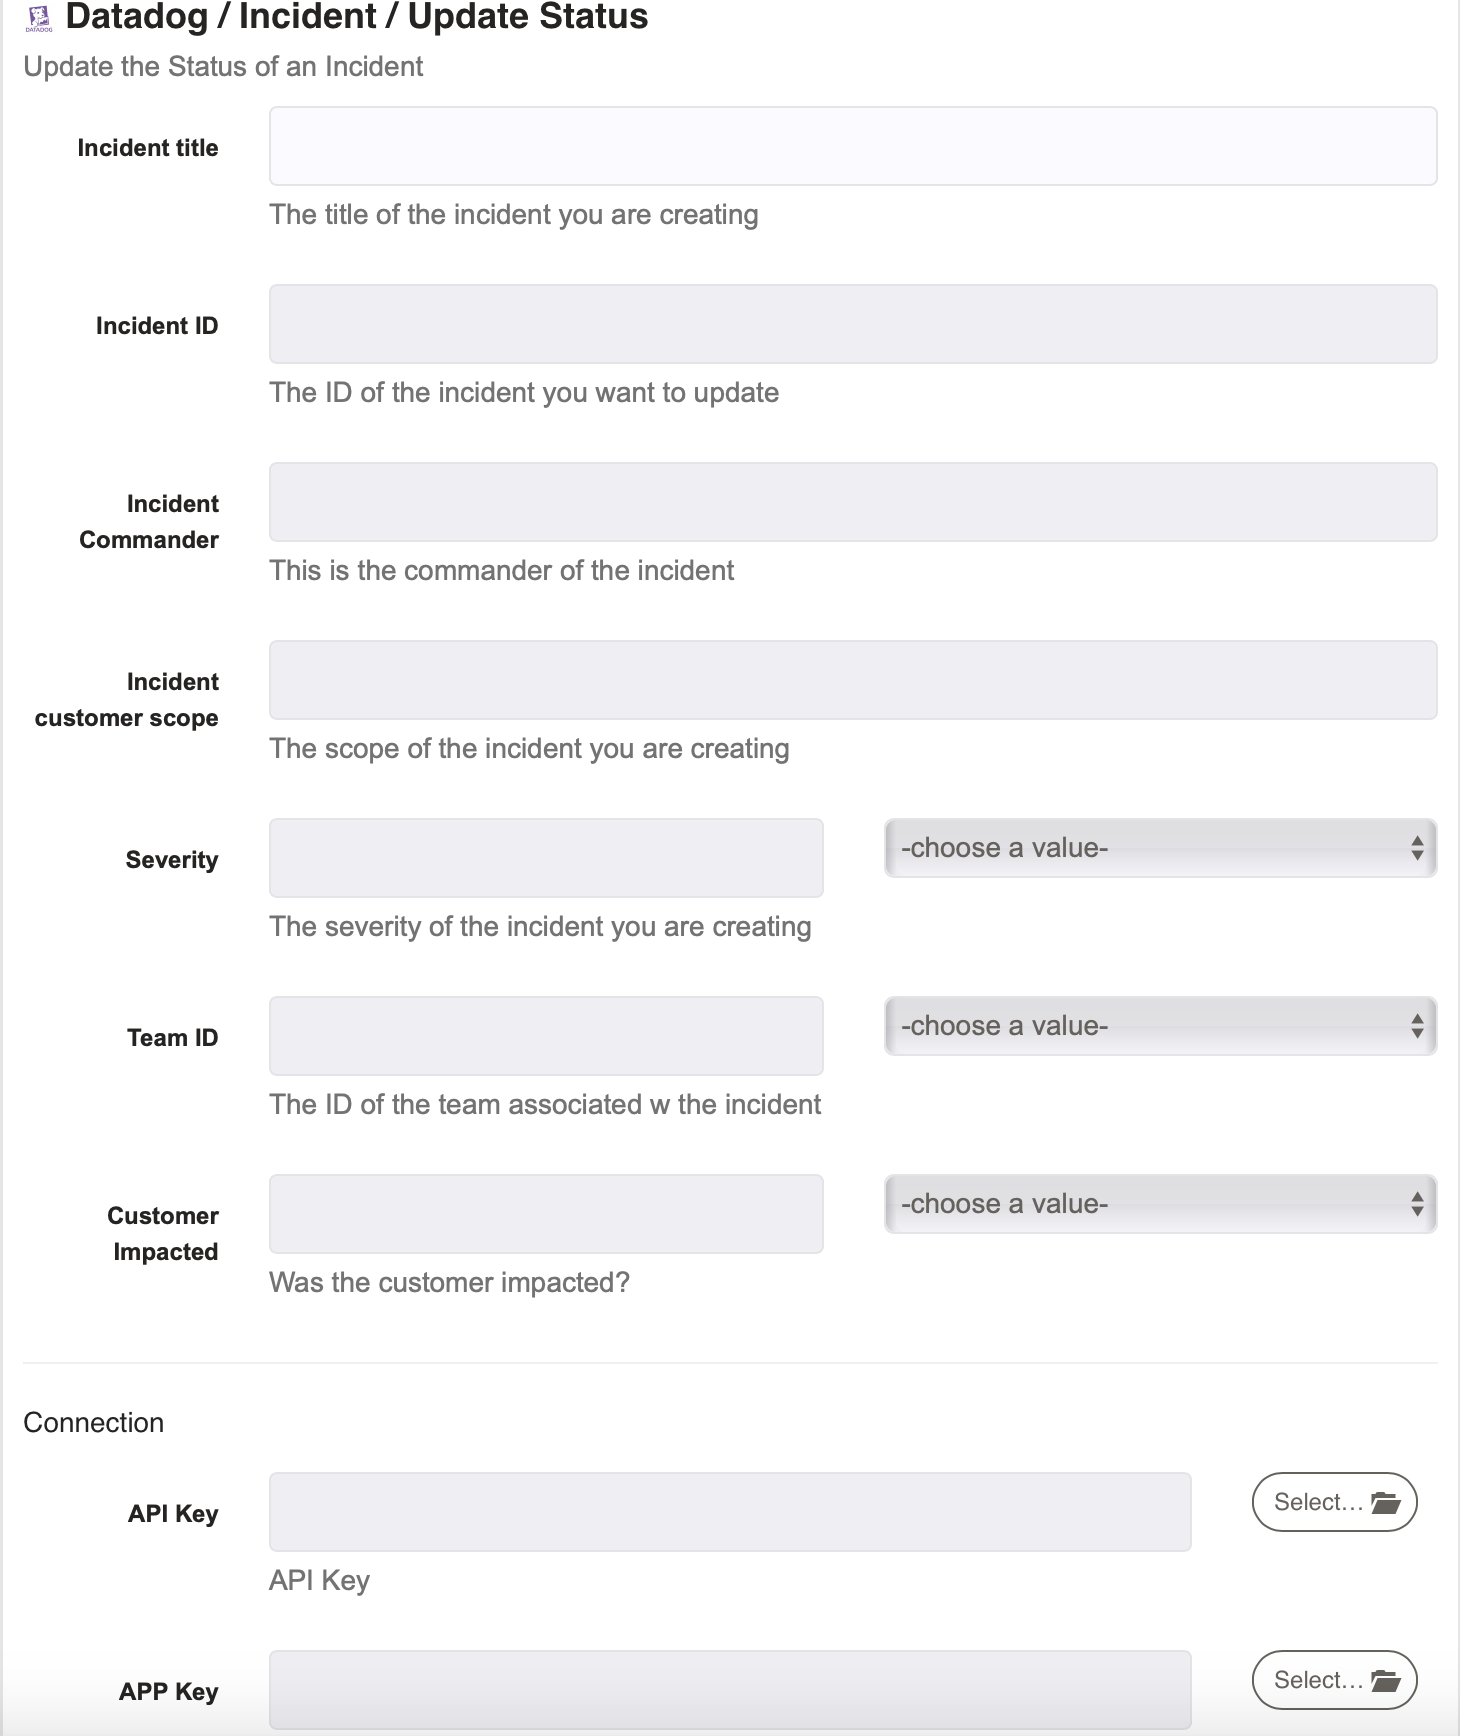
Title: The new title of the incident being updated.
Incident ID: The id of the incident that is being updated.
Incident Commander: The updated ID of the user who should be assigned as the commander on the incident. This can be found in Datadog by selecting "Teams" in the bottom left corner, selecting the user you want, and copying their ID from the URL of that page.
Incident Customer Scope: The scope of the customer impact for the incident that is being updated.
Severity: The severity of the incident being updated. The dropdown will be populated with severity values unique to the account, as long as the API/APP keys are both set in the project configuration or framework as mentioned above.
Customer Impacted: Was the customer impacted? The options are true, false. If true or false are selected, the customer impacted bool will be updated in Datadog. Can also be left blank.
API Key: This is where you can choose the key from storage that we save earlier. Just click on browse, and choose the key you want to use. So select the API key here.
APP Key: This is where you can choose the key from storage that we save earlier. Just click on browse, and choose the key you want to use. So select the APP key here.
# Datadog / Incidents / Update State
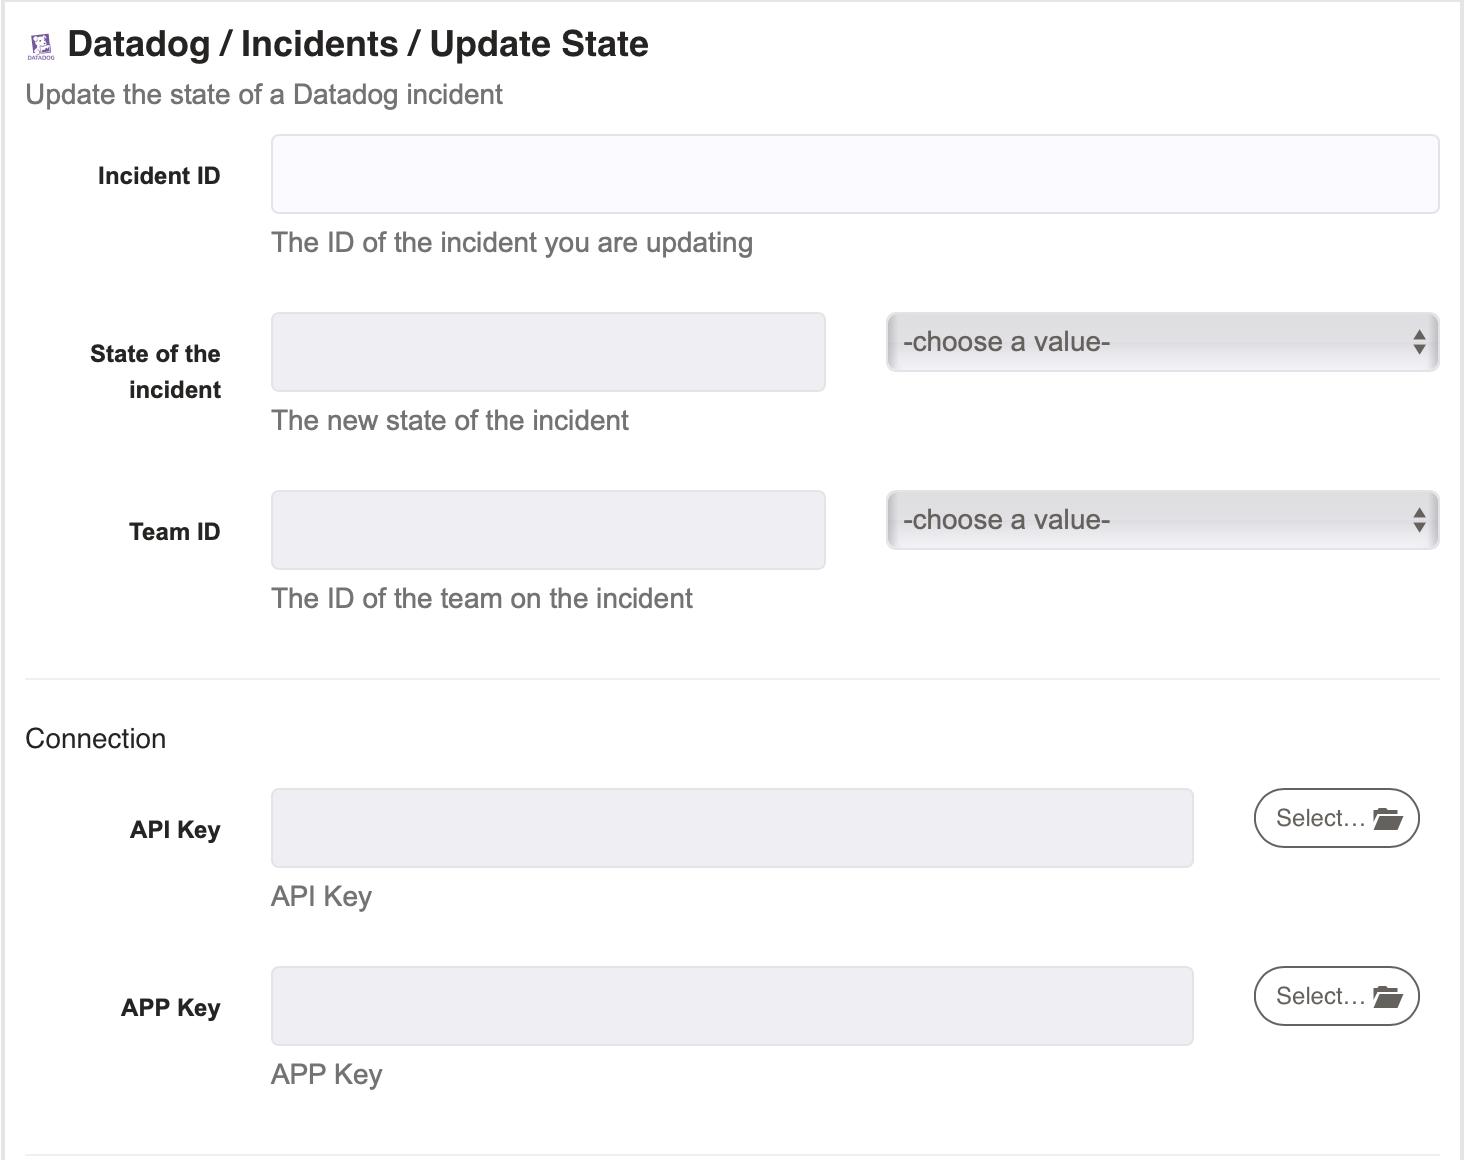
Incident ID: The id of the incident that is being updated.
State: The state of the incident being updated. The dropdown will be populated with state values unique to the account, as long as the API/APP keys are both set in the project configuration or framework as mentioned above.
Team ID: The of the team that is associated with the incident. The dropdown will be populated with teams unique to the account, as long as the API/APP keys are both set in the project configuration or framework as mentioned above.
API Key: This is where you can choose the key from storage that we save earlier. Just click on browse, and choose the key you want to use. So select the API key here.
APP Key: This is where you can choose the key from storage that we save earlier. Just click on browse, and choose the key you want to use. So select the APP key here.
# Datadog / Incidents / Add Task
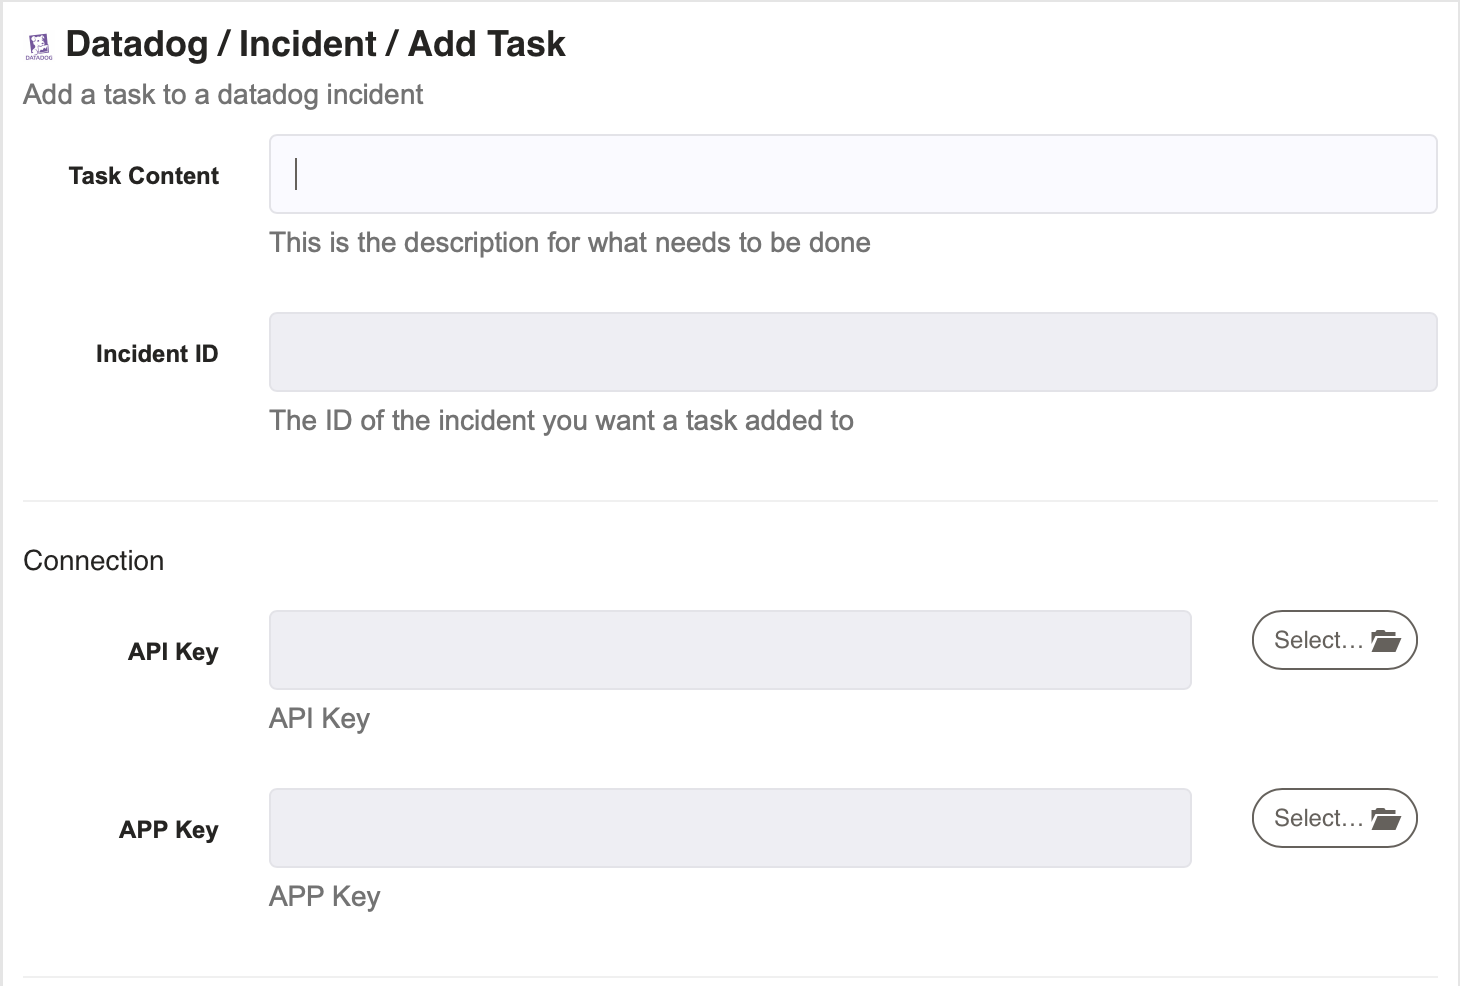
Task Content: This is description of what needs to be done in the task that is being created.
Incident ID: The ID of the incident to add a task to.
API Key: This is where you can choose the key from storage that we save earlier. Just click on browse, and choose the key you want to use. So select the API key here.
APP Key: This is where you can choose the key from storage that we save earlier. Just click on browse, and choose the key you want to use. So select the APP key here.
TIP
Any job steps in the same workflow, following add task can use the task ID by referencing ${data.dd_task_id}.
# Datadog / Incidents / Complete Task
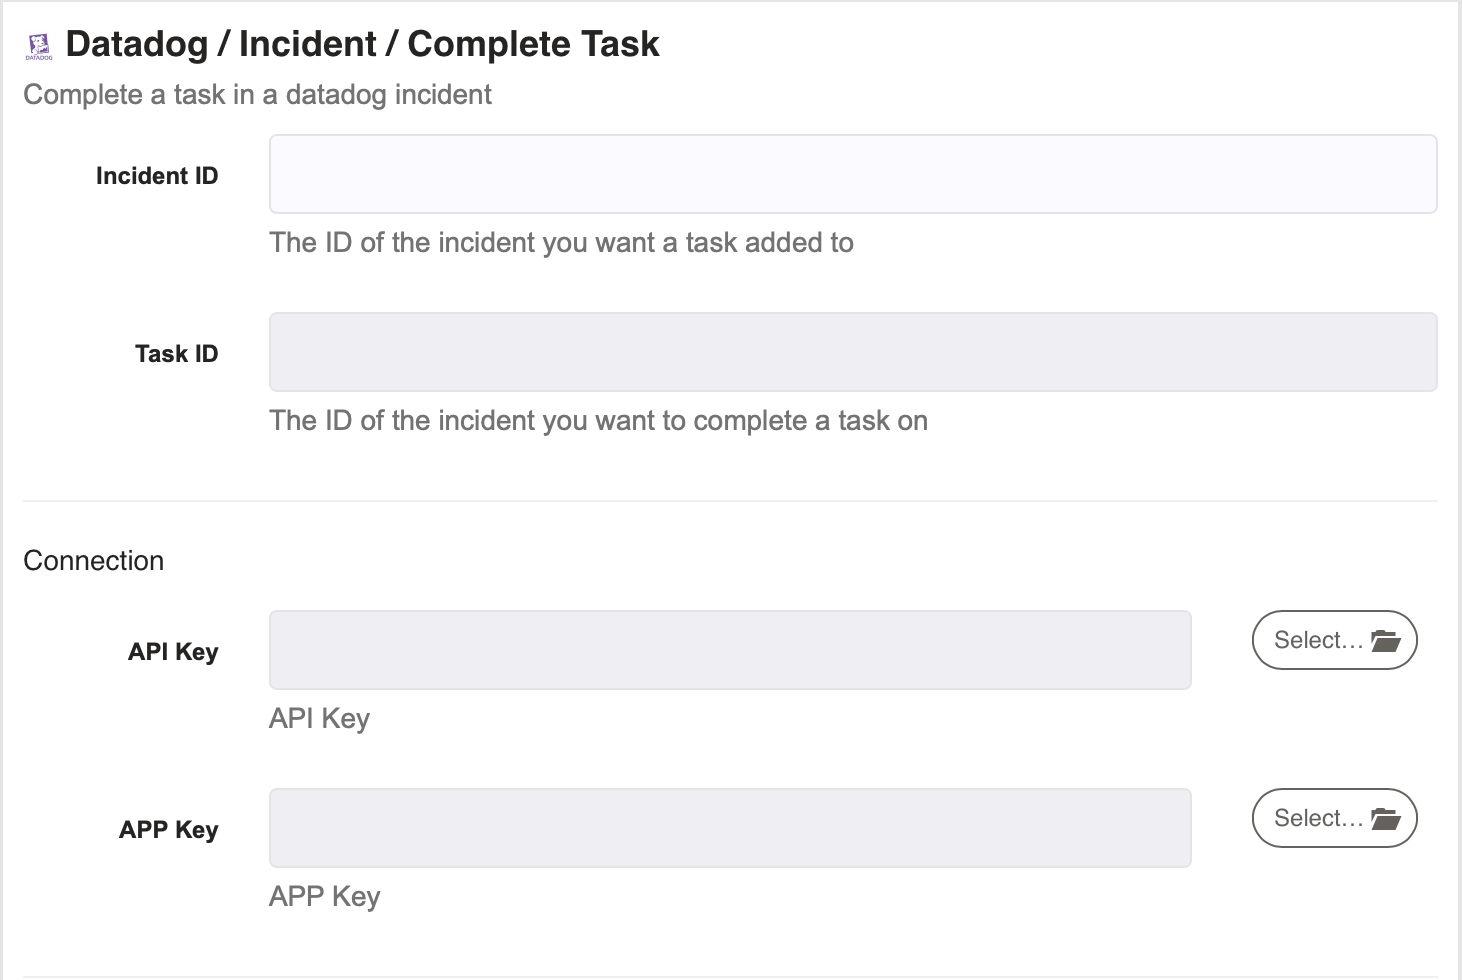
Incident ID: The ID of the incident to add a task to.
Task ID: The ID of the task that should be marked as completed.
API Key: This is where you can choose the key from storage that we save earlier. Just click on browse, and choose the key you want to use. So select the API key here.
APP Key: This is where you can choose the key from storage that we save earlier. Just click on browse, and choose the key you want to use. So select the APP key here.