Creating jobs
Creating a job
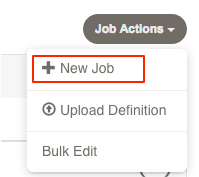
From the Jobs, page press the “Create Job” menu to begin creating a Job. Then menu contains items to create a job definition or upload a definition from a file.
For the first Job example, create a Job that calls the info script.
Like in the earlier example, begin by pressing the “New Job” menu item.
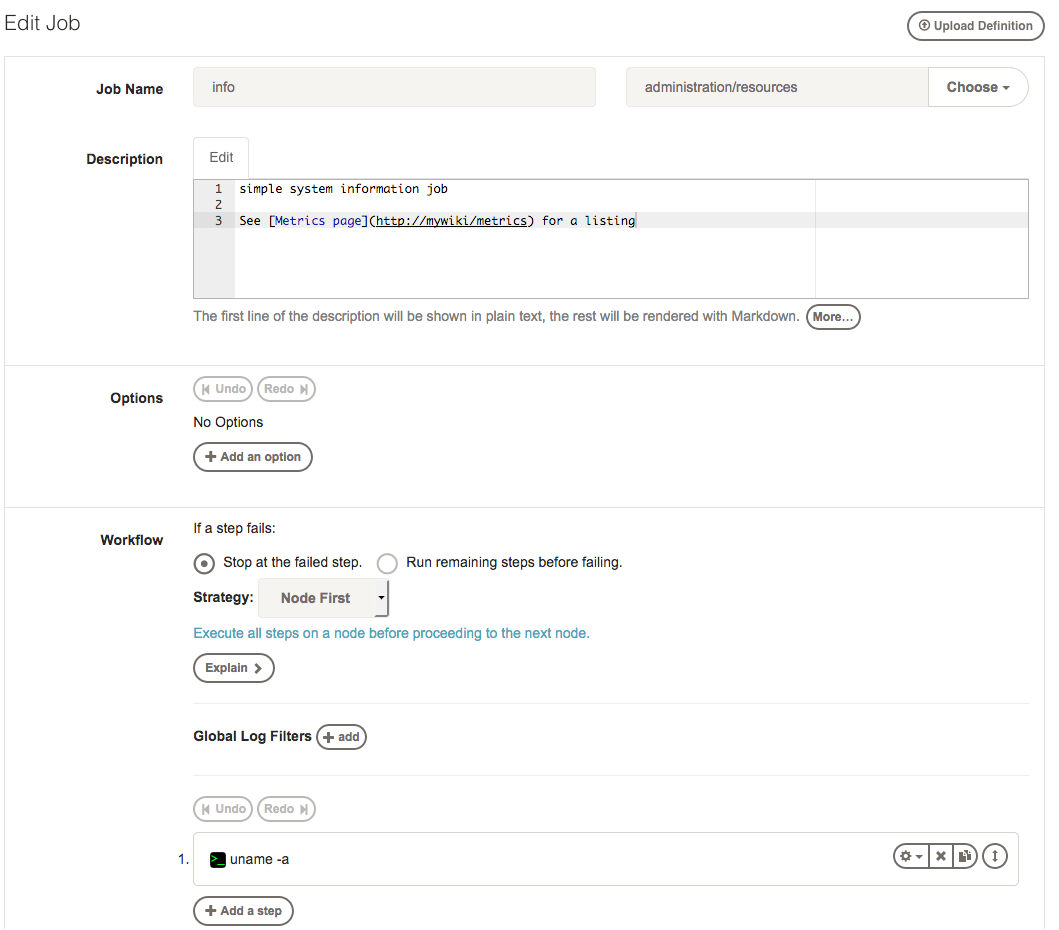
Within the new job form:
For “Job Name”, enter “info” and for the “Group”, enter “adm/resources”. If you want to specify your own UUID you can enter it in the field. Otherwise a unique value will be set for you. Providing a description will be come helpful to other users to understand the intent and purpose for the Job.
Give the job a description. It’s best practice to give a short description on the first line. Create one blank line and all subsequent lines can use markdown format. You can see line 3, has text that show a URL link in markdown format. When Rundeck shows the job, this extra information can be displayed to the user. Rich text is useful to link to external tools or even charts and graphs. Anything useful to support the job user.
Check the box for “Dispatch to Nodes”. Choose the “Node Exclude Filters” and enter the name of your Rundeck server. This will cause the job to run on just the remote Nodes (eg., centos54 and ubuntu).
Type in shell script that produces some information (eg, uname -a)
Save the Workflow step.
Press the “Create” button at the bottom of the page.
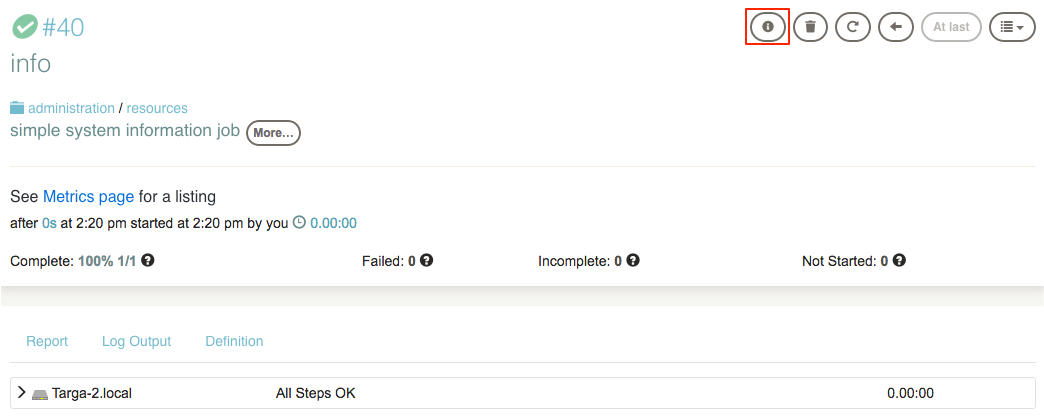
After the the job is created, the browser is directed to the Jobs page. You will see folder icons reflecting the Job’s group. Navigate through to the adm/resources folder. Notice the extra information is displayed, markdown now rendered as HTML.
Notice the play button before the job name.
Press the play button to run the Job.

Press the “Run Job Now” button to begin execution. The job will be queued and executed.
Look in the “Now running” section. Press the progress bar in the Activity area to go to the execution follow page.
Multiple Executions
By default, a job runs as a “Single Execution” – it can only have a single execution running at a time. This is useful if the steps the Job performs might be interfered with if another separate process was also performing them on the same Node(s).
However, in some cases it is useful to allow a Job to be executed more than once simultaneously.
You can make a job allow “Multiple Executions” by toggling the value to Yes in the Job editor field shown below:

Timeout
You can set a maximum runtime for a job. If the runtime exceeds this value, the job will be halted (as if a user had killed it.) (Note: Timeout only affects the job if is invoked directly, not if it is used as a Job Reference.)

The value for the timeout can be:
- A number of seconds, such as
240 - A string indicating numbers and units, such as “1d 12h 30m 24s”. Each number must have a unit letter next to it. The total timeout duration will be the sum of the values. Available units are “d” (days) “h” (hours) “m” (minutes) and “s” (seconds, default if unspecified.)
- An embedded property reference such as
${option.timeout}. This allows a Job Option to be used to change the timeout for the job.
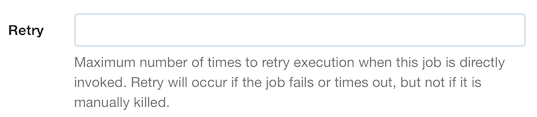
Retry
You can set a maximum number of retries for a job. If a job fails or times out, it will be executed again up to the specified number of times until it succeeds. (Note: Retry only affects the job if is invoked directly, not if it is used as a Job Reference.)
The value for the retry can be:
- A specific integer number
- An embedded property reference such as
${option.retryMax}. This allows a Job Option to be used to change the retry count for the job.
Each execution will be started with context variables indicating the current retry attempt and whether it was a retry.
See Context Variables.
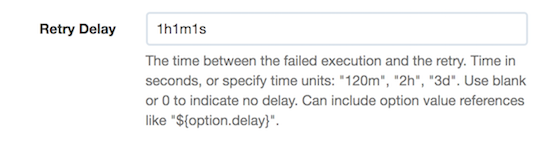
Optionally a delay between retries can be established:
- A number of seconds, such as
30 - A string indicating numbers and units, such as “1d 12h 30m 24s”. Each number must have a unit letter next to it. The total timeout duration will be the sum of the values. Available units are “d” (days) “h” (hours) “m” (minutes) and “s” (seconds, default if unspecified.)
- An embedded property reference such as
${option.delay}. This allows a Job Option to be used to change the delay between retries for the job.
Log Limit
You can specify a log limit, which can perform an action depending on how much log output the Job produces.
The limit can be set in one of three ways:
- Maximum total number of log lines
- Maximum total log file size
- Maximum number of log lines for a single node
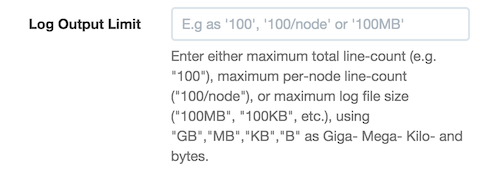
Enter a value in the “Log Output Limit” field. The syntax of the value you enter determines the type of limit:
###If you specify a number, that is treated as the “Maximum total number of log lines”###/nodeIf you specify a number followed by/node, the number is treated as the “Maximum number of log lines for a single node”###[GMK]BIf you specify a number followed by a filesize suffix, that is treated as the “total log file size”. The file size suffixes allowed are “GB” (gigabyte), “MB” (megabyte), “KB” (kilobyte) and “B” (byte).
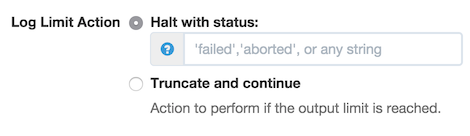
And one of three actions can be performed if the limit is exceeded:
- Halt - the job will halt with a certain status
- Enter a status string in the field, such as “failed” or “aborted”, or any custom status
- Truncate and Continue - the job will not halt, but no more log output will be produced.
Node dispatching and filtering
When you create a job you can choose between either running the job only locally (on the Rundeck server), or dispatching it to multiple nodes (including the Rundeck server if you want).
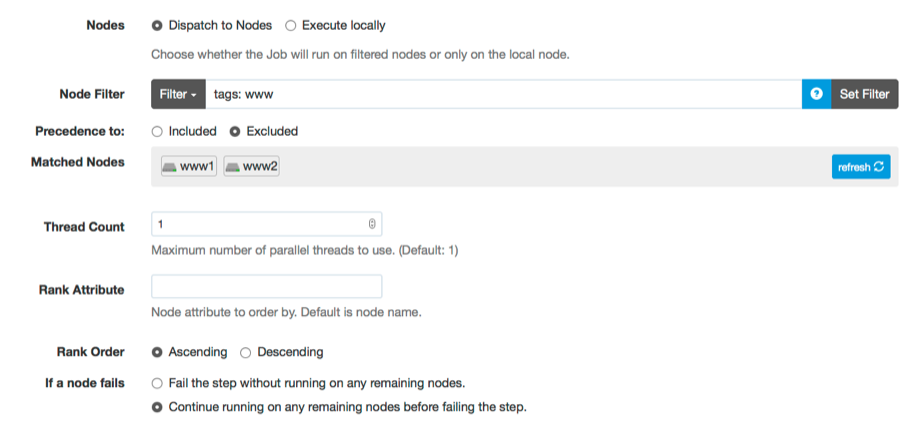
In the GUI, the “Dispatch to Nodes” checkbox lets you enable node dispatching. When you click this box you are presented with the Node Filtering interface:
Filters
You can click the different filter fields “Name”, and “Tags” to enter filter values for those fields. As you update the values you will see the “Matched Nodes” section updated to reflect the list of nodes that will match the inputs. You can click “More” to see more of the available inclusion filters, and you can click “Extended Filters” to enter exclusion filters for the same fields.
Threadcount
You can set the maximum number of simultaneous threads to use by changing the “Thread Count” box. A value of 1 means all node dispatches happen sequentially, and any greater value means that the node dispatches will happen in parallel.
Rank order
You can change the order in which nodes are executed on by setting the “Rank Attribute” and “Rank Order”. By default nodes are ordered by name (“nodename” attribute) in ascending order. You can change the node attribute to sort on by entering it here, for example “rank”, and you can change the order to descending to sort in reverse.
If the attribute you use has an integer number value, then the nodes will be sorted numerically by that attribute, rather than lexically. Otherwise the sort is based on the string value rather than the integer value.
Any nodes without the specified attribute will then be sorted by their names.
If a node fails
This setting determines how to continue if one of the nodes has a failure.
The option “Fail the step without running on any remaining nodes”, will cause no further dispatches to be executed and the Job Execution will fail immediately.
The option “Continue running on any remaining nodes before failing the step” will allow the remaining nodes to continue to be executed until all have been executed. At the end of the workflow for all nodes, the Job Execution will fail if any of the nodes had failed.
Dynamic node filters
In addition to entering static values that match the nodes, you can also use more dynamic values.
If you have defined Options for the Job (see Job Options), you can use the values submitted by the user when the job is executed as part of the node filtering.
Simply set the filter value to ${option.name}, where “name” is the name of the option.
When the job is executed, the user will be prompted to enter the value of the option, and that will then be used in the node filter to determine the nodes to dispatch to.
Note, Since the dynamic option value is not set yet, the “Matched Nodes” shown in the node filtering input may indicate that there are “None” matched. Also, when the Job is executed, you may see a message saying “Warning: The Node filters specified for this Job do not match any nodes, execution may fail.” The nodes matched will be determined after the user enters the option values.
Orchestrator
Orchestrators define how a Job orchestrates the dispatching of executions to multiple nodes.
The default behavior is to dispatch based on these Job configuration values:
- Threadcount: how many nodes to process in parallel
- Rank Order: which node attribute to use to sort the nodes (default is the node name.), and whether to sort ascending or descending
You can select an Orchestrator plugin to use instead, which can choose its own logic for how many and what order to process the nodes.
To learn how to develop your own Orchestrator plugin see Plugin Developer Guide - Orchestrator Plugin.
Scheduled Jobs
Jobs can be configured to run on a periodic basis. If you want to create a Scheduled Job, select Yes under “Schedule to run repeatedly?”

The schedule can be defined in a simple graphical chooser or Unix crontab format.
To use the simple chooser, choose an hour and minute. You can then choose “Every Day” (default), or uncheck that option and select individual days of the week. You can select “Every Month” (default) or unselect that option and choose specific months of the year:
If the crontab time and date format is preferred, enter a cron expression.
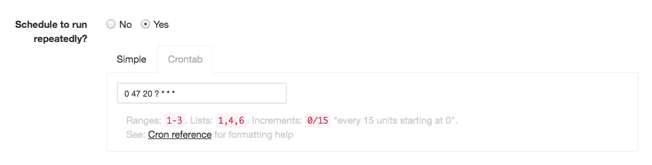
Use the crontab syntax referenced here: [Quartz Scheduler crontrigger].
A good place to generate, validate and test job crontabs is here.
After the Job has been updated to include a schedule, a clock icon will be displayed when the Job is listed:

Job Notifications
Job notifications are messages triggered by a job event. You can configure notifications to occur when a Job Execution starts or finishes, with either success or failure. The notification form will list all the installed notification plugins.
If you want to receive notifications, click Yes under “Send Notification?”.
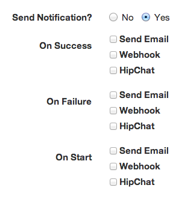
You can enable notifications for either Start, Success or Failure events and choose the notifier, using a builtin like mail, or webhook. Click the checkbox next to the type of notification to enable.
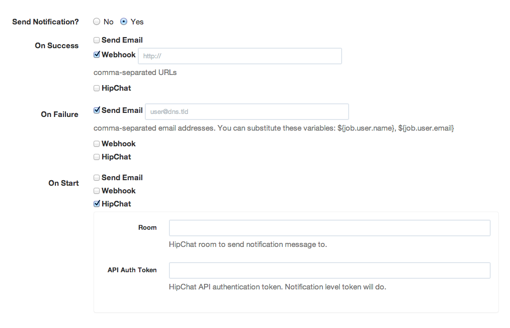
When the Job starts, all “start” notifications will be triggered.
When the Job finishes executing, all “success” notifications will be triggered if the Job is successful. Otherwise, all “failure” notifications will be triggered if the Job fails or is cancelled.
For a full list of notification plugins, see Job Plugins - Notifications
Deleting Jobs
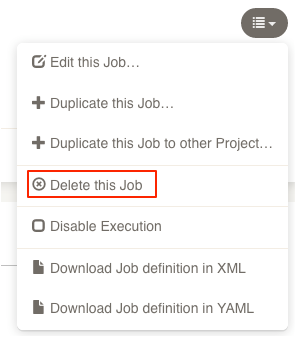
In the Job view page, click the Action button for a menu of actions, and select “Delete this Job…” to delete the Job.
Click “Yes” when it says “Really delete this Job?”
If you have access, you can choose to delete all executions for the job as well.
Updating and copying Jobs
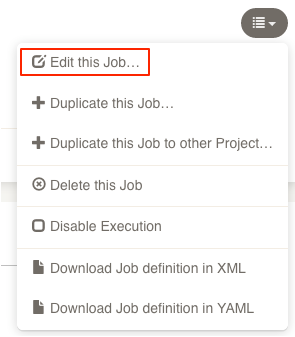
All of the data you set when creating a job can be modified (except UUID). To edit a Job, you can click the “edit job” icon:
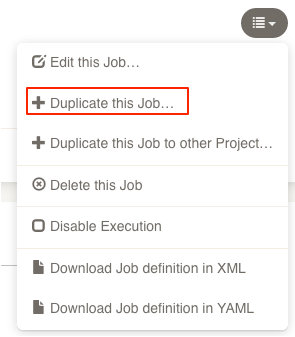
Similarly, to Copy a Job definition to a new Job, press the “duplicate to a new job” button.
Exporting Job definitions
Job definitions created inside the Rundeck graphical console can be exported to XML or YAML file formats and be used for later import.
Two methods exist to retrieve the Job definitions: via Rundeck’s graphical interface, and via the [rd-jobs] shell tool.
In the Job definition tab, locate the “Download Definition” menu button. Clicking on the icon will let you choose either XML or YAML format to download the definition.
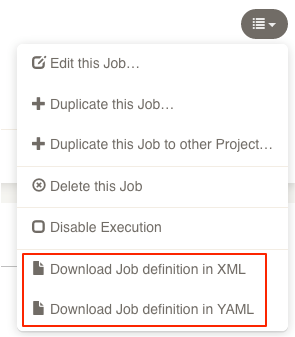
Click the preferred format to initiate the file download to your browser.
To export jobs to a git repository, see the Git plugin
Importing Job definitions
If you have a job definition file (See above) and want to upload it via the GUI web interface, you can do so.
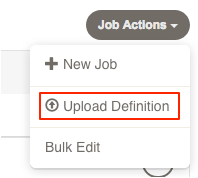
Click on the “Create Job” menu button in the Job list.
Click the item that says “Upload Definition…”:
Click the Choose File button and choose your job definition file to upload.
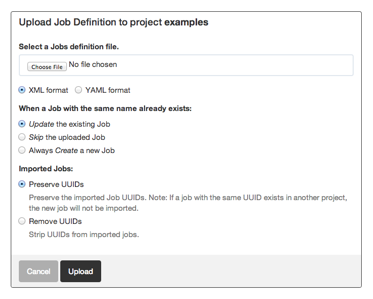
Choose an option where it says “When a job with the same name already exists:”:
- Update - this means that a job defined in the xml will overwrite any existing job with the same name.
- Skip - this means that a job defined in the xml will be skipped over if there is an existing job with the same name
- Create - this means that the job defined in the xml will be used to create a new job if there is an existing job with the same name.
Choose an option where it says “Imported Jobs:”:
- Preserve UUIDs - this means that UUIDs defined in the imported jobs will be used when importing them. UUIDs must be unique, so if you have a Job with the same UUID defined in any project, your import may fail.
- Remove UUIDs - this means that imported Job UUIDs will be ignored, and the imported jobs will either update an existing job, or be created with a new UUID.
Click the Upload button. If there are any errors with the Job definitions in the XML file, they will show up on the page.
To import jobs from a git repository, see the Git plugin